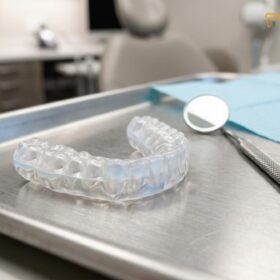
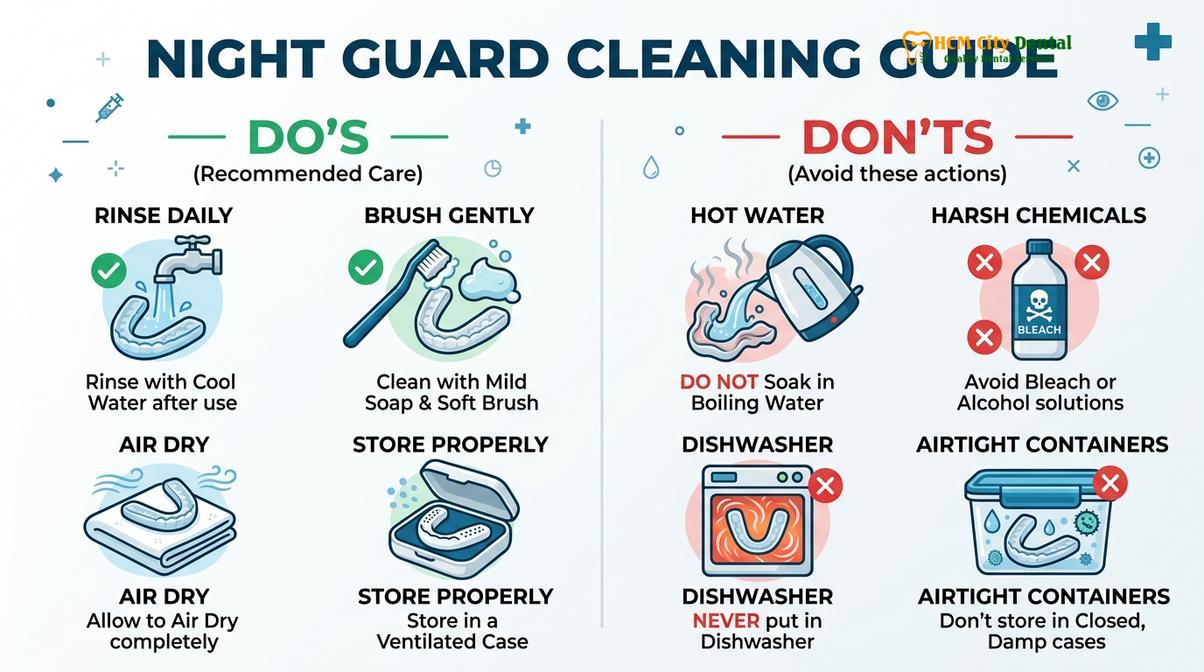
To properly clean your night guard, rinse it with cool water immediately upon removal, gently brush it using a soft-bristled toothbrush and mild, non-abrasive soap, and allow it to air dry completely on a clean surface before storing it in a ventilated case to prevent bacterial overgrowth.
Clinical Summary:
Maintaining impeccable night guard hygiene is critical not only for the longevity of the appliance but also for preserving the delicate balance of the oral microbiome. A custom-fabricated occlusal splint is constantly exposed to saliva, oral bacteria, and cellular debris throughout the night. Without a rigorous daily and weekly cleaning protocol, the porous nature of thermoplastic and acrylic materials allows for the rapid colonization of pathogenic bacteria and fungi, such as Candida albicans. Proper maintenance requires a combination of mechanical debridement using soft bristles and mild surfactants, alongside weekly chemical disinfection using non-abrasive soaking agents. Clinical guidelines strictly prohibit the use of hot water, abrasive toothpastes, and harsh chemicals like bleach, which induce micro-structural damage, warping, and premature material degradation. By adhering to evidence-based cleaning workflows, patients can prevent appliance-induced halitosis, mitigate the risk of secondary dental caries, and ensure their protective device functions optimally for its intended lifespan.
Key Takeaways:
- Rinse the appliance with cool water immediately after waking to prevent saliva and plaque from hardening.
- Brush daily using a dedicated soft-bristled toothbrush and mild, fragrance-free soap—never use abrasive toothpaste.
- Perform a weekly deep clean using specialized non-abrasive tablets or a diluted hydrogen peroxide solution.
- Always allow the appliance to air dry completely before placing it in a hard, well-ventilated storage case.
- Avoid hot water, bleach, and alcohol-based mouthwashes, as these will warp and degrade the material.
Daily Cleaning Routine
A daily cleaning routine involves rinsing the appliance with cool water, brushing with a dedicated soft toothbrush and mild soap, and ensuring complete air drying.
Establishing a meticulous daily cleaning routine is the foundational step in extending the lifespan of your oral appliance and protecting your systemic health. When you wear a protective splint overnight, it rests in a warm, moist environment that is highly conducive to microbial proliferation. Throughout the sleep cycle, salivary flow naturally decreases, reducing the mouth’s innate ability to wash away bacteria and neutralize acids. Consequently, the appliance becomes coated in a complex biofilm composed of glycoproteins, oral flora, and desquamated epithelial cells. If this biofilm is not disrupted and removed every single morning, it rapidly calcifies into hard calculus (tartar), which cannot be removed by simple brushing and serves as a retentive matrix for even more pathogenic bacteria [1].
The very first action you should take upon waking and removing the appliance is to rinse it thoroughly under a steady stream of cool or lukewarm tap water. This immediate rinsing is crucial because it flushes away loose saliva, cellular debris, and unattached plaque before they have the opportunity to dry and adhere firmly to the acrylic or thermoplastic surface. It is imperative to use cool or lukewarm water during this step. Thermoplastic materials, particularly those used in soft or dual-laminate guards, possess a specific glass transition temperature. Exposure to hot water can induce thermal stress, leading to irreversible molecular deformation and warping, which will completely ruin the custom fit of the device.
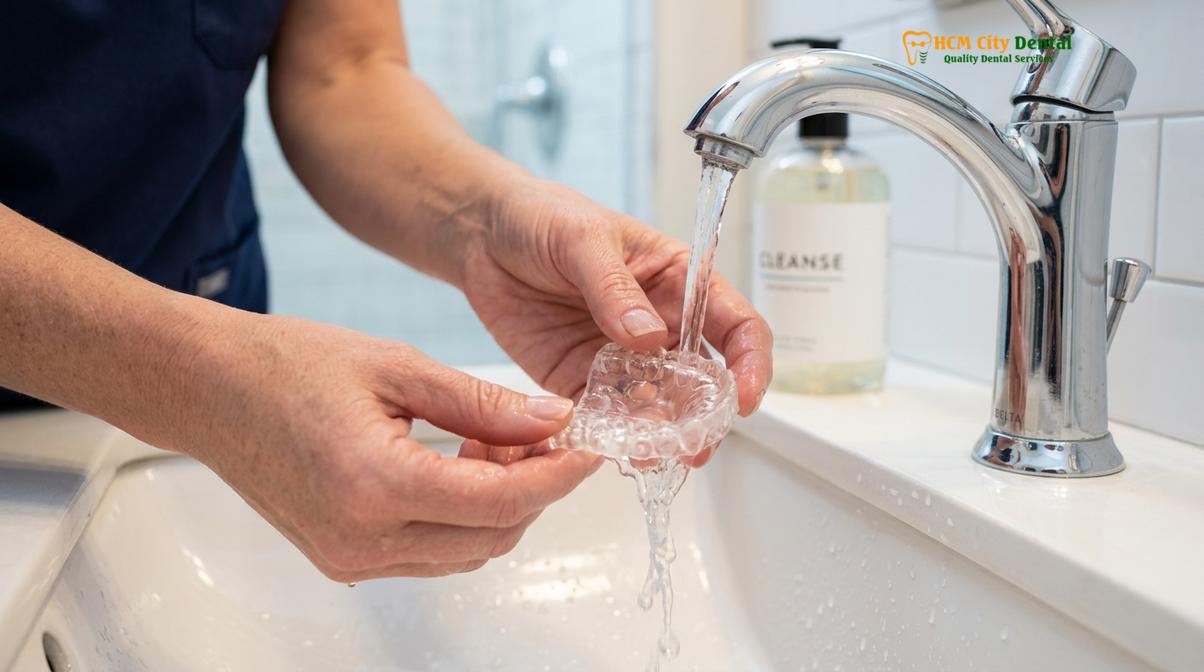
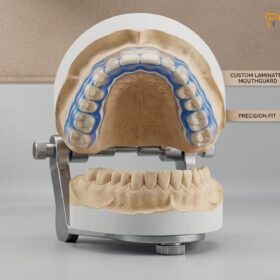
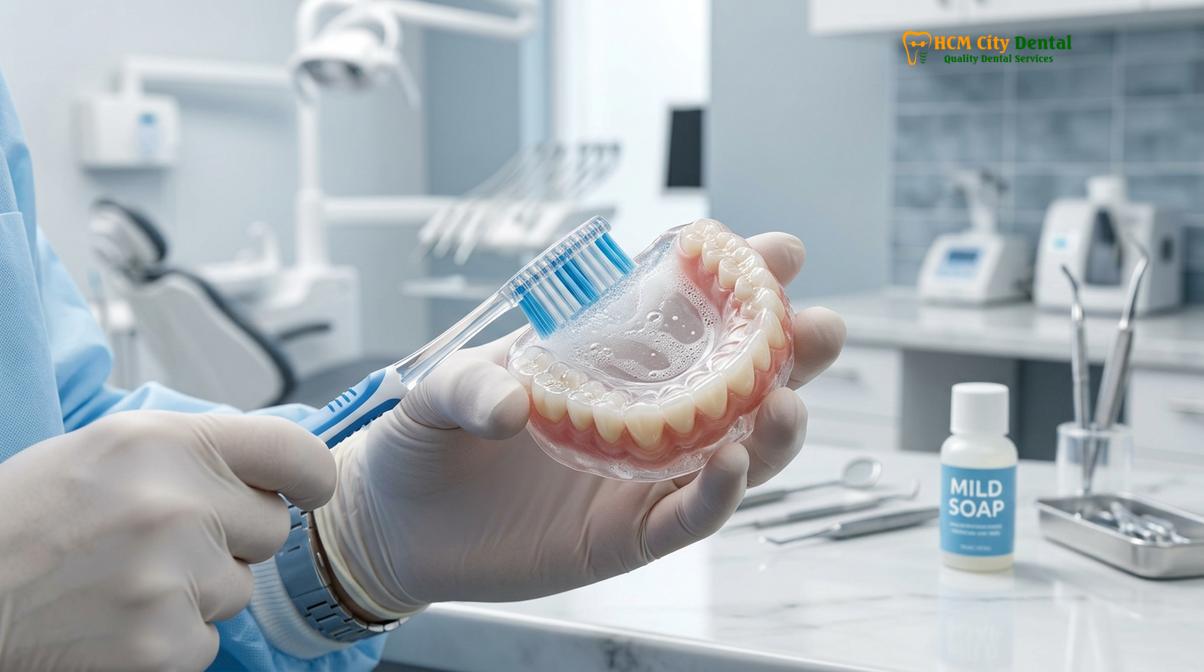
Following the initial rinse, mechanical debridement is required. You must use a soft-bristled toothbrush specifically designated for your appliance. Do not use the same toothbrush you use for your natural teeth, as cross-contamination can transfer active bacterial colonies back and forth. Apply a small amount of mild, fragrance-free liquid soap—such as a gentle castile soap or clear dish soap—to the bristles. Gently but thoroughly brush all surfaces of the appliance. Pay special attention to the intaglio surface (the inner portion that directly contacts the teeth), as this area features complex anatomical indentations corresponding to your dental cusps and fissures where bacteria easily hide.
Dr. Nguyen Van Cuong, a leading specialist at HCMC Dental Clinic, frequently emphasizes the importance of proper mechanical cleaning to his patients. He notes that many individuals underestimate the speed at which plaque biofilm matures on artificial surfaces. “The acrylic used in custom splints is microscopically porous,” Dr. Cuong explains. “If a patient fails to mechanically disrupt the biofilm daily with a soft brush and mild surfactant, the bacteria will penetrate these micro-pores, leading to deep-seated discoloration and persistent halitosis that no amount of soaking can fully reverse.”
After thoroughly brushing the appliance, rinse it again under cool water to ensure all soap residue is completely removed. Ingesting residual soap can cause mild gastrointestinal upset and leave an unpleasant taste in the mouth. Once rinsed, the final and arguably most critical step of the daily routine is drying. Place the appliance on a clean, dry towel or a designated drying rack in a well-ventilated area. It must be allowed to air dry completely before being placed into its storage case. Storing a damp appliance in a closed, dark environment creates an ideal incubator for fungal growth, particularly Candida species, which can lead to oral thrush and severe mucosal irritation [2].
Weekly Deep Cleaning Methods
Weekly deep cleaning requires soaking the appliance in specialized non-abrasive denture tablets or a diluted hydrogen peroxide solution to dissolve stubborn calcium deposits and eliminate embedded bacteria.
While a rigorous daily brushing routine is highly effective at removing soft plaque and unattached debris, it is not sufficient to completely eradicate the microscopic bacterial colonies that embed themselves within the structural micro-porosities of the material. Over time, minerals from your saliva, primarily calcium and phosphate, will begin to precipitate onto the surface of the appliance, forming microscopic layers of calculus. To combat this, a weekly deep cleaning protocol utilizing chemical disinfection and dissolution is clinically necessary.
One of the most effective and widely recommended methods for deep cleaning is the use of specialized, non-abrasive effervescent cleaning tablets. These tablets are formulated specifically for removable dental appliances, including retainers, dentures, and occlusal splints. When dissolved in water, these tablets release oxidizing agents, such as sodium perborate or sodium percarbonate, which generate micro-bubbles. This effervescent action provides a gentle mechanical lifting force that dislodges debris from deep crevices while the chemical oxidizers break down the cell walls of bacteria and fungi. To use this method, fill a clean glass or container with enough lukewarm water to fully submerge the appliance, drop in one tablet, and allow it to soak for the duration specified by the manufacturer—typically 15 to 20 minutes. Prolonged soaking beyond the recommended time should be avoided, as excessive exposure to oxidizing agents can eventually degrade the polymer chains of the material.
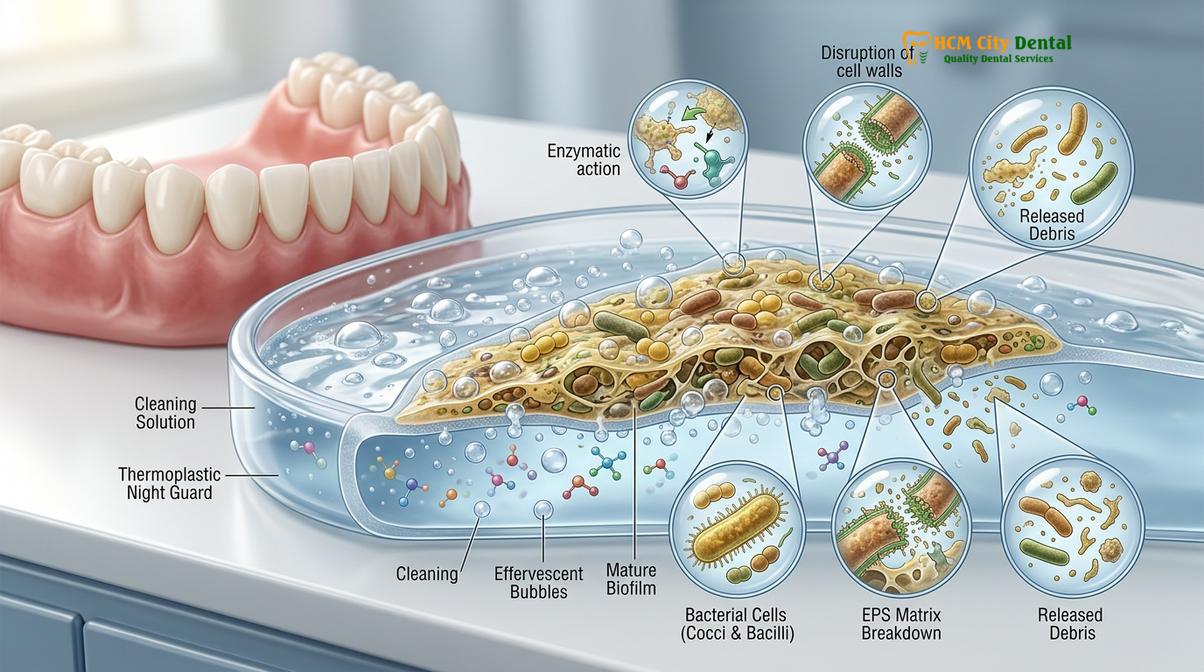
For patients who prefer utilizing household items, a diluted hydrogen peroxide solution serves as an excellent antimicrobial alternative. Hydrogen peroxide (3% concentration) is a potent oxidizing agent that effectively neutralizes anaerobic bacteria and helps lift organic stains. To prepare this soak, mix equal parts of 3% hydrogen peroxide and cool water in a clean container. Submerge the appliance completely and allow it to soak for no more than 20 to 30 minutes. After soaking, it is absolutely critical to rinse the appliance exhaustively under cool running water to remove all traces of the peroxide before it enters the mouth, as residual peroxide can cause tissue irritation and mucosal sloughing.
Another highly effective home remedy, particularly for dissolving stubborn calcium deposits and hard water stains, is a white vinegar soak. Acetic acid, the active component in white vinegar, is a mild acid that excels at breaking down mineralized calculus without damaging the underlying acrylic. Mix one part distilled white vinegar with three parts cool water. Submerge the appliance for 15 to 30 minutes. The mild acidity will soften any calcified deposits, making them easy to brush away with your soft-bristled toothbrush afterward. However, because vinegar has a strong, pungent odor, you must wash the appliance thoroughly with mild soap and water following the soak to ensure no residual taste remains.
| Cleaning Agent | Recommended Concentration | Optimal Soak Time | Primary Clinical Benefit | Important Precautions |
|---|---|---|---|---|
| Effervescent Tablets | 1 tablet per cup of water | 15 – 20 minutes | Broad-spectrum antimicrobial, lifts organic stains | Ensure tablets are non-abrasive; do not over-soak. |
| Hydrogen Peroxide | 50% mix of 3% H2O2 and water | 20 – 30 minutes | Neutralizes anaerobic bacteria, mild bleaching effect | Must rinse thoroughly to prevent mucosal irritation. |
| White Vinegar | 25% vinegar to 75% water | 15 – 30 minutes | Dissolves calcified mineral deposits (tartar) | Requires thorough washing post-soak to remove odor. |
It is important to note that the specific material of your appliance may dictate which deep cleaning method is most appropriate. Hard acrylic splints generally tolerate effervescent tablets and peroxide well, whereas softer EVA (ethylene vinyl acetate) materials may be more susceptible to degradation from frequent chemical exposure [3]. If you are unsure about the exact composition of your device, consulting with your providing clinician is highly recommended to establish a safe and effective maintenance protocol.
Products to Use and Avoid
Always use mild, fragrance-free soaps or specialized retainer cleaners, while strictly avoiding boiling water, bleach, alcohol-based mouthwashes, and abrasive toothpastes that degrade the material.
The longevity and clinical efficacy of your oral appliance are heavily dependent on the specific products you choose to expose it to. The materials utilized in modern dental splints—ranging from rigid polymethyl methacrylate (PMMA) to flexible thermoplastic elastomers—are engineered to withstand the immense compressive forces of the human bite. However, they are surprisingly vulnerable to chemical degradation and abrasive wear. Understanding the biochemical interaction between cleaning agents and these polymers is essential for proper maintenance.
When selecting a daily cleaning agent, the primary goal is to find a surfactant that effectively emulsifies lipids and disrupts bacterial cell membranes without scratching the surface or leaving toxic residues. Mild, clear liquid soaps are the gold standard. Castile soap, formulated from vegetable oils, is an excellent choice due to its natural, non-toxic profile and lack of harsh synthetic detergents. Mild dish soaps can also be utilized, provided they are free from heavy artificial fragrances, dyes, and antibacterial agents like triclosan, which can leave a lingering, unpleasant chemical taste that is difficult to wash away.
Conversely, the list of products to avoid is extensive and critical to memorize. The most common and destructive mistake patients make is using standard toothpaste to brush their appliance. Toothpaste is specifically formulated for human enamel, the hardest substance in the human body. To effectively remove pellicle and surface stains from enamel, toothpaste contains abrasive compounds such as hydrated silica, calcium carbonate, or aluminum oxide. When these abrasives are scrubbed against the relatively soft plastic or acrylic of a splint, they create thousands of microscopic scratches. These micro-abrasions dull the finish of the appliance, making it appear cloudy, and more importantly, they create perfect, sheltered breeding grounds for bacteria and fungi that cannot be reached by normal brushing.
Clinical Warning: Never expose your oral appliance to boiling water, dishwashers, or microwave radiation in an attempt to sterilize it. Temperatures exceeding the material’s glass transition point will cause immediate, irreversible thermal deformation, rendering the custom fit useless and requiring a complete replacement of the device.
Chemical solvents must also be strictly avoided. Bleach (sodium hypochlorite) should never be used on your appliance. While it is a powerful disinfectant, bleach is highly caustic and will rapidly degrade the polymer matrix, causing the material to become brittle, porous, and prone to fracturing under occlusal stress. Furthermore, bleach will permanently discolor clear acrylics, turning them an unsightly yellow or brown. Similarly, alcohol-based mouthwashes are detrimental. High concentrations of ethanol act as a solvent on certain plastics, leaching out plasticizers and causing the appliance to dry out, warp, and crack prematurely [4].
“The structural integrity of thermoplastic dental appliances is highly susceptible to abrasive degradation. Clinical observations confirm that patients utilizing dentifrice (toothpaste) for daily maintenance exhibit a 60% faster rate of surface micro-porosity formation compared to those utilizing non-abrasive liquid surfactants, directly correlating with increased bacterial retention and material failure.”
— Journal of Oral Rehabilitation
If you are managing a complex case involving Bruxism Sleep Apnea Connection: Clinical Guide | HCMC Dental, the integrity of your appliance is paramount for maintaining airway patency and protecting the dentition. Using the wrong cleaning products can compromise the precise vertical dimension of occlusion engineered into the splint, thereby reducing its therapeutic effectiveness.
Storing Your Night Guard Properly
Proper storage requires a hard, ventilated case kept in a cool, dry environment, ensuring the appliance is completely dry beforehand to prevent fungal and bacterial proliferation.
How you store your appliance when it is not in your mouth is just as critical as how you clean it. The storage environment directly influences the microbial load on the device and its physical stability. The fundamental rule of storage is that the appliance must be completely dry before it is enclosed. Moisture is the primary catalyst for microbial growth. If a damp splint is placed into a dark, sealed container, it creates a micro-environment with 100% relative humidity—the exact conditions required for the rapid proliferation of mold, mildew, and pathogenic bacteria.
Always use a hard, protective case specifically designed for dental appliances. These cases serve a dual purpose: they protect the device from physical trauma, such as being accidentally crushed or dropped, and they shield it from environmental contaminants. Crucially, the case must be ventilated. Look for cases that feature small air holes or ventilation slots. This allows for continuous air circulation, ensuring that any residual microscopic moisture evaporates completely, thereby maintaining a desiccated environment that is hostile to microbial survival.
The location where you keep the case is also of significant clinical importance. The bathroom counter is, surprisingly, one of the worst places to store your appliance. Bathrooms experience extreme fluctuations in temperature and humidity due to showers and baths. Furthermore, the aerosolization of bacteria from toilet flushing creates a highly contaminated environment. It is highly recommended to store your case in a cool, dry location, such as a bedside table drawer or a bedroom shelf, away from direct sunlight. Prolonged exposure to ultraviolet (UV) rays and radiant heat from the sun can cause the plastic polymers to degrade, discolor, and become brittle over time.
Patients must also remember that the storage case itself requires regular hygiene maintenance. A clean appliance placed into a contaminated case will immediately become re-infected. You should wash your storage case at least once a week using warm water and mild dish soap. Scrub the interior corners thoroughly with a small brush to remove any accumulated dust or biofilm. For a deeper clean, you can occasionally wipe the inside of the case with a cotton swab dipped in isopropyl alcohol, ensuring you let the alcohol evaporate completely before placing the appliance back inside. Additionally, it is a sound clinical practice to replace the storage case entirely every six to twelve months to ensure optimal hygiene standards are maintained.
For patients who have recently undergone restorative work and are using a Night Guard After Dental Crowns: Clinical Guide | HCMC Dental, proper storage is vital to ensure the splint remains perfectly dimensioned to protect the new porcelain restorations from nocturnal grinding forces.
Signs Your Guard Needs Replacing
You should replace your night guard when you observe deep micro-cracks, persistent malodor, severe discoloration, or a loss of retention that compromises its protective function.
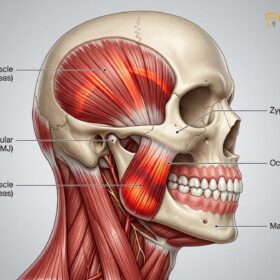
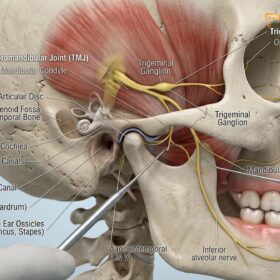
Even with the most meticulous and disciplined cleaning routine, no oral appliance is designed to last indefinitely. The constant exposure to the acidic oral environment, combined with the immense mechanical forces generated by the masseter and temporalis muscles during nocturnal bruxism, will inevitably lead to material fatigue and degradation. Recognizing the clinical signs that indicate your appliance has reached the end of its functional lifespan is crucial to ensure your teeth and temporomandibular joints (TMJ) remain adequately protected.
The most obvious indicator for replacement is physical damage. Inspect your appliance regularly under good lighting. Look for micro-cracks, deep fissures, or areas where the material has become excessively thin or frayed. In severe cases of bruxism, patients may actually grind completely through the occlusal surface of the splint, creating a hole. Once the structural integrity of the device is compromised, it can no longer evenly distribute occlusal forces, rendering it therapeutically ineffective and potentially dangerous, as sharp edges can lacerate the tongue and buccal mucosa.
Changes in fit and retention are also critical warning signs. A custom-fabricated splint should fit snugly and securely over your dentition without causing excessive pressure or pain. If the appliance begins to feel loose, falls out during sleep, or conversely, feels excessively tight and causes morning tooth soreness, it has likely warped. Warping can occur due to improper cleaning with hot water, exposure to heat sources, or simply the gradual relaxation of the polymer chains over years of use. An ill-fitting appliance not only fails to protect the teeth but can actually induce unwanted orthodontic movement, shifting your bite out of alignment [5].
Clinical Case Study: A 34-year-old patient presented to HCMC Dental Clinic in Ho Chi Minh City complaining of returning morning jaw pain and headaches, despite wearing her occlusal splint nightly. Upon clinical examination, the appliance was found to be severely warped and thinned out due to three years of heavy bruxism and improper cleaning with hot water. The loss of proper occlusal vertical dimension meant the splint was no longer decompressing the TMJ. Following the fabrication of a new, precisely calibrated dual-laminate splint and comprehensive education on proper maintenance, the patient’s muscular symptoms resolved completely within two weeks.
Persistent aesthetic and olfactory changes also dictate the need for replacement. If your appliance has developed a deep, cloudy yellow or brown discoloration that cannot be removed by weekly deep cleaning soaks, the material has likely become highly porous and saturated with bacterial byproducts. Similarly, if the device emits a persistent, foul odor even immediately after a thorough cleaning, it indicates that anaerobic bacteria have colonized deep within the micro-fractures of the acrylic. Continuing to wear a heavily contaminated appliance poses a significant risk to your oral health, increasing the likelihood of gingival inflammation and recurrent decay.
For a comprehensive understanding of the replacement timeline, patients should review the When to Replace Night Guard Signs: Clinical Guide | HCMC Dental to ensure they are not relying on a compromised device.
Common Cleaning Mistakes
The most frequent errors include using hot water that warps the plastic, scrubbing with abrasive toothpaste, and storing the appliance while still damp.
Despite the best intentions, many patients inadvertently damage their oral appliances by employing incorrect cleaning methodologies based on common misconceptions. Education regarding what not to do is just as vital as understanding the proper protocols. Correcting these common mistakes can significantly extend the life of the device and maintain its hygienic integrity.
The “toothpaste fallacy” is perhaps the most widespread error. Because patients associate toothpaste with oral cleanliness, they naturally assume it is the best product for cleaning an oral appliance. As previously detailed, the abrasive nature of dentifrice causes catastrophic micro-structural damage to acrylics and thermoplastics. This damage is cumulative; every time the appliance is brushed with toothpaste, more scratches are created, leading to a rapid decline in hygiene and aesthetics. Transitioning to a mild liquid soap is the single most important correction a patient can make to their routine.
Another frequent mistake is the misuse of mouthwash as a soaking agent. Many patients attempt to freshen their appliance by leaving it submerged in commercial mouthwash overnight. Most over-the-counter mouthwashes contain high percentages of alcohol, artificial dyes, and flavoring agents. Prolonged exposure to alcohol degrades the plasticizers in the appliance, causing it to become brittle and prone to snapping. Furthermore, the artificial dyes (such as deep blues or greens) can permanently stain the clear material. If a patient wishes to use mouthwash for a brief freshening effect, it must be an alcohol-free variant, heavily diluted with water, and the soak should never exceed ten minutes.
“Patient compliance with proper maintenance protocols is the weakest link in appliance therapy. We frequently observe patients utilizing boiling water in an attempt to ‘sterilize’ their splints, completely unaware that they are inducing irreversible thermal deformation that destroys the precise occlusal calibration we worked so hard to achieve.”
— Dr. Nguyen Van Cuong, Clinical Director
Finally, the failure to allow the appliance to dry completely before storage is a critical error that leads to rapid microbial colonization. Patients often rush their morning routine, rinsing the appliance and immediately snapping it into a closed case while it is still dripping wet. This traps moisture and creates a humid micro-climate ideal for fungal spores to germinate. Taking the extra few minutes to gently pat the appliance dry with a clean tissue or allowing it to air dry on a ventilated rack is a simple behavioral change that prevents severe hygienic complications.
For parents managing Bruxism in Children & Teens: Clinical Guide | HCMC Dental, overseeing the cleaning routine is essential, as younger patients are particularly prone to these common maintenance errors.
When to See a Doctor
While diligent home care is the cornerstone of appliance maintenance, there are specific clinical scenarios where professional intervention is required. You should schedule an appointment with your dentist if you notice any physical damage to the appliance, such as cracks, sharp edges, or significant thinning of the material. Continuing to wear a damaged splint can cause soft tissue lacerations and fail to protect your teeth from occlusal trauma.
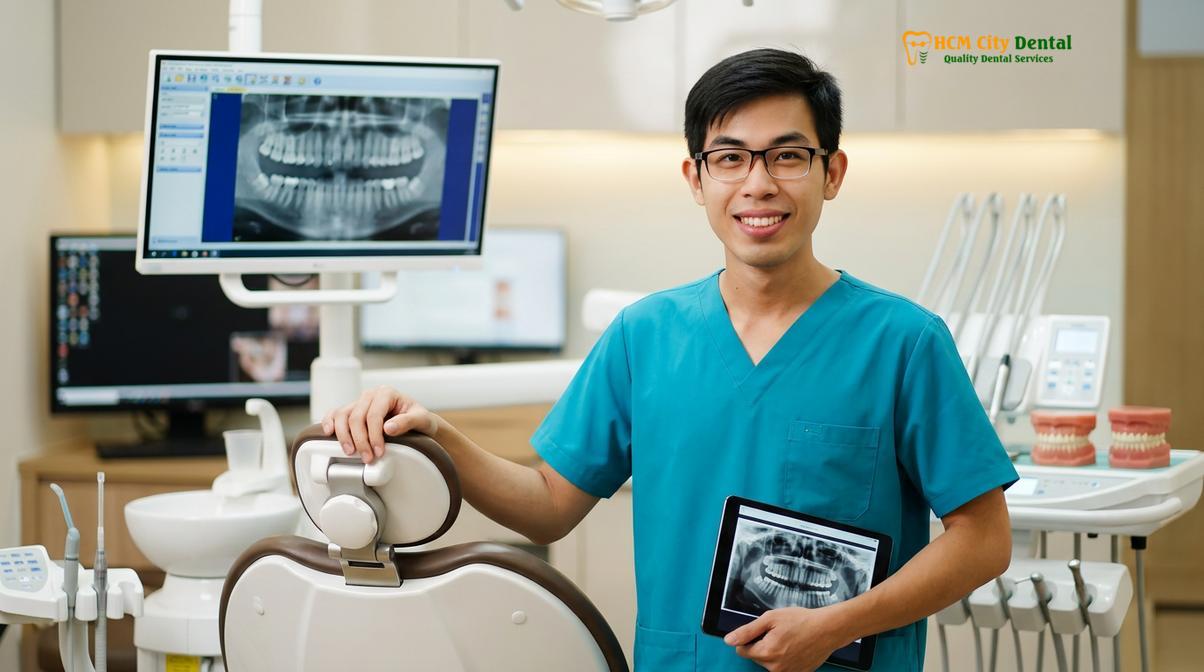
Additionally, if the appliance no longer fits securely, causes pain upon insertion, or if you begin experiencing a return of morning jaw pain, headaches, or tooth sensitivity, the device has likely warped or worn down and requires professional evaluation. A dentist can assess the fit, adjust the occlusal contacts, or recommend a replacement if the structural integrity is compromised.
If you are experiencing persistent bad breath or if the appliance remains severely discolored despite following all deep cleaning protocols, bring the device to your next Dental Cleaning appointment. The clinical team at HCMC Dental Clinic in Ho Chi Minh City possesses specialized ultrasonic equipment and professional-grade solvents that can safely remove heavy calculus buildup and deep-seated stains without damaging the custom fabrication. Regular professional evaluations ensure your appliance remains a hygienic and effective tool in your overall oral health strategy.
For pregnant patients utilizing a splint, ensuring impeccable hygiene is even more critical due to pregnancy-induced gingivitis. Consult the Is a Night Guard Pregnancy Safe? Clinical Guide | HCMC Dental for specialized considerations, and always seek professional advice if you notice increased gingival bleeding or irritation associated with appliance wear.
Frequently Asked Questions
How do I clean my night guard daily?
To clean your night guard daily, rinse it with cool water immediately after removal, then gently brush it using a soft-bristled toothbrush and mild, fragrance-free soap. Avoid using toothpaste, as its abrasive agents can create micro-scratches on the acrylic surface where bacteria can easily accumulate and multiply. After brushing, rinse thoroughly to remove all soap residue and allow the appliance to air dry completely on a clean surface before placing it in a ventilated storage case.
Can I use toothpaste on my night guard?
No, you should never use toothpaste to clean your night guard. Toothpaste contains abrasive particles like silica designed for human enamel, which is much harder than the plastic or acrylic of your guard. Brushing with toothpaste will scratch the material, leading to bacterial buildup, discoloration, and unpleasant odors. Instead, use a mild liquid soap or a specialized non-abrasive foam cleanser designed specifically for removable dental appliances.
Should I soak my guard in mouthwash?
You should generally avoid soaking your guard in standard mouthwash, especially if it contains alcohol. Alcohol can degrade the polymers in the night guard, causing it to become brittle, warp, or lose its structural integrity. Furthermore, the artificial dyes in many mouthwashes can permanently stain the clear material. If you must use mouthwash for freshness, use an alcohol-free variant diluted with water for no more than ten minutes, and rinse thoroughly afterward.
Why does my night guard smell?
Your night guard smells because of the accumulation of bacterial biofilm, plaque, and microscopic food particles that have not been adequately removed during your daily cleaning routine. When stored in a damp, unventilated case, these microorganisms proliferate, releasing volatile sulfur compounds that cause a persistent and unpleasant malodor. Implementing a rigorous daily brushing routine and a weekly deep cleaning soak will eliminate the bacteria responsible for the odor.
How often should I deep clean my guard?
You should deep clean your night guard at least once a week using a specialized non-abrasive denture tablet or a diluted hydrogen peroxide solution. This weekly deep cleaning process helps dissolve stubborn calcium deposits, eliminates embedded bacterial colonies, and prevents the appliance from developing a cloudy appearance or foul odor. Ensure you follow the manufacturer’s instructions for soaking times to prevent chemical degradation of the material.
References
- Journal of Prosthetic Dentistry. Biofilm formation on occlusal splint materials. (2021).
- American Dental Association. Care and maintenance of removable dental appliances. (2020).
- International Journal of Prosthodontics. Effects of chemical cleansers on thermoplastic materials. (2019).
- Journal of Clinical Pediatric Dentistry. Hygiene protocols for orthodontic and bruxism appliances. (2022).
- Journal of Oral Rehabilitation. Longevity and degradation of acrylic night guards. (2018).
For pricing, booking, and a free clinical assessment, visit our Night Guard & Mouthguard service page at HCMC Dental Clinic in Ho Chi Minh City.