A veneer shade guide is a standardized clinical tool used by prosthodontists to match and select the precise color, brightness, and translucency of dental restorations. It ensures your new smile harmonizes perfectly with your facial features, skin tone, and natural dentition.
Clinical Summary:
Selecting the optimal shade for Porcelain Veneers requires a meticulous balance of art and science. A comprehensive veneer shade guide, such as the VITA Classical or 3D Master system, allows clinicians to evaluate hue, chroma, and value with mathematical precision. According to Dr. Nguyen Van Cuong at HCMC Dental Clinic in Ho Chi Minh City, achieving a lifelike aesthetic goes beyond simply choosing the whitest option. It involves analyzing the patient’s skin undertones, the whiteness of their eye sclera, and the optical translucency required at the incisal edge. By utilizing advanced materials like lithium disilicate and zirconium dioxide, alongside digital smile design protocols, prosthodontists can craft restorations that are both structurally robust and visually indistinguishable from perfect natural enamel.
Key Takeaways:
- The VITA shade system categorizes tooth color into natural shades (A1-D4) and bleach shades (BL1-BL4).
- BL2 is currently the most requested shade for full smile makeovers, offering high brightness with natural warmth.
- A successful shade match must consider the patient’s skin tone, age, and the color of their eye sclera.
- Lighting conditions (metamerism) significantly alter how dental ceramics appear in natural versus artificial light.
- Premium veneers require custom laboratory characterization to replicate the translucent edges and mamelons of natural teeth.
Understanding the VITA Classical and 3D Master Shade Guides
The VITA shade systems categorize tooth color by hue, chroma, and value, providing a universal language for dentists and ceramists to achieve precise aesthetic outcomes.
In the realm of cosmetic dentistry, communication between the prosthodontist and the master ceramist must be flawless. To eliminate subjectivity, the dental industry relies on standardized color matching systems, the most prominent being the VITA Classical and the VITA Toothguide 3D-MASTER. Understanding how a vita shade guide veneers system works is the first step in planning your smile makeover.
The VITA Classical guide, introduced decades ago, categorizes natural tooth colors into four primary hues: A (reddish-brown), B (reddish-yellow), C (grayish shades), and D (reddish-gray). Within each hue, the chroma (intensity or saturation of the color) is designated by a number from 1 to 4. For example, A1 is a light, bright reddish-brown, while A4 is a deeply saturated, darker version of the same hue[1].
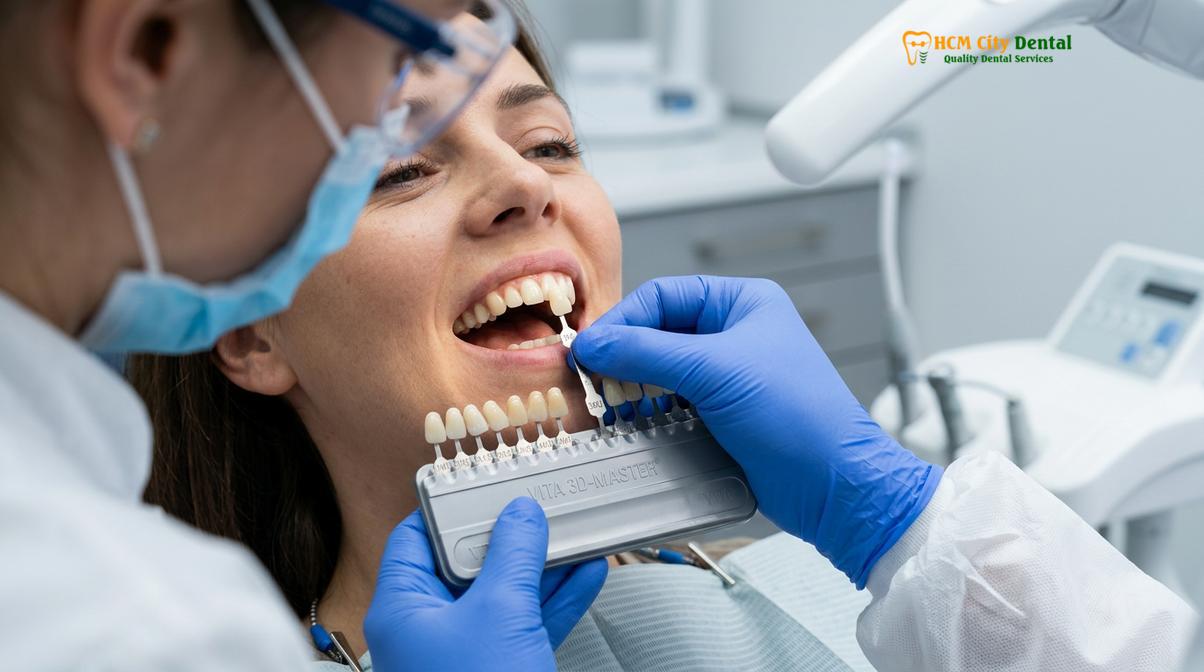
However, as aesthetic demands evolved, clinicians realized that the human eye perceives “value” (the lightness or darkness of a color) more acutely than hue or chroma. This led to the development of the VITA 3D-MASTER guide. This advanced system prioritizes value, allowing the dentist to first determine how bright the tooth should be, followed by selecting the color saturation and finally the specific hue. This three-dimensional approach drastically reduces the margin of error when matching a single veneer to adjacent natural teeth.
During a clinical assessment, the dentist will view these shade tabs against your natural dentition under color-corrected lighting (typically 5500K, which mimics natural daylight). This precise methodology ensures that whether you are receiving a single restoration or a full arch, the foundational color metrics are mathematically sound before the laboratory begins fabrication.
Bleach Shades (BL1, BL2, BL3, BL4) vs. Natural Shades (A1, B1)
Bleach shades offer a Hollywood-bright aesthetic beyond natural enamel, whereas natural shades like B1 represent the lightest naturally occurring tooth color.
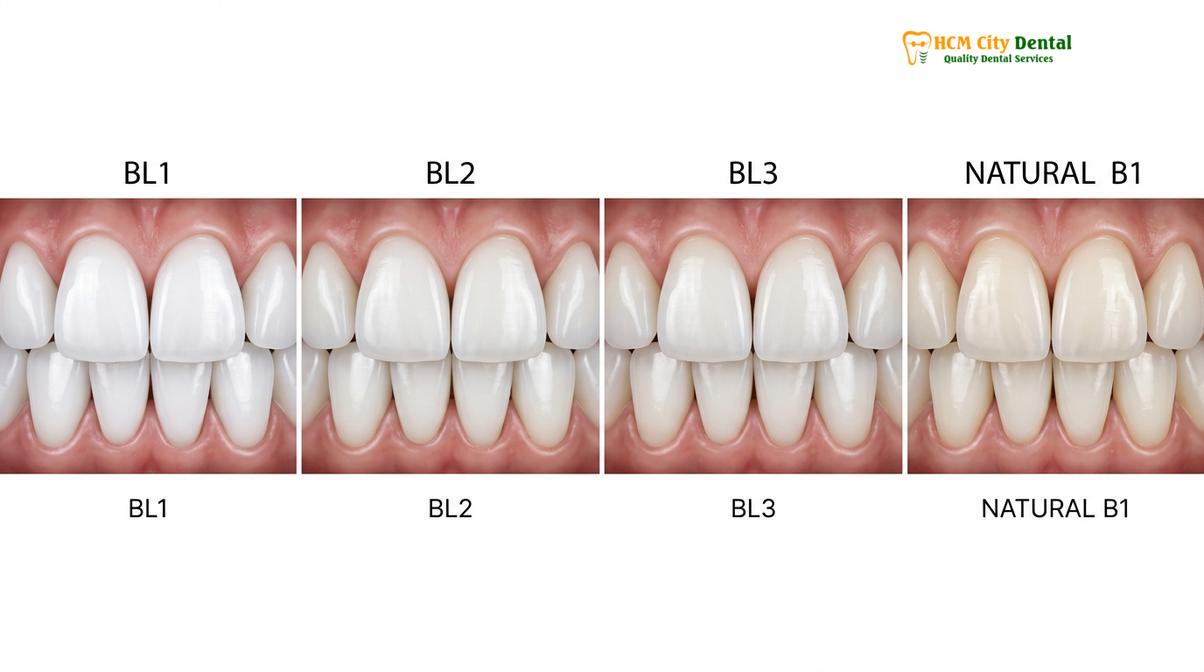
As cosmetic dentistry advanced and teeth whitening became ubiquitous, patient demand outgrew the traditional VITA Classical scale. The lightest natural shade, B1, was no longer sufficient for patients desiring a truly transformative, ultra-bright smile. In response, dental manufacturers introduced the Bleach (BL) scale, comprising four distinct levels of enhanced whiteness.
Understanding the distinction between these categories is crucial for managing expectations and achieving the desired aesthetic result.
| Shade Category | Description | Clinical Application & Aesthetic Profile |
|---|---|---|
| BL1 (Super Bleach) | The absolute whitest shade available in dental ceramics. | Maximum brightness and impact. Often chosen by celebrities and influencers. Requires masterful layering to avoid looking opaque or artificial. |
| BL2 (Bright White) | Highly bright but with a subtle touch of warmth. | The most popular choice for full smile makeovers. It delivers a stunningly white appearance while maintaining enough natural depth to look believable. |
| BL3 (Natural Bleach) | A balanced, soft white. | Ideal for patients who want a noticeably upgraded smile that mimics the results of excellent, professional teeth whitening. |
| BL4 (Subtle Bleach) | The darkest of the bleach shades, bridging the gap to natural colors. | Perfect for older patients or those seeking a very conservative enhancement that blends seamlessly with slightly aged natural dentition. |
| B1 (Whitest Natural) | The lightest shade on the traditional natural scale. | The gold standard for a pristine, naturally healthy smile. It does not look “bleached” but rather inherently clean and bright. |
| A1 / A2 (Classic Natural) | Warm, natural ivory tones. | Frequently used when matching a single veneer to existing, unwhitened natural teeth to ensure a flawless, invisible integration. |
The debate between bleach shades BL1 and natural tooth B1 often centers on the patient’s ultimate goal. If the objective is a “Hollywood smile” that commands attention, the BL scale is appropriate. However, if the goal is biomimetic restoration—where the dental work is entirely undetectable—shades like B1 or A1 are preferred. It is also important to note that the material chosen plays a significant role; a BL1 shade executed in high-quality lithium disilicate will look vastly superior and more lifelike than the same shade milled from a basic, opaque block of older-generation ceramics[2].
Factors Influencing Your Veneer Shade Choice (Skin Tone, Eye Sclera, Age)
Selecting the ideal shade requires evaluating the patient’s skin undertones, the whiteness of their eye sclera, and age-appropriate enamel characteristics to ensure a harmonious smile.
Choosing a veneer shade is not an isolated decision; it is a highly individualized process that must account for the unique canvas of the patient’s face. A shade that looks breathtaking on one individual may appear jarring and artificial on another. Clinical prosthodontists utilize several established guidelines to navigate this selection process.
The Sclera Rule
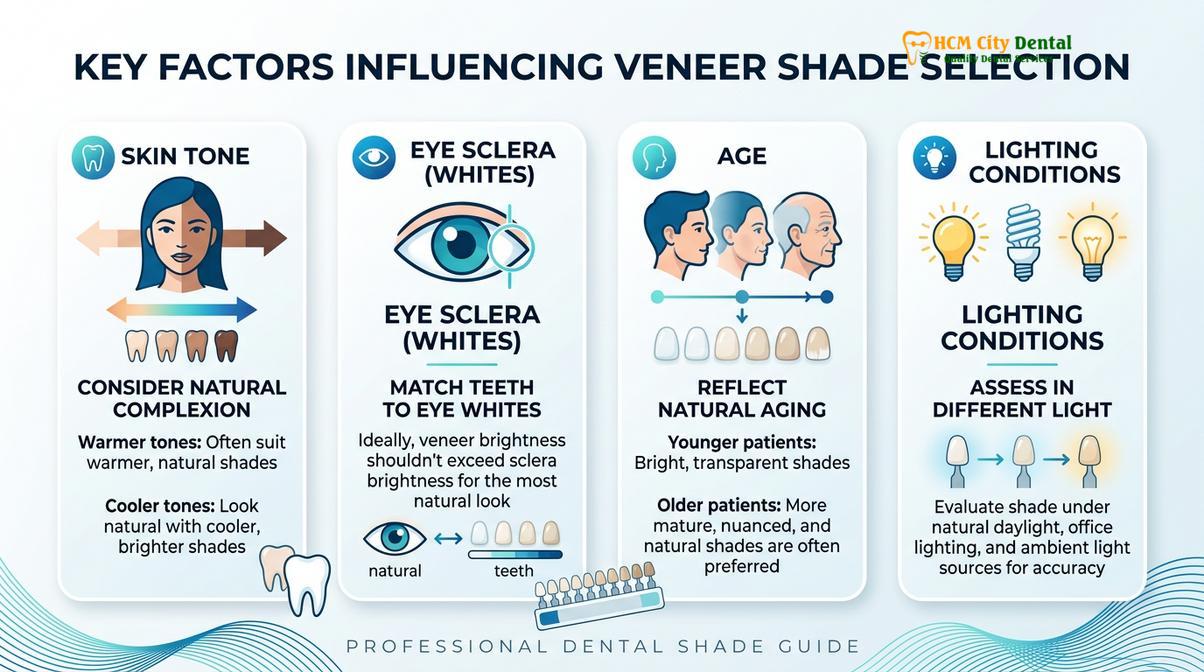
One of the most reliable clinical benchmarks is the “Sclera Rule.” As a general guideline, the value (brightness) of your veneers should not exceed the whiteness of the sclera (the white part) of your eyes. If the teeth are significantly whiter than the eyes, they become the dominant focal point of the face, creating an unnatural, distracting appearance. Matching the teeth to the sclera ensures a balanced, harmonious facial aesthetic.
Skin Tone and Contrast
Skin tone plays a profound role in how tooth color is perceived due to the principles of contrast. Patients with darker or deeply tanned skin naturally provide a high contrast background for their teeth. Consequently, even a natural shade like B1 or a soft bleach like BL3 will appear incredibly bright and striking. If a patient with a deep skin tone selects BL1, the contrast can be overwhelming.
Conversely, patients with very fair or pale skin have less natural contrast. To achieve a smile that “pops,” they may need to select a brighter shade, such as BL1 or BL2. However, the undertones of the skin (warm, cool, or neutral) must also be considered. Warm skin tones often pair beautifully with the slight warmth of a BL2 or B1, whereas cool skin tones can carry the stark crispness of a BL1 more effectively.
Age-Appropriate Aesthetics
Natural teeth change as we age. The outer layer of translucent enamel gradually thins due to mechanical wear and acid erosion, exposing more of the underlying dentin, which is naturally yellow or amber. Therefore, a stark white BL1 smile on a patient in their 60s or 70s may immediately signal that the teeth are artificial. For mature patients seeking a rejuvenated but authentic look, shades like BL3, BL4, or B1 often provide the most flattering and age-appropriate enhancement.
“The artistry in cosmetic dentistry lies in creating a smile that belongs to the patient’s face. We are not just picking a color from a chart; we are calibrating brightness against skin tone, facial symmetry, and personality to ensure the final result is both striking and undeniably natural.”
How Natural Light and Office Lighting Affect Veneer Appearance
Metamerism causes dental ceramics to appear different under various lighting conditions, making it crucial to evaluate shade selections in natural daylight.
A critical phenomenon in dental optics is metamerism—the scientific principle where two colors appear to match under one light source but look entirely different under another. This is why a veneer shade selected under the harsh fluorescent lights of a standard dental operatory might look unexpectedly yellow or gray when the patient steps outside into the sunlight.
To combat metamerism, high-end clinics like HCMC Dental Clinic utilize specialized color-corrected lighting systems calibrated to 5500 Kelvin, which accurately simulates natural midday sunlight. This ensures that the hue, chroma, and value perceived by the dentist and the patient during the consultation will remain consistent in real-world environments[3].
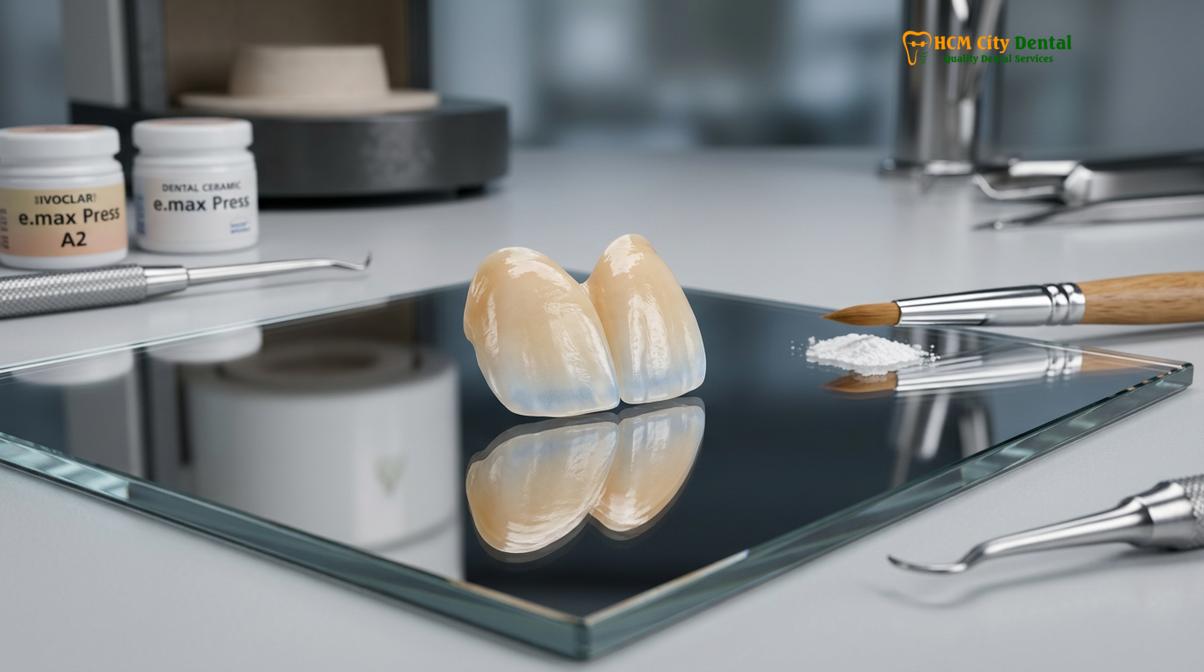
Furthermore, the optical properties of the ceramic material interact dynamically with light. Natural enamel is not a solid, opaque color; it absorbs, reflects, and transmits light. Premium dental ceramics must mimic this behavior. When evaluating a shade, the clinician must consider how the material will perform in various settings—from the bright flash of a camera to the dim, warm lighting of a restaurant. This is why a try-in paste is utilized before final cementation, allowing the patient to view their new smile in different lighting conditions before giving final approval.
Custom Characterization: Adding Translucency and Halo Effects in the Lab
Master ceramists layer porcelain to mimic natural enamel, incorporating translucent edges, mamelons, and halo effects for a lifelike, three-dimensional appearance.
Selecting the base shade from a guide is only the foundation of the aesthetic process. The true magic occurs in the dental laboratory, where a master ceramist transforms a monochromatic block of material into a vibrant, lifelike tooth. This process is known as custom characterization.
Natural teeth exhibit a gradient of color and light transmission. The gingival third (near the gum line) is typically more saturated with chroma due to the thicker underlying dentin. The middle third represents the true base shade. The incisal third (the biting edge) is composed almost entirely of enamel, giving it a high degree of optical translucency. If a veneer lacks this gradient, it will look like a flat, artificial “chiclet.”
To achieve this biomimetic gradient, ceramists utilize advanced techniques. When working with a pressed ceramic ingot, they may use a cut-back technique, where the facial surface of the pressed core is reduced and then meticulously hand-layered with translucent feldspathic porcelain. This allows the ceramist to build internal effects, such as mamelons (the subtle, finger-like projections of dentin visible inside youthful teeth) and the incisal halo (a thin, opaque white line at the very edge of the tooth that frames the translucency)[4].
Clinical Warning: Requesting a shade that is “as white as possible” without allowing the ceramist to incorporate translucent veneer edges often results in a highly opaque, unnatural appearance. Always trust your prosthodontist’s recommendation regarding the balance of brightness and translucency.
Clinical Workflow: From Digital Smile Design to Adhesive Cementation
Modern veneer treatments utilize 3D intraoral scanning, minimal-prep techniques, and advanced bonding protocols to ensure long-lasting, biologically sound restorations.
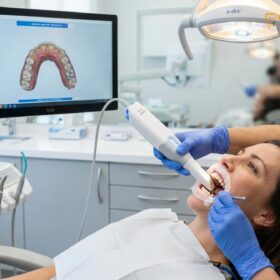
The journey to a flawless smile involves a highly orchestrated clinical workflow that prioritizes both aesthetics and biological preservation. At HCMC Dental Clinic, this process begins with advanced diagnostics. Traditional, uncomfortable silicone impressions have been entirely replaced by state-of-the-art digital scanning technology, utilizing the iTero Element 5D and Medit i700 Intraoral Scanners. These devices capture the exact micro-topography of the teeth and gingival architecture in high-definition 3D, providing maximum comfort and unparalleled precision.
Once the digital impression is captured, the clinical team employs Digital Smile Design (DSD) software. This allows the prosthodontist to calibrate the gingival zenith, respect the biological width, and design the ideal tooth proportions before any physical treatment begins. Patients can even preview their new smile via a 3D mock-up directly in their mouth.
Tooth preparation is a critical phase. The goal is maximum enamel preservation. Depending on the case, preparation depths range from a minimal-prep 0.3mm to 0.7mm. In specific scenarios, prep-less Lumineers (0.2mm) may be utilized. Keeping the preparation strictly within the enamel layer is vital, as it ensures the highest possible bond strength during the final adhesive cementation phase.
The final delivery involves a meticulous bonding protocol. The internal surface of the ceramic is etched with hydrofluoric acid and treated with a silane coupling agent, while the natural tooth is conditioned with phosphoric acid. A premium bonding resin is then applied, creating a micromechanical and chemical bond that essentially fuses the veneer to the tooth structure. While resin-modified glass ionomer cements are excellent for certain crowns, true porcelain veneers require dedicated light-cured or dual-cured adhesive resin cements for optimal color stability and retention.
Material Selection and Structural Integrity
The choice between lithium disilicate and zirconia depends on the required flexural strength and aesthetic demands of the patient’s unique bite dynamics.
The longevity and appearance of your veneers are heavily dependent on the materials selected. Modern cosmetic dentistry relies primarily on two powerhouse ceramics, each with distinct clinical indications.
E.max (Lithium Disilicate): Manufactured by Ivoclar in Liechtenstein, E.max is widely considered the gold standard for anterior (front) teeth. It offers outstanding lifelike aesthetics, exceptional shade mapping capabilities, and brilliant translucency matching. With a flexural strength of approximately 400-500 MPa, it is more than strong enough to withstand normal biting forces while providing the most beautiful, natural-looking results.
Zirconia (Zirconium Dioxide): For patients with heavy bites, sleep bruxism (teeth grinding), or those requiring structural differences between restorations to mask severely discolored underlying teeth, Zirconia HT (such as Cercon HT from Germany) is often indicated. Zirconia boasts a massive flexural strength MPa exceeding 1000. While older generations of zirconia were notoriously opaque, modern highly translucent (HT) zirconia blends exceptional durability with highly acceptable aesthetics.
For patients seeking a more budget-friendly or reversible option, chair-side composite veneers utilizing a nano-hybrid composite resin can be sculpted directly onto the teeth. While they do not possess the same stain resistance or longevity as porcelain, they offer a conservative and immediate aesthetic upgrade, comparing porcelain and composite options effectively.
Treatment Timelines, Pricing, and Global Support in Ho Chi Minh City
HCMC Dental Clinic offers transparent pricing, express turnaround times for international patients, and comprehensive warranties for premium veneer treatments.
For dental tourists and expatriates, efficiency and reliability are paramount. HCMC Dental Clinic operates with a Direct Lab Partnership in Ho Chi Minh City, enabling complete quality control and direct collaboration between the prosthodontist and the ceramist. This synergy allows for an Express 3-5 Day Turnaround, meaning a complete smile makeover can be designed, fabricated, characterized, and permanently fitted within a single week.
Understanding the financial investment is crucial. The clinic offers a transparent pricing structure, utilizing only authentic, certified materials. Patients who book their consultation remotely via WhatsApp are eligible for a significant 40% pre-arrival discount.
- Composite Veneer (Chair-side): Walk-in: ~$80 (2.0M VND) | WhatsApp discount: From $48 (1.2M VND) (-40%).
- Zirconia Veneer (Cercon HT): Walk-in: ~$240 (6.0M VND) | WhatsApp discount: From $144 (3.6M VND) (-40%).
- E.max Porcelain Veneer (Ivoclar): Walk-in: ~$320 (8.0M VND) | WhatsApp discount: From $192 (4.8M VND) (-40%).
- Smile Design 3D Mock-up: Walk-in: ~$200 (5.0M VND) | WhatsApp discount: From $120 (3.0M VND) (Free if treatment is performed).
- Laser Gum Contouring (Diode): Walk-in: ~$160 (4.0M VND) | WhatsApp discount: From $96 (2.4M VND) per arch.
- In-Office Teeth Whitening (Laser): Walk-in: ~$140 (3.5M VND) | WhatsApp discount: From $84 (2.1M VND).
Patient Experience: A patient from Australia visited HCMC Dental Clinic in Ho Chi Minh City seeking to correct tetracycline stains and mild diastemas (gaps). Dr. Cuong utilized the iTero scanner and DSD to plan 10 upper E.max veneers. After evaluating the patient’s warm skin tone, shade BL2 was selected with custom incisal translucency. The entire treatment, including a custom nightguard for protection, was completed in just 5 days, backed by a global manufacturer warranty and a 3-year clinic bonding guarantee.
To ensure peace of mind for international patients, the clinic provides remote follow-up support via WhatsApp, utilizing specific photo and video assessment protocols to monitor the longevity of your dental restorations long after you return home. Flexible 0% interest monthly credit card installment plans are also available.
When to Consult a Prosthodontist
While cosmetic enhancements are highly desirable, they are medical procedures that require careful clinical evaluation. You should schedule a professional consultation if you experience any of the following:
- Severe Tooth Discoloration: Intrinsic stains (like those from tetracycline antibiotics or trauma) cannot be resolved with standard whitening and require professional assessment to determine the necessary opacity of the restorative material.
- Signs of Bruxism: If you wake up with jaw pain, headaches, or notice flattened, worn edges on your teeth, you may be grinding your teeth at night. A prosthodontist must evaluate your bite dynamics; placing delicate ceramics without addressing bruxism (often requiring a custom nightguard) will lead to catastrophic fracture of the restorations.
- Gum Inflammation or Bleeding: Healthy gingival tissues are a prerequisite for any cosmetic dental work. Active periodontal disease must be treated and stabilized before veneers can be safely placed to ensure the biological width is respected and the margins remain sealed[5].
- Significant Misalignment: While veneers can correct minor crowding (often termed “instant orthodontics”), severe malocclusion should be addressed with orthodontic treatment (like clear aligners) prior to restorative work to ensure long-term structural integrity.
A thorough clinical examination, including 3D imaging and periodontal probing, is essential to determine your candidacy for these treatments. Never proceed with irreversible enamel preparation without a comprehensive diagnostic workup.
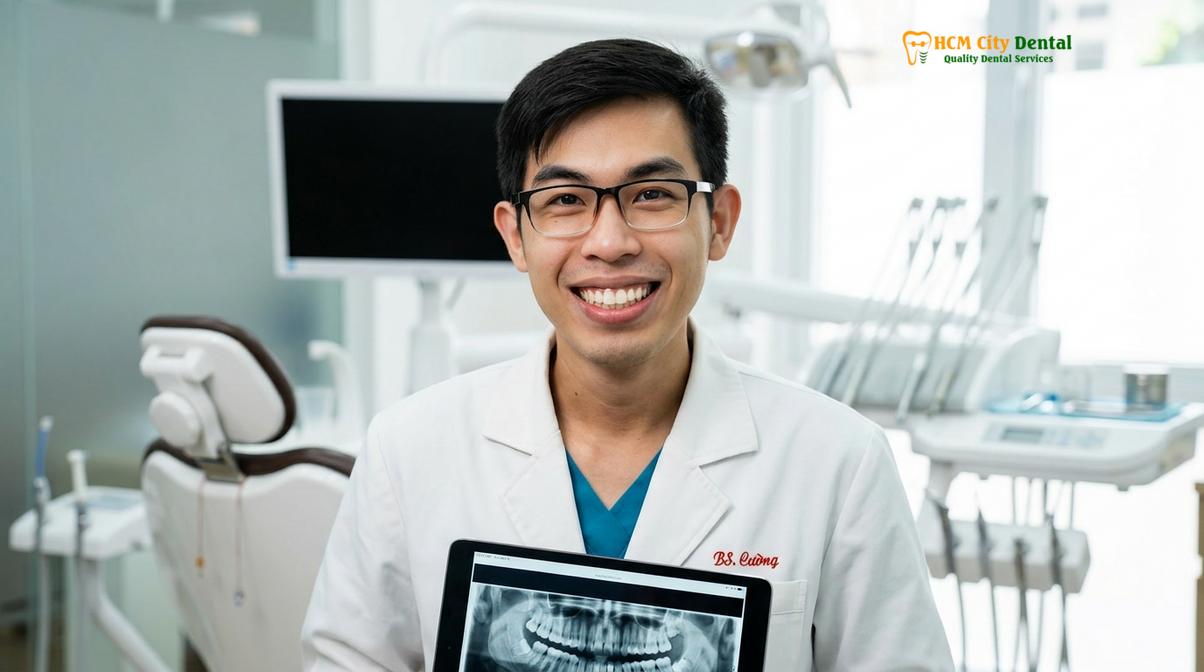
“The foundation of aesthetic dentistry is biological health. A beautiful veneer placed on a compromised tooth or inflamed gums is a clinical failure waiting to happen. We must engineer the smile from the roots up, ensuring that function and health dictate the final aesthetic form.”
Frequently Asked Questions
What is the most popular veneer shade?
The most popular veneer shade is BL2, as it provides a bright, modern aesthetic without appearing artificially opaque. It strikes the perfect balance between a Hollywood white appearance and natural tooth translucency, making it highly requested for full smile makeovers.
Is BL1 too white for veneers?
BL1 can appear too white if not properly layered with translucent edges, especially on patients with very fair skin. However, for individuals seeking maximum brightness or those with darker skin tones that provide high contrast, a masterfully crafted BL1 veneer can look stunning.
Can I change my veneer shade after bonding?
No, you cannot change the shade of porcelain veneers once they are permanently bonded. Dental ceramics do not respond to traditional teeth whitening treatments, which is why utilizing a try-in paste before final cementation is a critical clinical step.
Do porcelain veneers stain over time?
High-quality porcelain veneers are highly resistant to staining due to their non-porous glazed surface. Unlike natural enamel or composite resin, materials like lithium disilicate will not discolor from coffee, tea, or red wine, provided proper oral hygiene is maintained.
How does the underlying tooth color affect the final veneer shade?
The underlying tooth color can significantly impact the final result, especially with highly translucent veneers. If a patient has severe tetracycline staining, the prosthodontist must use a more opaque ceramic ingot or a masking luting cement to prevent the dark hue from showing through.
References
- Journal of Esthetic and Restorative Dentistry. Translucency and masking ability of lithium disilicate ceramics. (2021).
- International Journal of Prosthodontics. Enamel preservation and bond strength in minimal-prep veneers. (2020).
- The Journal of Prosthetic Dentistry. Flexural strength and optical properties of monolithic zirconia. (2019).
- Clinical Oral Investigations. Metamerism and color stability in dental ceramics under varying light sources. (2022).
- Journal of Clinical Periodontology. Biological width preservation around anterior aesthetic restorations. (2018).