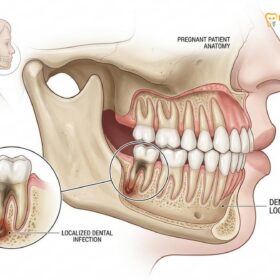
A root canal procedure in Ho Chi Minh City involves removing infected dental pulp, disinfecting the inner chamber, and sealing the tooth to prevent reinfection. This endodontic therapy saves natural dentition, alleviates severe pain, and restores structural integrity using advanced microscopic and rotary techniques.
Clinical Summary:
Endodontic therapy, commonly known as a root canal, is a highly predictable microsurgical procedure designed to eradicate intracanal microbial infections and preserve the natural tooth structure. The modern workflow integrates high-resolution Cone Beam Computed Tomography (CBCT) for precise anatomical mapping, profound local anesthesia for patient comfort, and strict aseptic protocols using rubber dam isolation. Mechanical debridement is achieved through flexible Nickel-Titanium (NiTi) rotary instruments, followed by rigorous chemical irrigation using sodium hypochlorite and EDTA to dissolve organic tissue and remove the smear layer. The disinfected canal space is then hermetically sealed using biocompatible materials, preventing future bacterial ingress. When performed under optimal clinical conditions, this procedure offers a conservative alternative to tooth extraction, maintaining the patient’s natural proprioception and alveolar bone volume.
Key Takeaways:
- CBCT imaging provides a 3D anatomical map, crucial for locating hidden accessory canals prior to treatment.
- Strict isolation with a dental dam is mandatory to prevent salivary bacterial contamination of the root canal system.
- Chemical irrigation is just as critical as mechanical shaping for disrupting complex bacterial biofilms.
- Modern obturation techniques utilize biocompatible sealers to ensure a fluid-tight, three-dimensional seal.
- A final coronal restoration, typically a crown, is essential to protect the treated tooth from vertical fractures.
Step 1: Digital CBCT Imaging and Local Anesthesia Injection
Precise 3D imaging maps the complex root anatomy, while targeted local anesthesia ensures the patient remains completely comfortable throughout the intervention.
The foundation of a successful endodontic intervention begins with accurate diagnostics. While traditional two-dimensional periapical radiographs provide a baseline understanding of the tooth’s condition, modern endodontics heavily relies on Cone Beam Computed Tomography (CBCT). This advanced imaging modality generates a high-resolution, three-dimensional reconstruction of the maxillofacial region. By analyzing these scans, clinicians can identify complex anatomical variations, such as the elusive MB2 canal in maxillary molars, severe root curvatures, and the exact extent of periapical radiolucencies (bone lesions)[1]. This diagnostic precision minimizes the risk of missed canals, which is a primary cause of post-treatment endodontic failure.
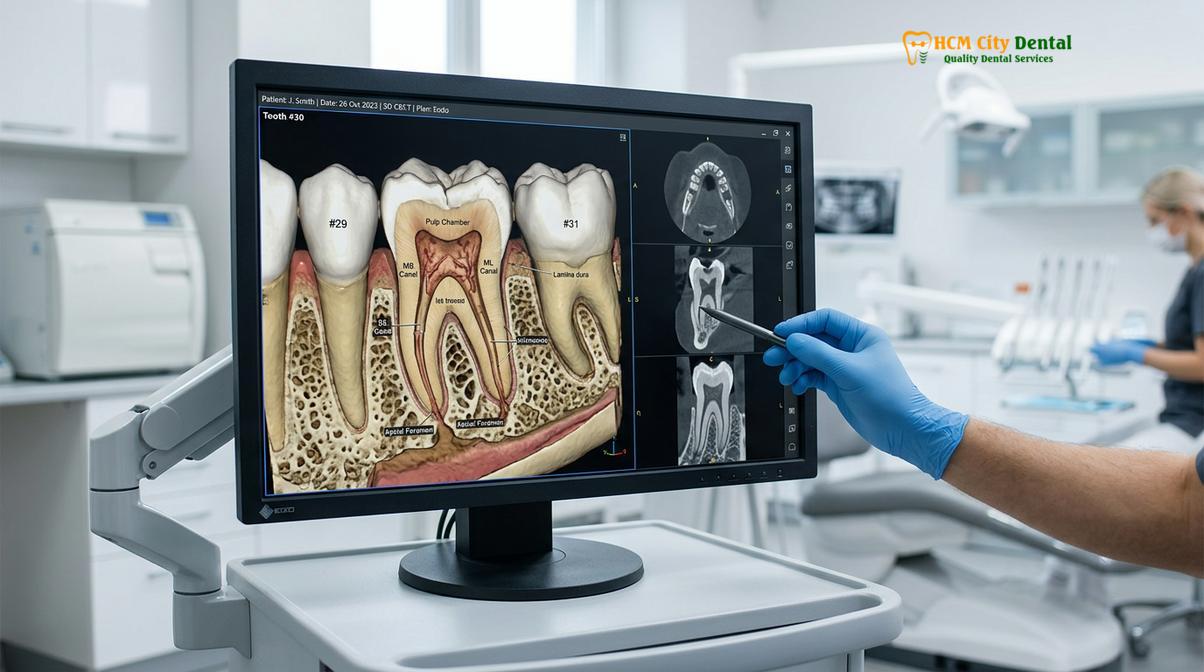
Once the anatomical roadmap is established, achieving profound pulpal anesthesia is the next critical step. The goal is to provide a painless root canal Saigon experience, mitigating the historical anxiety associated with this procedure. Clinicians typically utilize advanced anesthetic agents such as 4% Articaine with epinephrine (1:100,000) for maxillary infiltrations, due to its superior ability to diffuse through cortical bone. For mandibular teeth, an Inferior Alveolar Nerve Block (IANB) using 2% Lidocaine or Articaine is standard protocol. In cases of irreversible pulpitis—often termed a “hot tooth”—the inflamed nerve fibers exhibit altered resting potentials, making them resistant to standard anesthesia. In such scenarios, supplemental techniques like intraligamentary (PDL) or intraosseous injections are administered to ensure complete sensory blockade before any mechanical instrumentation commences.
Step 2: Rubber Dam Isolation: Preventing Bacterial Contamination
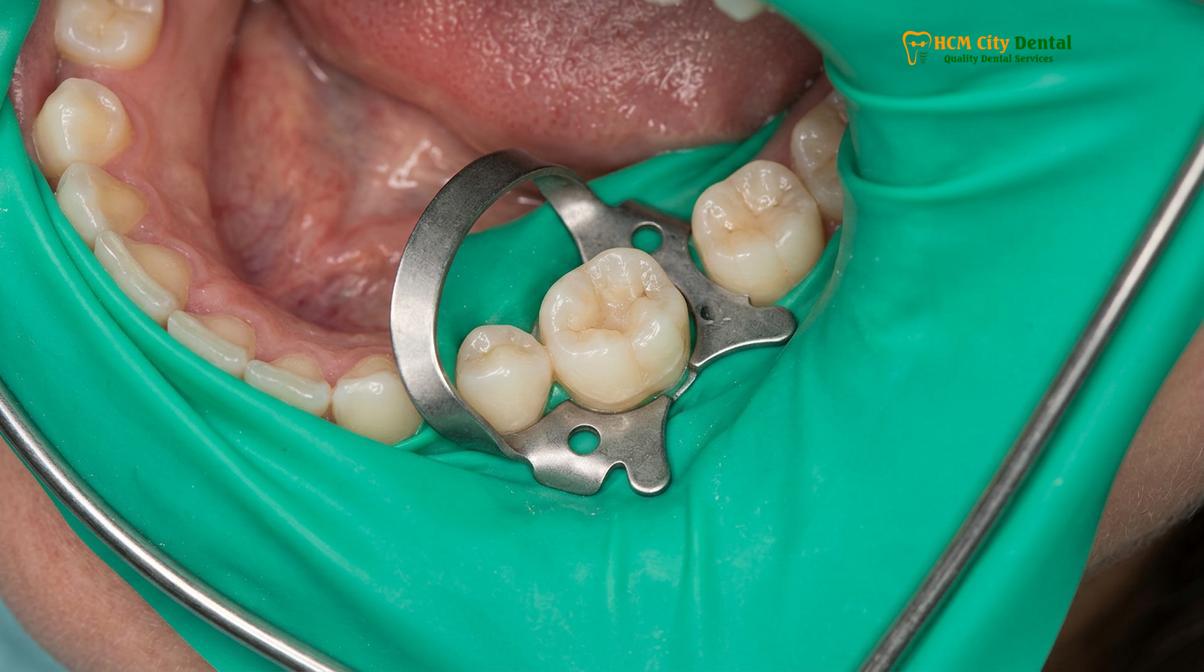
A latex or nitrile barrier is placed around the tooth to maintain a sterile operating field and protect the patient from swallowing irrigants.
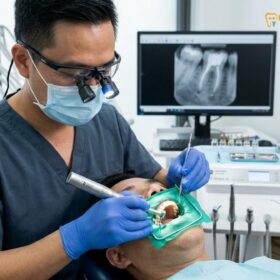
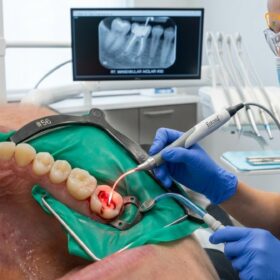
Endodontic therapy is fundamentally a microbiological battle. The primary objective is to reduce the intracanal bacterial load to a level compatible with periapical tissue healing. To achieve this, strict aseptic technique is non-negotiable. The application of a dental rubber dam is the universal standard of care in endodontics. This involves placing a thin sheet of latex or non-latex nitrile over the target tooth, secured by a specialized metal or plastic clamp at the cervical margin.
Proper rubber dam isolation serves multiple indispensable functions. First, it creates a physical barrier that prevents saliva—which harbors millions of oral bacteria—from entering the sterile root canal system. Even a microscopic droplet of saliva can introduce new pathogens, compromising the entire disinfection process[2]. Second, it protects the patient’s airway and gastrointestinal tract from the accidental aspiration or ingestion of small endodontic files and potent chemical irrigants. Third, it retracts the soft tissues (lips, cheeks, and tongue), providing the clinician with an unobstructed, dry field of vision, which is particularly crucial when operating under a dental microscope.
“The utilization of a dental dam is not merely a clinical recommendation; it is an absolute prerequisite for safe, predictable, and biologically sound endodontic therapy, ensuring both asepsis and patient protection.”
Step 3: Access Cavity Design: Exposing the Pulpal Chamber
The clinician creates a precise opening through the dental crown to locate all canal orifices while preserving maximum structural dentin.
Following profound anesthesia and isolation, the clinician initiates the mechanical phase of treatment by preparing the access cavity. Using high-speed diamond or carbide burs under copious water coolant, an opening is created through the enamel and dentin to unroof the pulp chamber. The design of this access cavity is a delicate balance between achieving adequate visibility and preserving the tooth’s structural integrity.
Historically, endodontic access preparations were large and expansive to ensure straight-line access to the apical third of the root. However, modern minimally invasive endodontics (MIE) emphasizes the preservation of pericervical dentin (PCD)—the critical zone of tooth structure near the gumline that dictates the long-term fracture resistance of the tooth. Dr. Nguyen Van Cuong, a leading specialist, frequently emphasizes that conservative access cavity design, guided by magnification and illumination, is paramount to preventing catastrophic vertical root fractures post-treatment. Once the chamber is unroofed, specialized ultrasonic tips and endodontic explorers are utilized to identify the orifices of all root canals, ensuring no anatomy is overlooked before shaping begins.
Step 4: Canal Debridement and Shaping Using Rotary NiTi Files
Flexible nickel-titanium instruments mechanically remove infected tissue and shape the canal walls to facilitate optimal chemical disinfection.
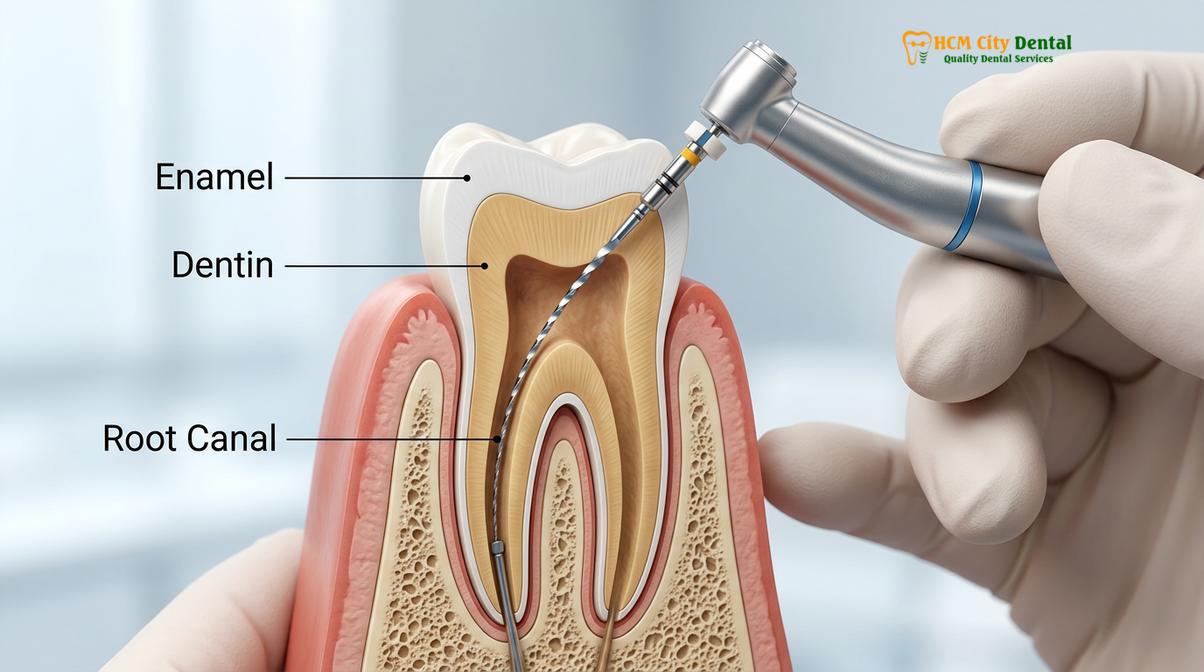
With the canal orifices located, the process of debridement and shaping commences. The objective is to remove the necrotic or inflamed pulpal tissue, infected dentin, and bacterial biofilms from the canal walls, while simultaneously creating a continuously tapering funnel shape from the coronal orifice to the apical terminus. This specific geometry is essential to allow a sufficient volume of chemical irrigants to reach the deepest parts of the root system.
Modern endodontics has largely transitioned from rigid stainless steel hand files to engine-driven rotary or reciprocating files manufactured from Nickel-Titanium (NiTi) alloys. NiTi files possess superelasticity and shape-memory properties, allowing them to navigate severe root curvatures without straightening or transporting the canal anatomy[3]. The procedure typically follows a “crown-down” technique, where the coronal two-thirds of the canal are flared first, reducing the bacterial load before the delicate apical third is instrumented. Clinicians meticulously monitor torque and cyclic fatigue to prevent file separation within the canal, ensuring a smooth, continuous glide path is maintained throughout the shaping phase.
Step 5: Chemical Irrigation: Sodium Hypochlorite and EDTA Sterilization
Antimicrobial solutions flush out debris, dissolve organic tissue, and remove the smear layer to eradicate intracanal bacterial biofilms.
While mechanical shaping is vital, endodontic files only physically contact approximately 50% to 60% of the internal canal walls due to the complex, web-like anatomy of the root canal system, which includes isthmuses, lateral canals, and apical deltas. Therefore, the true eradication of microbes relies heavily on robust chemical irrigation. The gold standard irrigant in endodontics is Sodium Hypochlorite (NaOCl), typically used in concentrations ranging from 2.5% to 5.25%. NaOCl is highly effective at dissolving organic pulpal tissue and exhibits potent broad-spectrum antimicrobial properties against endodontic pathogens.
However, mechanical instrumentation creates a “smear layer”—a microscopic layer of organic and inorganic debris that coats the canal walls and blocks the dentinal tubules, harboring bacteria. To address this, a chelating agent, usually 17% Ethylenediaminetetraacetic acid (EDTA), is introduced to dissolve the inorganic components of the smear layer, opening the tubules for deeper disinfection[4]. To maximize the efficacy of these solutions, clinicians often employ Passive Ultrasonic Irrigation (PUI) or sonic activation devices. These technologies create acoustic microstreaming and cavitation within the fluid, propelling the irrigants into the microscopic anatomical irregularities that files cannot reach.
| Endodontic Irrigant | Primary Function | Clinical Advantage |
|---|---|---|
| Sodium Hypochlorite (NaOCl) | Dissolves organic tissue and destroys bacteria. | Gold standard for broad-spectrum antimicrobial action and tissue dissolution. |
| EDTA (17%) | Chelates calcium ions to remove the inorganic smear layer. | Opens dentinal tubules, allowing deeper penetration of antimicrobial agents. |
| Chlorhexidine (CHX 2%) | Provides residual antimicrobial activity (substantivity). | Highly effective against Enterococcus faecalis in retreatment cases. |
Step 6: Three-Dimensional Obturation with Bioceramic Sealer
The disinfected canal space is densely filled with biocompatible materials to entomb remaining bacteria and prevent future microbial ingress.
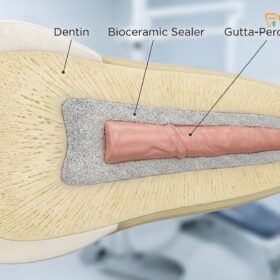
Once the root canal system is thoroughly cleaned, shaped, and dried using sterile paper points, it must be hermetically sealed. This phase, known as obturation, aims to prevent the reinfection of the canal space by blocking the ingress of oral fluids from the crown and tissue fluids from the apex. The traditional and still widely used core material is gutta-percha, a natural, biocompatible thermoplastic polymer derived from the Palaquium gutta tree.
In contemporary practice, the integration of advanced bioceramic obturation techniques has revolutionized this step. Bioceramic sealers, composed of calcium silicates, are highly hydrophilic, meaning they utilize the natural moisture within the dentinal tubules to initiate their setting reaction. Unlike older zinc oxide eugenol sealers that shrink upon setting, bioceramics expand slightly, creating a superior, fluid-tight chemical bond with the dentin walls. Furthermore, they are highly biocompatible and exhibit osteogenic potential, actively promoting the healing of periapical bone lesions. The combination of a precisely fitted gutta-percha master cone and a bioceramic sealer ensures a dense, three-dimensional fill of the entire root canal system.
Step 7: Temporary Filling Placement and Post-Treatment Recommendations
A temporary seal protects the root canal system until a permanent restorative crown can be fabricated and cemented.
Following the completion of the obturation phase, the access cavity must be sealed to prevent coronal microleakage. If the permanent restoration cannot be placed immediately, a dense temporary filling material (such as Cavit or IRM) is compacted into the access opening. It is imperative that this temporary seal remains intact; if it is compromised, salivary bacteria can rapidly recontaminate the root canal system, necessitating a complete retreatment.
“The ultimate success of endodontic therapy relies as much on the quality of the final coronal restoration as it does on the precision of the root canal treatment itself.”
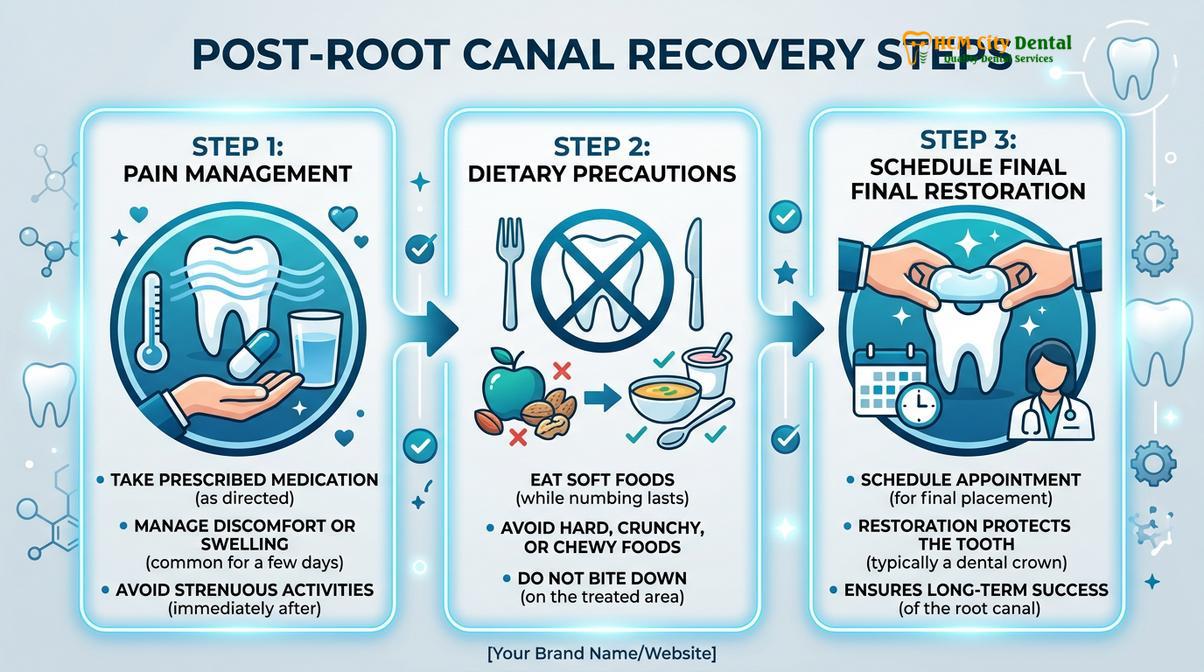
Post-operative care is relatively straightforward. Patients may experience mild to moderate tenderness in the surrounding tissues or jaw for a few days, primarily due to inflammation of the periodontal ligament (PDL) at the root apex. This is a normal physiological response to instrumentation and is typically well-managed with over-the-counter non-steroidal anti-inflammatory drugs (NSAIDs) like Ibuprofen, sometimes combined with Acetaminophen for synergistic pain relief[5]. Patients are strongly advised to avoid chewing hard or sticky foods on the treated tooth until the final permanent restoration—usually a dental crown—is securely cemented.
When to See a Doctor: Clinical Considerations
Prompt clinical evaluation is necessary if post-operative symptoms escalate, indicating potential complications or the need for alternative interventions.
While root canal therapy boasts a high success rate, biological variations and complex anatomies can occasionally lead to complications. It is crucial to monitor the treated tooth and surrounding tissues during the healing phase. Patients should seek immediate clinical evaluation if they experience severe, unremitting pain that does not respond to prescribed analgesics, or if there is visible swelling in the gums, face, or neck, which may indicate an acute flare-up or spreading infection.
Clinical Warning: Delaying the placement of a permanent crown after a root canal significantly increases the risk of a vertical root fracture. If a treated tooth fractures below the gumline, it is often non-restorable and will require extraction.
Additionally, the reappearance of a sinus tract (a small pimple-like bump on the gums) or persistent sensitivity to biting pressure weeks after the procedure warrants further investigation. Dr. Nguyen Van Cuong advises that in rare instances where a tooth does not heal as anticipated, advanced diagnostics via CBCT may reveal untreated accessory canals or micro-fractures. In such cases, endodontic retreatment or apical microsurgery (apicoectomy) may be recommended. If the tooth is deemed structurally compromised beyond repair, a tooth extraction followed by prosthetic replacement may be the most predictable clinical pathway.
Clinical Case Review: A patient presented to HCMC Dental Clinic in Ho Chi Minh City with severe spontaneous pain in a lower right molar. Clinical testing and CBCT imaging confirmed irreversible pulpitis with early periapical periodontitis. The tooth was isolated, and a conservative access cavity was prepared. Using rotary NiTi files and copious NaOCl irrigation, the complex canal system was debrided. The canals were obturated using a bioceramic sealer, and a temporary filling was placed. The patient reported complete resolution of pain within 48 hours and returned two weeks later for a final zirconia crown, ensuring long-term functional stability.
For personalized diagnostic advice and to determine if endodontic therapy is the right solution for your dental pain, we encourage you to schedule a comprehensive evaluation. You can learn more about our clinical team and approach by visiting our About Us page, or reach out directly through our Contact portal to book a consultation at HCMC Dental Clinic.
Frequently Asked Questions
How many appointments does a standard root canal take in Saigon?
A standard root canal procedure typically requires one to two appointments, depending on the complexity of the root anatomy and the presence of active infection. Uncomplicated cases are often completed in a single visit using modern endodontic technology. However, if severe periapical infection, complex multi-canal anatomy, or persistent exudate is present, the clinician may place an intracanal medicament like calcium hydroxide and schedule a second visit to ensure complete bacterial eradication before final obturation.
Is local anesthesia during a root canal completely effective?
Local anesthesia is highly effective for the vast majority of root canal procedures, ensuring a comfortable and manageable experience for the patient. Modern endodontics utilizes advanced anesthetic agents, such as Articaine, which offer superior bone penetration. In cases of severe acute pulpitis where the nerve is highly inflamed (often referred to as a ‘hot tooth’), supplemental techniques like intraligamentary or intraosseous injections are employed to achieve profound numbness before any instrumentation begins.
Can I drive or go back to work after a root canal procedure?
Yes, patients can typically drive themselves home and return to work immediately following a routine root canal procedure under local anesthesia. Because the procedure does not involve systemic sedation or general anesthesia, cognitive and motor functions remain unimpaired. Patients may experience mild localized soreness or jaw fatigue from keeping their mouth open, but this rarely interferes with normal daily activities. It is advisable to avoid chewing on the treated side until the numbness wears off.
Why is a dental crown usually required after root canal therapy?
A dental crown is generally required after root canal therapy to restore the structural integrity of the tooth and prevent catastrophic vertical root fractures. Following endodontic treatment, the tooth loses its internal blood supply, causing the dentin to become more brittle over time. Additionally, the access cavity created during the procedure removes a significant portion of the coronal tooth structure. A full-coverage crown distributes occlusal chewing forces evenly, protecting the underlying root.
What happens if I choose to extract the tooth instead of getting a root canal?
Extracting a tooth without replacing it can lead to adjacent teeth shifting, alveolar bone loss, and bite misalignment, which may cause temporomandibular joint (TMJ) issues. While extraction removes the immediate infection, the resulting edentulous space requires a dental implant or a fixed bridge to restore function and aesthetics. In most clinical scenarios, preserving the natural tooth through endodontic therapy is more conservative, biologically sound, and cost-effective in the long term compared to extraction and prosthetic replacement.
References
- Journal of Endodontics. Outcomes of root canal treatment and restoration longevity. (2020).
- International Endodontic Journal. Biofilms in endodontics and disinfection strategies. (2021).
- Journal of the American Dental Association. Microscope-assisted endodontics and missed canals. (2019).
- Clinical Oral Investigations. Biocompatibility of bioceramic root canal sealers. (2022).
- British Dental Journal. Pain management and dental anxiety in endodontics. (2018).