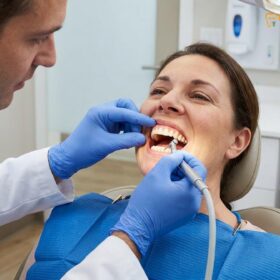
The denture fabrication process is a multi-step clinical and laboratory workflow designed to create custom removable prosthetics. It involves precise anatomical mapping, bite registration, aesthetic try-ins, and final acrylic processing to restore oral function, facial support, and natural aesthetics for edentulous patients.
Clinical Summary:
The fabrication of custom removable prosthetics requires a meticulous sequence of clinical appointments and laboratory phases. By transitioning from initial anatomical mapping to master functional molds, clinicians capture exact tissue dynamics and muscle attachments. Subsequent steps involve establishing the vertical dimension of occlusion, verifying phonetics and aesthetics during a wax try-in, and executing complex laboratory processing. This rigorous protocol ensures optimal retention, stability, and biocompatibility. Adhering strictly to these biomechanical principles minimizes post-operative sore spots, maximizes patient comfort, and restores efficient masticatory function.
Key Takeaways:
- The standard workflow typically requires five clinical visits and three dedicated laboratory phases to ensure precision.
- Master impressions utilize dynamic border molding to capture active muscle movements for superior prosthetic suction.
- Bite registration establishes the correct vertical dimension, preventing jaw joint strain and facial collapse.
- The wax try-in appointment allows patients to approve tooth shape, color, and alignment before final acrylic processing.
- Laboratory processing transforms the temporary wax model into durable, biocompatible acrylic resin under controlled heat and pressure.
Appointment 1: Preliminary Marks and Primary Gums Mapping
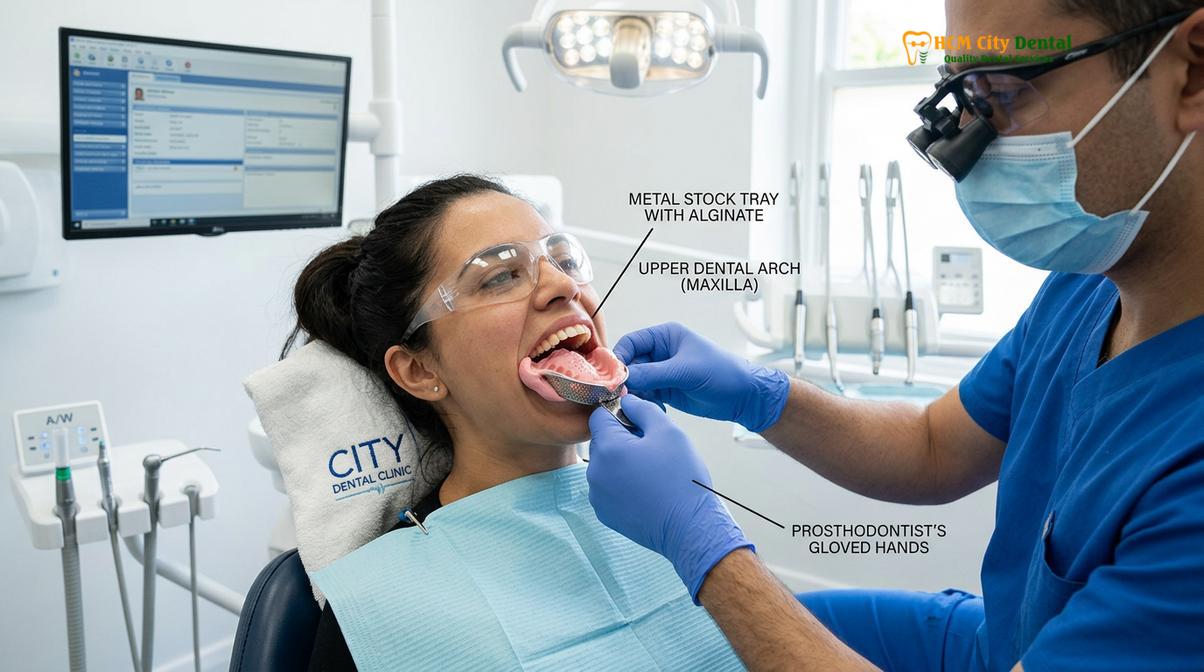
The initial visit focuses on capturing the broad anatomical landmarks of the edentulous ridges using stock trays and alginate or putty materials to create a foundational study model.
The foundation of any successful removable prosthesis begins with an accurate assessment of the patient’s oral anatomy. During this first clinical encounter, the dentist evaluates the health of the oral mucosa, the height and width of the residual alveolar bone, and the presence of any anatomical anomalies such as tori (bony growths) or flabby tissue. This comprehensive evaluation is a cornerstone of comprehensive dental care, ensuring that the underlying tissues are healthy enough to support a prosthesis.
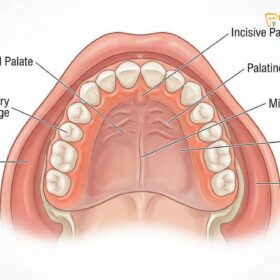
Once the visual and tactile examination is complete, the clinician proceeds to take the primary impressions. These initial molds are typically captured using prefabricated stock trays that roughly approximate the size and shape of the patient’s dental arches. The impression material of choice is often alginate (an irreversible hydrocolloid) or a heavy-body polyvinyl siloxane (PVS) putty. The goal here is not microscopic detail, but rather a broad, overextended capture of all relevant anatomical landmarks, including the retromolar pads, the hamular notches, and the deepest parts of the vestibular sulcus[1].
Capturing accurate primary impressions is critical because it dictates the trajectory of the entire fabrication workflow. If a crucial anatomical landmark is missed during this stage, the subsequent custom trays will be deficient, leading to a compromised final fit. The dentist carefully manipulates the patient’s lips and cheeks while the material sets to ensure that the borders of the impression reflect the general functional movements of the oral musculature.
Laboratory Phase 1: Casting Gypsum Models and Custom Trays
Dental technicians pour the preliminary impressions into dental stone to create study models, upon which individualized impression trays are fabricated to match the patient’s unique arch anatomy.
Following the first clinical appointment, the primary impressions are transferred to the dental laboratory. Here, skilled technicians pour a specialized gypsum material—typically Type III dental stone—into the molds. As the stone sets, it creates a rigid, three-dimensional replica of the patient’s edentulous ridges, known as the preliminary or diagnostic cast.
Because stock trays used in the first appointment are generic, they cannot capture the precise functional depth and width of the patient’s specific vestibules. To overcome this limitation, the laboratory technician uses the diagnostic cast to fabricate custom impression trays. These trays are constructed using light-cured acrylic resin or self-curing polymethyl methacrylate (PMMA). The technician carefully adapts the resin over the stone model, ensuring that the borders of the custom tray end approximately 2 to 3 millimeters short of the deepest part of the vestibule (the mucobuccal fold)[2].
This deliberate shortening of the tray borders is a crucial biomechanical design feature. It provides the necessary space for the dentist to apply border molding materials during the next clinical visit. Furthermore, the technician may place a layer of baseplate wax over the stone model before adapting the resin, creating a “spacer” that ensures uniform thickness of the final impression material. The creation of precise custom impression trays is what separates high-quality custom removable prosthetics from generic, poorly fitting alternatives.
Appointment 2: Border Molding and Master Functional Impressions
Using the custom tray, the dentist performs dynamic border molding to record active muscle attachments, followed by a highly accurate final impression using specialized elastomeric materials.
The second clinical appointment is arguably the most technique-sensitive phase of the entire denture fabrication process. The objective is to capture the “master functional impression”—a highly detailed, dynamic record of the oral tissues in their active state. This is achieved through a meticulous procedure known as border molding.
The clinician begins by applying a thermoplastic material, often referred to as green stick modeling compound, to the shortened edges of the custom tray. The compound is gently heated until it becomes moldable, and the tray is inserted into the patient’s mouth. The dentist then guides the patient through a series of exaggerated facial movements: puckering the lips, smiling widely, swallowing, and moving the tongue side to side. As the patient performs these actions, the active muscles shape the warm compound, creating a customized border that perfectly seals against the moving tissues without being dislodged[3].
Clinical Consideration: Patients with a severe gag reflex or highly irregular anatomical undercuts may experience discomfort during the master impression phase. Clinicians must carefully manage the volume of impression material and utilize proper breathing techniques to ensure patient comfort and material accuracy.
Once the border molding is complete and verified for retention and stability, the final impression material—typically a light-body polyvinyl siloxane (PVS) or polyether—is loaded into the tray. The tray is seated firmly over the ridges, and the patient repeats the functional movements. This final wash captures the microscopic details of the mucosal surface, ensuring intimate tissue contact. The resulting master impression is a perfect negative replica of the patient’s mouth in a functional state, providing the blueprint for a prosthesis with optimal suction and stability.
Laboratory Phase 2: Building Wax Rims for Bite Measurement
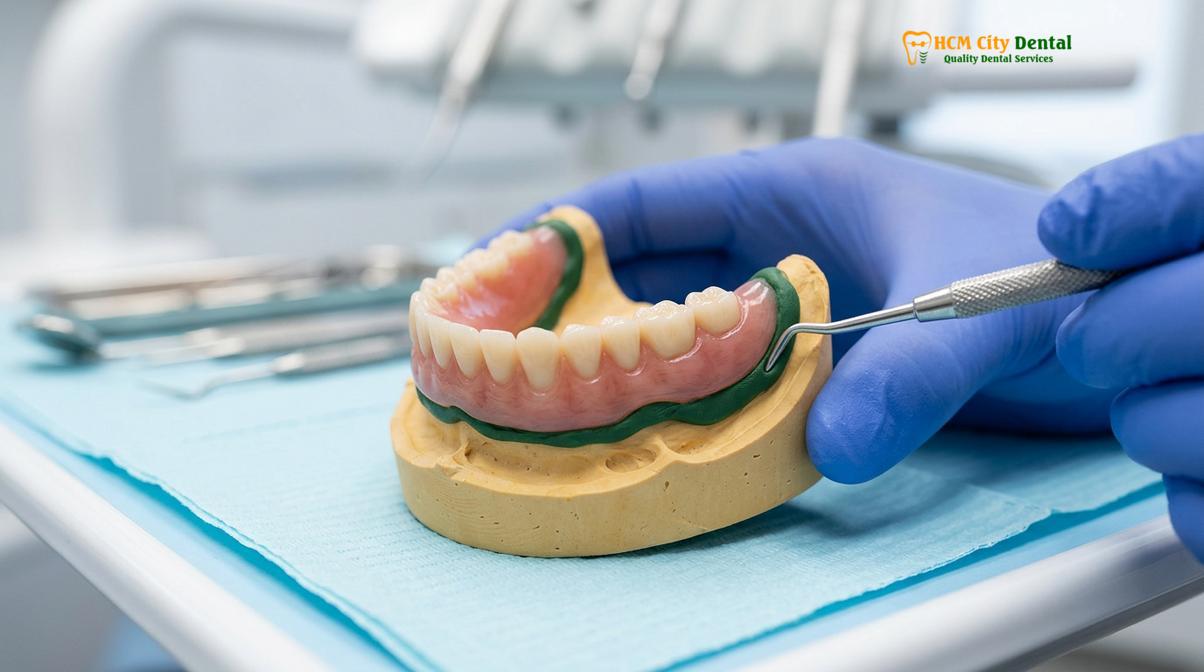
The master impression is cast into a definitive stone model, upon which a rigid baseplate and wax rim are constructed to record the patient’s jaw relationships and facial support.
Upon receiving the master functional impression, the laboratory technician pours it using a high-strength, low-expansion Type IV dental stone. This creates the master cast, the definitive model upon which the final prosthesis will be processed. To protect the delicate details of the master cast, technicians handle it with extreme care, as any abrasion or fracture at this stage would compromise the fit of the final product.
The next step is the fabrication of record bases and occlusion rims. The technician adapts a rigid, well-fitting baseplate over the master cast. This baseplate acts as a temporary foundation. On top of this baseplate, a block of specialized wax is contoured to form the occlusion rim. The wax rims are designed to roughly approximate the position, size, and shape of the natural teeth that have been lost.
The proper construction of these rims is vital for the upcoming clinical appointment. The technician ensures that the wax rims registration blocks are smooth, flat on the occlusal (biting) surfaces, and contoured to provide initial support for the patient’s lips and cheeks. Standard dimensions are often used as a starting point—for example, the maxillary (upper) rim is typically contoured to a height of 22 millimeters from the depth of the vestibule, while the mandibular (lower) rim is set to 18 millimeters. These dimensions provide the clinician with a solid baseline for customizing the bite in the patient’s mouth.
Appointment 3: Vertical Dimension and Tooth Selection Alignment
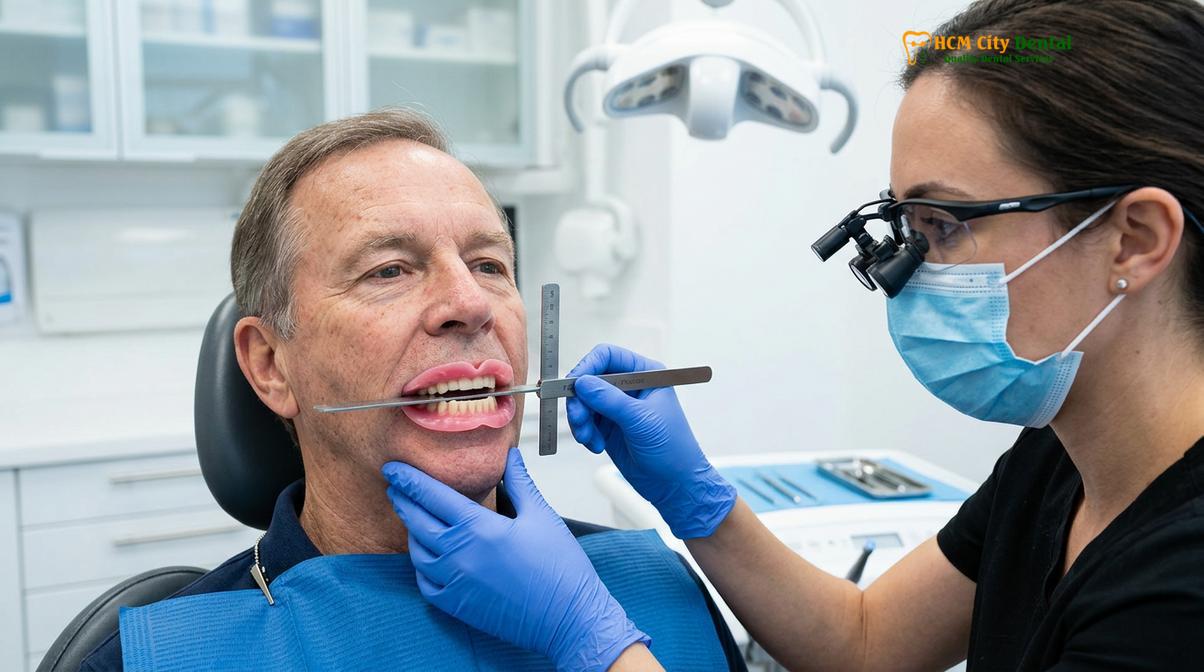
The clinician utilizes the wax rims to establish the correct resting jaw position, occlusal plane, and selects the appropriate prosthetic teeth based on facial aesthetics and biomechanics.
During the third appointment, the dentist transforms the generic wax rims into a personalized blueprint of the patient’s lower face. The primary objective is to establish the Vertical Dimension of Occlusion (VDO) and the Centric Relation (CR). The VDO refers to the distance between the upper and lower jaws when the teeth are in contact, while the CR is the most relaxed, repeatable position of the jaw joints (temporomandibular joints) regardless of tooth position.
The dentist inserts the wax rims and carefully adjusts their height and angle. Using tools like a Fox occlusal plane guide, the clinician ensures that the biting surface is parallel to the interpupillary line (the line between the eyes) and Camper’s line (the line from the bottom of the nose to the ear). Proper lip support is evaluated to smooth out deep facial wrinkles without making the patient look “bulky” or over-contoured. Once the correct VDO and CR are established, the upper and lower wax rims are locked together using bite registration material or heated staples[4].
“Establishing the correct vertical dimension is not merely an aesthetic requirement; it is a profound biomechanical necessity. An incorrect bite can lead to severe temporomandibular joint dysfunction, chronic facial pain, and accelerated resorption of the underlying alveolar bone.”
Following the bite registration, the clinician and patient collaborate on tooth selection. This involves choosing the size, shape (mold), and shade of the artificial teeth. The dentist considers the patient’s facial shape, age, skin tone, and personal preferences. High-quality prosthetic teeth are selected to ensure natural light reflection and durability. All these records—the locked wax rims, the selected tooth mold, and the shade—are then sent back to the laboratory for the critical setup phase.
Appointment 4: The Wax Try-In (Your Approval Step)
Patients evaluate a temporary wax mockup of their new teeth in the mouth, allowing for critical adjustments to aesthetics, speech phonetics, and bite alignment before final processing.
The wax try-in is often the most exciting appointment for the patient, as it provides the first visual representation of their new smile. In the laboratory, the technician has completed the tooth articulation setup, meticulously arranging the selected artificial teeth into the wax rims according to the bite records provided by the dentist. This wax mockup is then returned to the clinic for a comprehensive evaluation.
During this visit, the dentist places the wax setup into the patient’s mouth and conducts a series of clinical tests. First, the bite is verified to ensure that the upper and lower teeth meet evenly and simultaneously in Centric Relation. Next, phonetics are tested. The patient is asked to pronounce specific sounds, such as “f” and “v” (fricative sounds) to check the position of the upper front teeth against the lower lip, and “s” sounds (sibilant sounds) to ensure there is adequate speaking space between the teeth without clicking or whistling.
Clinical Case Review: A patient visited HCMC Dental Clinic in Ho Chi Minh City expressing dissatisfaction with the artificial appearance of their previous prosthetics. During the wax try-in phase, Dr. Nguyen Van Cuong spent considerable time customizing the arrangement of the anterior teeth, introducing slight natural asymmetries and adjusting the gingival contours in the wax. This personalized approach allowed the patient to approve a highly natural, individualized smile before the final acrylic conversion, ensuring complete aesthetic satisfaction.
Aesthetics are thoroughly evaluated with the patient holding a mirror. The clinician checks the midline, the smile line, and the buccal corridors (the dark spaces in the corners of the mouth when smiling). Because the teeth are embedded in soft wax, any necessary changes—such as rotating a tooth for a more natural look or changing the shade—can be easily communicated to the lab or adjusted chairside. Only when both the clinician and the patient are entirely satisfied with the function and appearance is the case approved for final processing.
Laboratory Phase 3: Flasking, Curing, Decasting, and High Polishing
The approved wax model undergoes a complex conversion process where the wax is melted away and replaced with heat-cured acrylic resin under intense pressure and temperature.
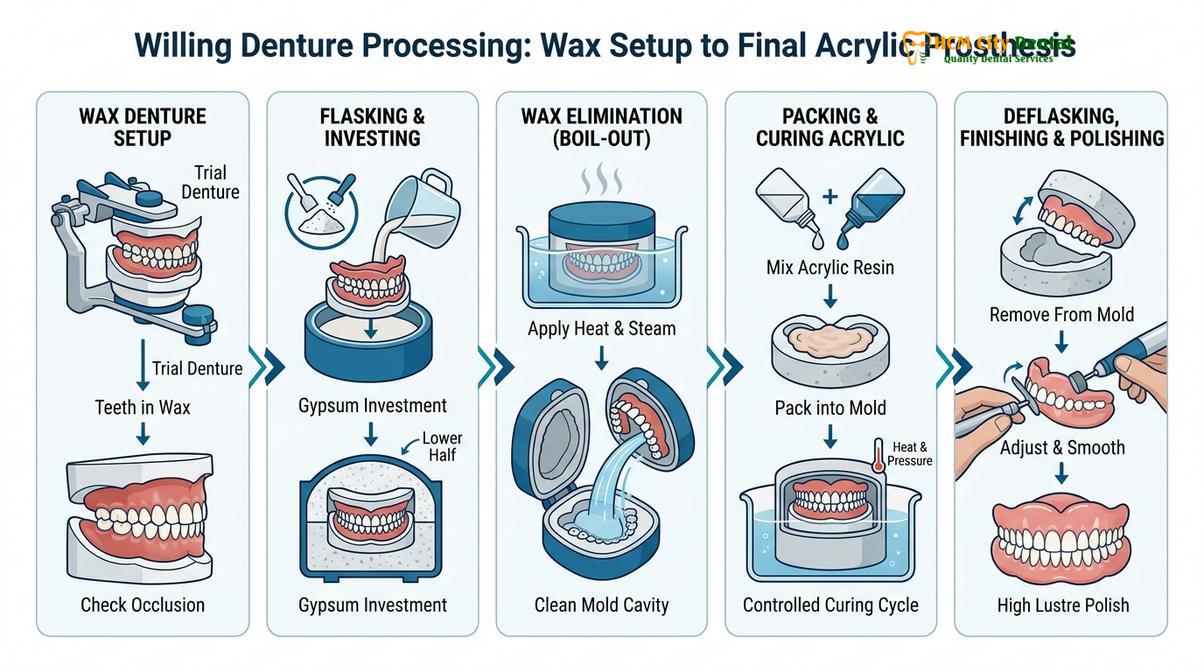
Once the wax try-in is approved, the laboratory undertakes the final, irreversible phase of fabrication. This process, known as the lost-wax technique, converts the temporary wax base into a permanent, durable acrylic resin. The technician begins by sealing the wax setup to the master cast. The entire assembly is then embedded in plaster within a specialized metal container called a denture flask.
After the plaster has set, the flask is placed in boiling water. This melts the wax, which is then flushed out completely, leaving behind a hollow cavity that perfectly retains the position of the artificial teeth. This critical step is known as the denture flasking wax-out. The technician applies a separating medium to the plaster to prevent the acrylic from sticking, and then carefully packs high-quality, dough-like polymethyl methacrylate (PMMA) acrylic resin into the hollow cavity.
| Laboratory Step | Clinical Purpose | Material Used |
|---|---|---|
| Flasking & Investment | Secures tooth position and creates a mold cavity. | Dental Plaster / Stone |
| Wax Elimination (Boil-out) | Removes temporary baseplate and wax. | Boiling Water / Detergent |
| Acrylic Packing & Pressing | Introduces permanent base material under pressure. | PMMA Acrylic Resin |
| Polymerization (Curing) | Hardens the resin, ensuring strength and biocompatibility. | Heat and Pressure Bath |
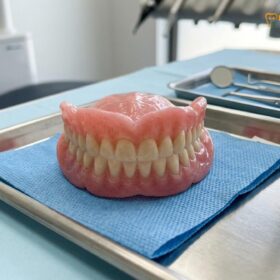
The packed flask is placed under a hydraulic press to extrude any excess material and ensure maximum density. It is then submerged in a temperature-controlled water bath for several hours to initiate polymerization (curing). Proper curing protocols are essential to minimize material shrinkage and eliminate unreacted residual monomers, which can cause tissue irritation. Following the acrylic curing polishing phase, the prosthesis is carefully decasted (removed from the plaster), trimmed, and polished to a high gloss to resist plaque accumulation and ensure a smooth, comfortable feel against the oral tissues[5].
Appointment 5: Fitting, Calibration, and Post-Op Adjustments
The final prosthesis is inserted, evaluated for internal pressure spots using indicating paste, and the bite is meticulously refined to ensure balanced occlusal forces.
The final clinical appointment involves the delivery and calibration of the completed prosthesis. Despite the rigorous precision of the preceding steps, minor dimensional changes inevitably occur during the acrylic curing process. Therefore, the dentist must carefully evaluate the internal fit and the external bite alignment before dismissing the patient.
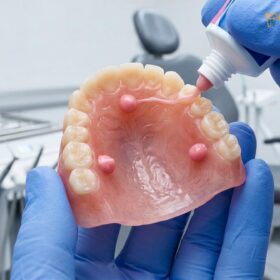
The clinician applies a specialized Pressure Indicating Paste (PIP) to the tissue-bearing surface of the prosthesis and seats it in the patient’s mouth. When removed, the paste reveals areas of excessive pressure where the acrylic is displacing the tissue too aggressively. The dentist uses an acrylic bur to gently relieve these specific high spots, preventing the formation of painful ulcers. This meticulous internal calibration is a hallmark of advanced routine oral health evaluations and prosthetic delivery.
“The delivery appointment is not the end of the treatment, but rather the beginning of the functional adaptation phase. As Dr. Cuong frequently advises patients, neuromuscular adaptation takes time, and minor post-operative adjustments are a normal and expected part of achieving long-term comfort.”
After the internal fit is verified, the clinician evaluates the occlusion using articulating paper. The patient is asked to tap their teeth together and perform grinding motions. Any premature contacts or interferences are carefully adjusted to ensure that the biting forces are distributed evenly across the entire arch. Uneven forces can cause the prosthesis to dislodge during chewing and accelerate bone loss. Finally, the patient is provided with comprehensive instructions on oral hygiene, prosthetic maintenance, and the expected adaptation timeline.
When to See a Doctor
While a brief period of adaptation and minor soreness is expected with any new removable prosthesis, certain symptoms warrant prompt clinical attention. Patients should not attempt to adjust or repair the acrylic themselves, as this can cause irreparable damage to the prosthesis and harm the oral tissues. It is crucial to seek professional evaluation if you experience persistent issues.
You should schedule an immediate follow-up appointment if you develop severe, localized pain or visible ulcerations (sore spots) that do not improve after a few days of wear. Additionally, if the prosthesis feels excessively loose, causes a gag reflex that was not previously present, or if you experience clicking sounds and jaw joint fatigue during normal speech and mastication, a clinical calibration is required. At HCMC Dental Clinic, our specialists emphasize that long-term success relies on personalized clinical examinations and timely adjustments to accommodate natural tissue changes and bone remodeling over time.
Frequently Asked Questions
Why are there so many appointments required for a denture?
Multiple appointments are necessary to capture dynamic muscle movements, establish the correct bite, and verify aesthetics before final processing. Skipping these rigorous clinical and laboratory steps often leads to poor retention, unstable bites, and uncomfortable pressure spots that require extensive remakes. Each visit builds upon the accuracy of the previous one, ensuring the final prosthesis functions harmoniously with your unique jaw biomechanics.
Can the laboratory phase be rushed for international travelers?
While expedited workflows exist using digital CAD/CAM technology, traditional high-quality acrylic processing requires adequate curing time to prevent material shrinkage. Rushing the polymerization phase can compromise the structural integrity and biocompatibility of the final prosthesis, increasing the risk of fractures. Clinics may offer accelerated schedules by utilizing in-house laboratories, but the fundamental chemical curing times must be respected to ensure a safe, long-lasting result.
What happens if I don’t like the look during the wax try-in phase?
If you are dissatisfied with the aesthetics during the wax try-in, the dentist can easily reposition, replace, or re-angle the teeth chairside or send them back to the lab. Because the teeth are set in soft wax, modifications are simple and highly encouraged before finalization. This appointment is specifically designed for your approval, ensuring the final smile matches your aesthetic expectations.
How long does it take to get used to wearing a new prosthesis?
Most patients require a functional adaptation period of four to eight weeks to fully adjust to speaking and chewing with a new prosthesis. Neuromuscular adaptation takes time, and minor adjustments by your dentist are typically needed during the first few weeks to relieve sore spots. Reading aloud and starting with a soft diet can significantly accelerate the retraining of your tongue and cheek muscles.
Will I need adhesive to keep my new teeth in place?
A well-fabricated prosthesis relying on accurate border molding should possess natural suction and stability without the need for daily adhesives. However, patients with severe bone resorption may occasionally use minimal adhesive for added psychological confidence during complex chewing tasks. If you find yourself relying heavily on adhesives just to keep the prosthesis in your mouth, it is a clinical sign that a reline or adjustment is necessary.
References
- Journal of Oral and Maxillofacial Surgery. Biomechanical principles and tissue response in complete dentures. (2021).
- International Journal of Oral and Maxillofacial Surgery. Suction-effective lower dentures and border molding outcomes. (2020).
- British Dental Journal. Patient satisfaction and chewing efficacy with premium BPS dentures. (2019).
- Journal of the American Dental Association. Implant-supported overdentures vs. conventional removable prosthetics. (2022).
- Clinical Oral Investigations. Thermoplastic flexible partial dentures: clinical suitability and aesthetics. (2018).