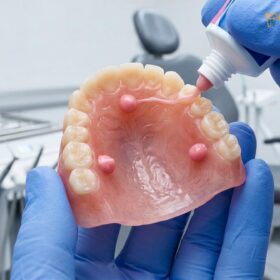
Border molding dentures is a precise clinical technique used to capture the dynamic movements of oral musculature, creating an airtight peripheral seal for complete dentures. This process ensures maximum retention, stability, and comfort by shaping the impression tray margins to harmonize with active facial and tongue muscles.
Clinical Summary:
In the field of removable prosthodontics, achieving adequate retention for complete dentures relies heavily on the accuracy of the final impression. Border molding is the critical intermediate step between the preliminary impression and the final wash impression. By utilizing thermoplastic materials or heavy-body elastomers on a custom-fabricated tray, clinicians can record the exact functional depth and width of the oral vestibules. The patient is guided through specific physiological movements—such as swallowing, speaking, and puckering—to shape the material. This dynamic registration prevents the final prosthesis from being dislodged by normal muscle activity, significantly reducing the incidence of post-insertion sore spots and improving the patient’s overall masticatory function and quality of life.
Key Takeaways:
- Border molding captures the dynamic, functional limits of the oral cavity rather than just the static anatomy.
- An accurate peripheral seal is the primary mechanism for complete denture retention, utilizing atmospheric pressure and interfacial surface tension.
- The procedure requires the patient to perform specific muscle movements, such as swallowing and lateral tongue thrusts, to shape the impression material.
- Custom trays are mandatory for this process, as they provide uniform space for the final impression material and prevent tissue distortion.
- Skipping this critical step often results in loose dentures, chronic ulcerations, and a compromised ability to chew and speak.
The Anatomy of Denture Retentive Seals: Peripheral Seal Principles
The retention of a complete denture relies on a precise peripheral seal that prevents air ingress, utilizing anatomical landmarks like the post-palatal seal and buccal vestibules to harness atmospheric pressure.
The fundamental physics of complete denture retention depend on a combination of adhesion, cohesion, interfacial surface tension, and atmospheric pressure. For these physical forces to operate effectively, the prosthesis must maintain intimate contact with the underlying mucosa while simultaneously preventing air from entering beneath the denture base. This is achieved through the establishment of a meticulous denture periphery seal. When the borders of the denture accurately fill the functional depth and width of the surrounding vestibules, a vacuum effect is created, resisting dislodging forces during speech and mastication[1].
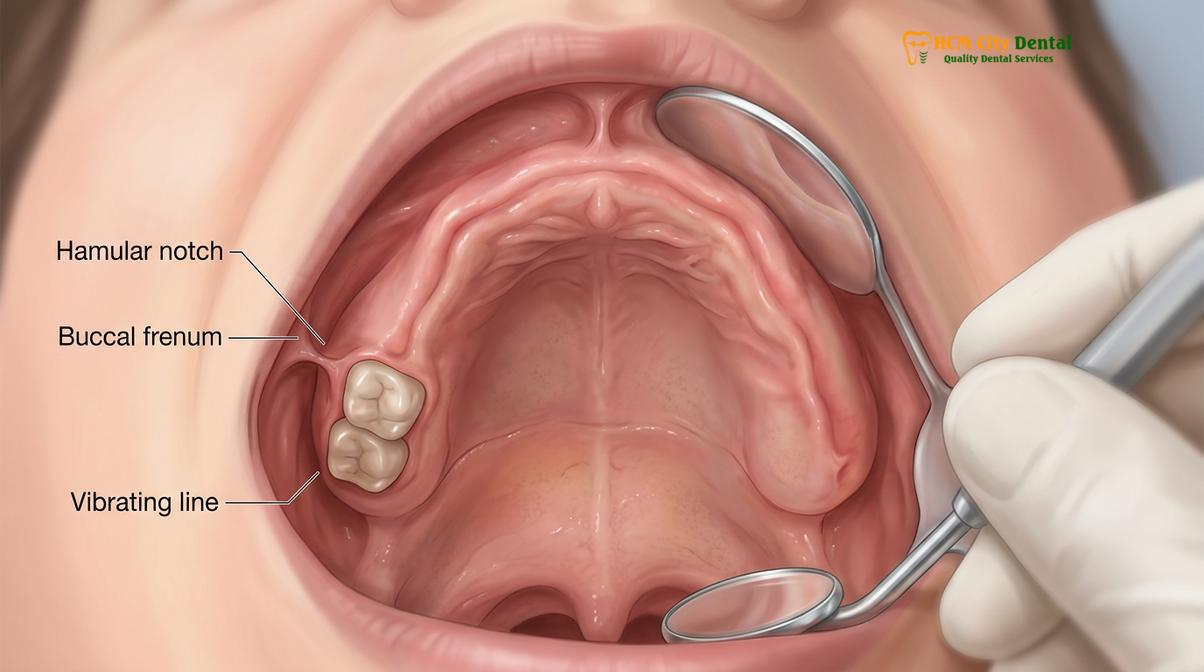
Understanding the complex anatomy of the edentulous ridges is paramount for the clinician. In the maxillary arch, the retentive seal must navigate several critical landmarks. The anterior labial vestibule is influenced by the orbicularis oris muscle, while the buccal frenum requires adequate relief to accommodate the movement of the levator anguli oris and buccinator muscles. Moving posteriorly, the buccal space (coronoid space) must be properly filled to prevent lateral dislodgement. The posterior boundary is defined by the hamular notches and the vibrating line, which together form the posterior palatal seal. This specific area is compressible and allows the denture to slightly embed into the tissue, compensating for the polymerization shrinkage of the acrylic resin and maintaining the seal during functional movements of the soft palate[2].
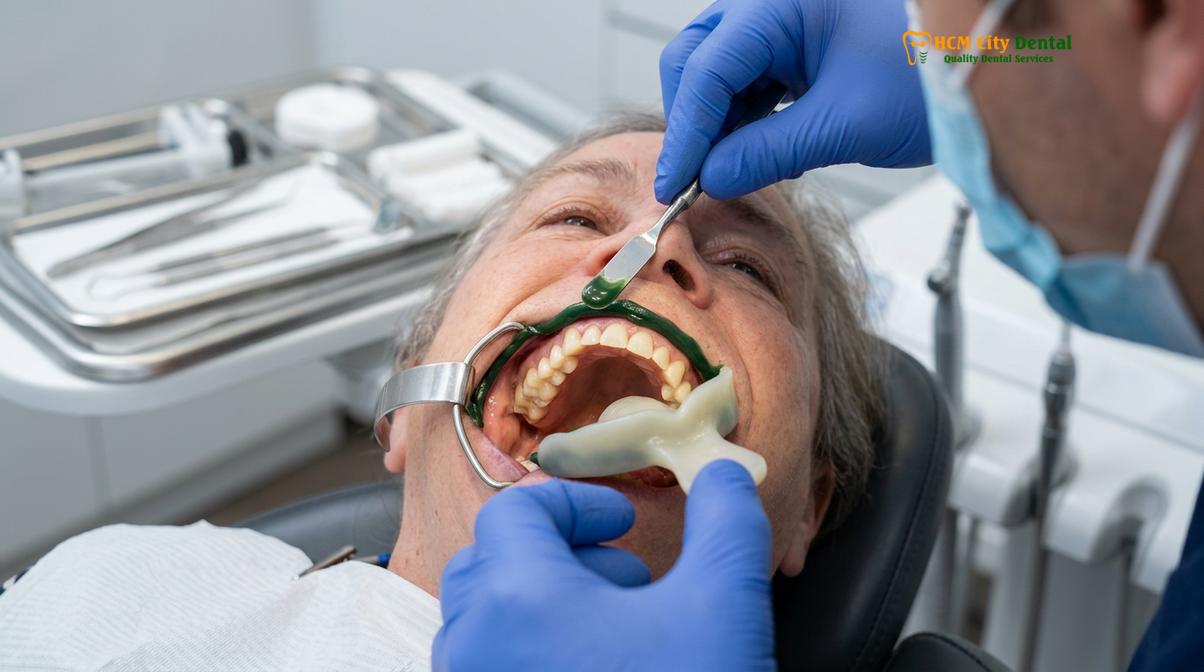
The mandibular arch presents a significantly greater challenge for retention due to its smaller surface area and the highly active surrounding musculature, particularly the tongue. The mandibular peripheral seal must account for the labial and buccal vestibules, with special attention given to the buccal shelf. The buccal shelf is the primary stress-bearing area of the mandible, bounded laterally by the external oblique ridge and the attachment of the buccinator muscle. Posteriorly, the denture must cover the retromolar pad to provide stability and prevent anterior displacement. On the lingual aspect, the functional depth is dictated by the mylohyoid muscle and the complex anatomy of the retromylohyoid fossa. Capturing these dynamic boundaries requires a profound understanding of oral anatomy and meticulous clinical execution.
What is Border Molding? Shaping the Trays to Active Muscles
Border molding is the dynamic shaping of custom tray margins using thermoplastic materials to record the exact functional depth and width of the oral vestibules during muscle activity.
Border molding, historically referred to as muscle trimming, is a specialized clinical procedure performed prior to the final wash impression. Its primary objective is to determine the optimal extension of the denture flanges so they harmonize with the physiological movements of the surrounding soft tissues. Unlike preliminary impressions, which often overextend and distort the tissues, border molding seeks to establish the exact functional tray margin. This margin represents the precise point where the movable mucosa transitions into the attached, non-movable mucosa, ensuring that the final denture will neither be dislodged by muscle action nor cause traumatic ulcerations due to overextension[3].
The process begins with a custom impression tray fabricated on a preliminary cast. This tray is intentionally designed to be 2 to 3 millimeters short of the anticipated vestibular depth. This deliberate under-extension provides the necessary space for the border molding material to be added and subsequently shaped by the patient’s musculature. The clinician applies a specialized impression material to the borders of the tray, inserts it into the patient’s mouth, and guides the patient through a series of specific functional movements. As the material sets, it is molded by the active muscles, creating a customized, three-dimensional record of the vestibular spaces.
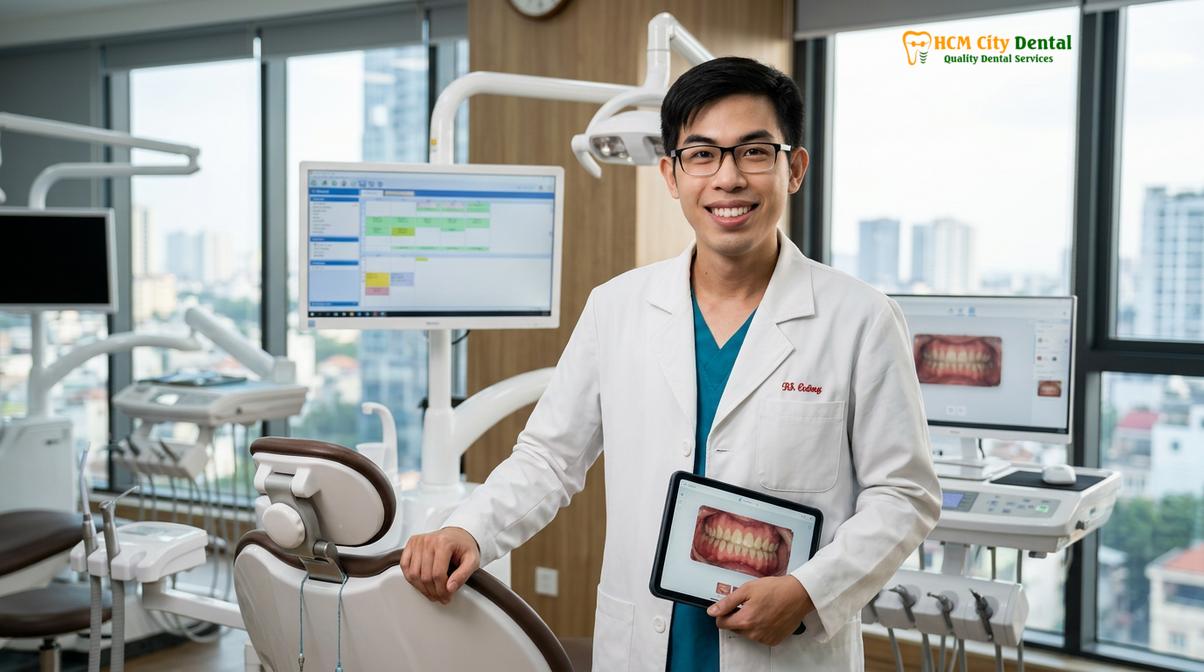
Dr. Nguyen Van Cuong, a leading specialist at HCMC Dental Clinic, emphasizes that the success of a complete denture is largely determined during this specific clinical phase. If the borders are underextended, the denture will lack a peripheral seal and suffer from poor retention. Conversely, if the borders are overextended, the active muscles will constantly push against the acrylic flanges, leading to instability, tissue displacement, and severe discomfort. Therefore, the meticulous shaping of the tray to the active muscles is a non-negotiable step in high-quality removable prosthodontics.
Clinical Movements: Tongue Swallowing and Cheeks Mimicking
To accurately capture the functional limits of the oral cavity, patients must perform specific muscle trimming movements, such as swallowing, puckering, and lateral tongue thrusts, while the material sets.
The accuracy of the border molding process is entirely dependent on the execution of appropriate physiological movements while the impression material is in a moldable state. These muscle trimming movements are designed to activate the specific muscle groups that will interact with the denture flanges during normal daily activities. The clinician must carefully instruct and guide the patient through these motions to ensure that the material is shaped to its true functional limits, rather than being arbitrarily manipulated by the dentist’s fingers.
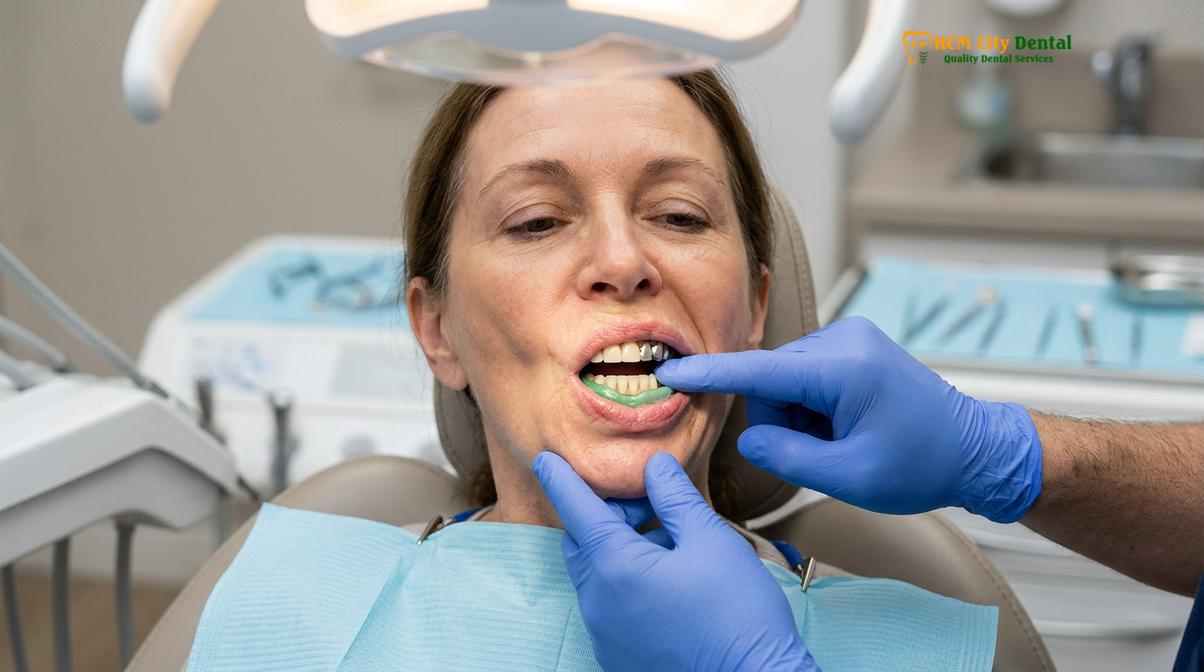
For the maxillary arch, the movements focus on the lips, cheeks, and soft palate. To mold the anterior labial vestibule, the patient is instructed to pucker their lips outward and then draw them inward over the tray handle, simulating the action of the orbicularis oris muscle. For the buccal vestibules, the clinician gently grasps the patient’s cheeks and moves them outward, downward, and inward, while the patient is asked to smile broadly and pucker. To capture the width of the coronoid space, the patient must open their mouth wide and move their lower jaw from side to side. Finally, to record the posterior palatal seal, the patient is asked to say “Ah” in short, vigorous bursts, which activates the soft palate and defines the vibrating line[4].
“The dynamic registration of the oral musculature is what transforms a static piece of acrylic into a functional, bio-compatible prosthesis. The patient’s own movements dictate the final shape of the denture, ensuring harmony between the appliance and the human body.”
The mandibular arch requires an even more complex sequence of movements, primarily due to the profound influence of the tongue. To mold the labial and buccal borders, the patient performs similar puckering and smiling motions as used for the maxilla. However, capturing the lingual borders is highly technique-sensitive. The patient is instructed to protrude their tongue to touch their upper lip, which determines the depth of the anterior lingual sulcus. They are then asked to push their tongue against their left and right cheeks, which activates the mylohyoid muscle and shapes the lateral lingual borders. Finally, the patient is instructed to swallow vigorously; this action is crucial for defining the posterior limit of the lingual flange in the retromylohyoid fossa, ensuring the denture does not interfere with the swallowing mechanism.
Dynamic vs. Static Impressions: The Failure of Standard Putty
Static impressions capture tissues at rest, often resulting in overextended flanges, whereas dynamic border molding records tissues in functional motion to prevent dislodgement and ensure a secure seal.
A common misconception in general practice is that a single, heavy-body impression material, such as standard alginate or silicone putty, can adequately capture the anatomy required for a complete denture. These materials are typically used to create mucostatic impressions, which record the oral tissues in a completely passive, resting state. While mucostatic techniques are excellent for capturing the fine details of hard tissues—such as teeth prepared for crowns or bridges—they are fundamentally flawed when applied to the fabrication of complete removable prostheses.
When standard putty is loaded into a stock tray and seated in the edentulous mouth, the high viscosity of the material inevitably displaces the movable mucosa and distorts the vestibular reflections. Because the tissues are not actively moving during the setting time, the resulting impression is almost always overextended. A denture fabricated from such a static impression will look anatomically correct on the master cast, but the moment the patient speaks, chews, or smiles, the activated muscles will impinge upon the overextended flanges, causing the denture to instantly lose its seal and dislodge.
| Clinical Parameter | Static Impression (Standard Putty) | Dynamic Impression (Border Molding) |
|---|---|---|
| Tissue State | Passive / Resting | Active / Functional |
| Tray Type Used | Generic Stock Tray | Custom-Fabricated Tray |
| Vestibular Depth | Often overextended and distorted | Accurately recorded to physiological limits |
| Muscle Attachments | Displaced or ignored | Accommodated via muscle trimming |
| Resulting Retention | Poor; easily dislodged during function | Excellent; utilizes atmospheric seal |
In contrast, dynamic border molding utilizes materials that possess a specific rheology, allowing them to flow under the gentle pressure of muscle action before reaching their final set. By capturing the tissues in their functional state, the dynamic impression ensures that the denture flanges will occupy the maximum available space in the vestibules without encroaching upon the active muscle attachments. This functional approach is the cornerstone of modern prosthodontics and is the only reliable method for achieving consistent, high-quality retention in complete dentures.
Materials for Border Molding: Green Stick Compound vs. Polyether
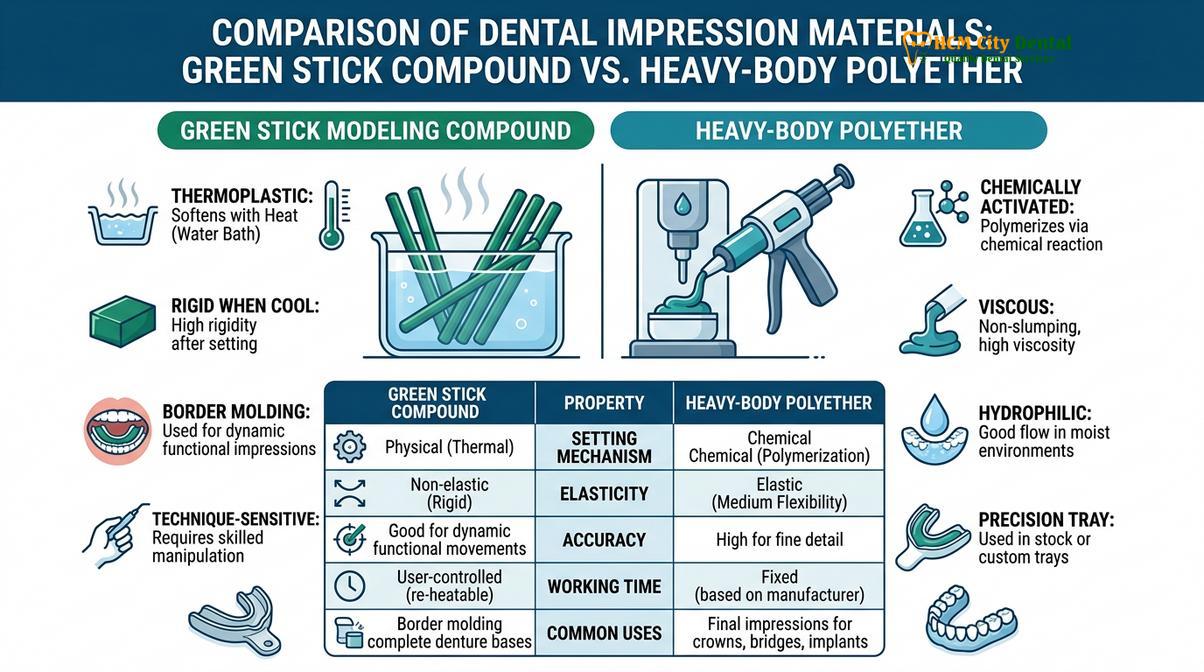
Clinicians primarily utilize low-fusing modeling plastic (green stick compound) or heavy-body polyether elastomers to achieve precise, dimensionally stable border extensions on custom trays.
The selection of the appropriate material is critical for the success of the border molding procedure. The material must possess adequate viscosity to support itself on the tray margins, sufficient working time to allow for muscle trimming, and the ability to capture fine anatomical details without distorting the soft tissues. Historically and currently, the two most prominent materials used for this purpose are low-fusing border molding compound (commonly known as green stick compound) and heavy-body elastomeric materials, particularly polyether.
Green stick compound is a thermoplastic material that softens when heated in a water bath (typically around 140°F or 60°C) and hardens at intraoral temperatures. Its primary advantage is that it allows for a sectional, step-by-step approach to border molding. The clinician can apply the compound to one specific segment of the tray, temper it in warm water to prevent thermal injury, insert it, and mold that single section. If the resulting border is deficient or overextended, the compound can be easily reheated, added to, or carved away. This correctability makes it an exceptional learning tool and the gold standard for highly complex anatomical presentations[5].
Clinical Case Review: HCMC Dental Clinic
A 68-year-old patient presented to HCMC Dental Clinic in Ho Chi Minh City with a history of severely loose mandibular dentures. Clinical examination revealed highly resorbed ridges and hyperactive mentalis and mylohyoid muscles. The prosthodontic team utilized a sectional border molding technique with green stick compound to meticulously capture the retromylohyoid space and buccal shelf. By precisely recording these functional limits, the new prosthesis achieved a suction-effective seal, allowing the patient to chew solid foods comfortably without the need for denture adhesives.
Alternatively, many modern practices utilize heavy-body polyether or polyvinyl siloxane (PVS) for border molding. These elastomeric materials are dispensed via an automix syringe directly onto the tray margins. Unlike the sectional approach of green stick compound, elastomers are typically applied to the entire periphery of the tray simultaneously. The tray is inserted, and the patient performs all muscle trimming movements in a single, continuous sequence before the material sets. While this simultaneous technique significantly reduces chair time and is highly accurate, it requires a dry operating field, precise timing, and a highly cooperative patient. Furthermore, elastomers are less easily correctable; if a significant error occurs, the material must often be completely removed and the process restarted.
How Custom Trays Prevent Tissue Displacement and Sore Spots
Fabricated on preliminary casts, custom trays provide uniform space for final impression materials, ensuring tissues are not over-compressed, which prevents post-insertion ulcerations.
The foundation of a successful border molding procedure is the custom impression tray. A custom tray is fabricated from light-cured or auto-polymerizing acrylic resin on a preliminary cast of the patient’s edentulous arch. The primary purpose of this tray is to carry, confine, and control the impression material, ensuring a uniform thickness of the final wash impression. Without a custom tray, achieving a predictable and accurate peripheral seal is virtually impossible.
During the fabrication of the custom tray, a layer of baseplate wax is adapted over the preliminary cast to act as a spacer. This spacer creates a predetermined, uniform room (usually 2 to 3 millimeters) for the final impression material. Tissue stops—small areas where the wax spacer is removed—are incorporated into the design. These stops allow the custom tray to rest securely on the firmest areas of the ridge, preventing the tray from being seated too deeply and over-compressing the underlying mucosa. This controlled seating is vital in prosthodontics Saigon practices, as over-compression during the impression phase inevitably leads to tissue rebound, loss of retention, and chronic sore spots once the final denture is delivered.
Clinical Warning: The Dangers of Overextension
Attempting to increase denture retention by arbitrarily extending the acrylic flanges beyond the functional vestibular depth is a critical clinical error. Overextended borders will impinge upon the active muscle attachments and the delicate mucosal reflections. This not only causes immediate dislodgement of the prosthesis during speech and mastication but also leads to severe, painful ulcerations, tissue hyperplasia, and accelerated resorption of the underlying alveolar bone.
Once the custom tray is verified in the mouth for proper extension (ensuring it is 2-3mm short of the vestibules), the border molding process is executed. After the borders are perfectly shaped, the wax spacer is removed from the inside of the tray, and vent holes are often drilled. These holes relieve hydraulic pressure during the final wash impression, allowing excess material to escape and preventing the displacement of flabby or highly mobile tissues. The synergy between a well-designed custom tray, precise border molding, and a controlled wash impression is the definitive workflow for creating a comfortable, retentive complete denture.
When to See a Doctor (Important Clinical Considerations)
Patients who currently wear complete dentures should be vigilant regarding the fit and function of their prostheses. The oral tissues and underlying alveolar bone undergo continuous, gradual remodeling throughout a person’s life. A denture that fit perfectly five years ago may now suffer from a compromised peripheral seal due to this natural anatomical shifting.
You should schedule a comprehensive clinical evaluation if you experience any of the following symptoms:
- Your dentures frequently dislodge or fall out when speaking, laughing, or eating.
- You rely heavily on over-the-counter denture adhesives to keep the prosthesis in place.
- You develop chronic sore spots, ulcerations, or redness along the edges of the denture flanges.
- You experience a persistent gag reflex, which may indicate that the posterior palatal seal is overextended or improperly adapted.
- You notice a whistling sound or difficulty pronouncing certain words, suggesting a loss of the anterior seal.
“A well-fitting denture should function as a seamless extension of the oral cavity. If a patient is constantly aware of their prosthesis or modifying their diet to accommodate instability, it is a clear clinical indicator that the peripheral seal has failed and a professional reassessment is required.”
Dr. Nguyen Van Cuong advises that patients should not attempt to adjust or reline their dentures at home using DIY kits, as this can permanently alter the bite alignment and cause severe tissue damage. A personalized clinical examination at a professional facility, such as HCMC Dental Clinic in Ho Chi Minh City, is necessary to determine whether the denture requires a professional laboratory reline, a re-establishment of the border molding, or the fabrication of an entirely new prosthesis based on updated clinical diagnostics.
Frequently Asked Questions
Why does border molding take so much time in the dental chair?
Border molding takes significant chair time because it requires the precise, sequential capture of individual muscle movements along the entire arch. The clinician must heat, temper, and shape the material section by section, ensuring that every anatomical landmark and functional limit is accurately recorded without overextending the tray. This meticulous attention to detail cannot be rushed, as it forms the foundation for the denture’s final retention and stability.
Will my dentures fall out when I laugh if border molding wasn’t done?
Yes, dentures are highly likely to dislodge during laughing, speaking, or chewing if border molding was omitted. Without this dynamic shaping process, the denture flanges will not harmonize with the active facial muscles, causing the muscles to push against the acrylic and break the retentive suction seal. Proper border molding ensures the denture borders accommodate these functional movements without losing contact with the tissues.
Is digital scanning replacing border molding in Vietnam?
While digital intraoral scanning is advancing rapidly, it has not completely replaced traditional border molding for fully edentulous patients. Scanners excel at capturing static hard tissues, but recording the dynamic, functional movements of the movable mucosa and muscle attachments still largely relies on physical border molding techniques. Some advanced workflows combine static digital scans with physical functional impressions to achieve the best clinical outcomes.
Does the border molding process hurt?
The border molding process is generally painless and non-invasive. Patients may feel slight warmth from the tempered modeling compound and mild pressure as the dentist guides the cheeks and lips through various functional movements, but the procedure does not involve needles, drilling, or significant discomfort. The clinician continuously monitors the temperature of the materials to ensure patient safety and comfort throughout the appointment.
How long does the final impression appointment usually last?
A final impression appointment involving comprehensive border molding typically lasts between 45 to 90 minutes. This duration allows the prosthodontist ample time to adjust the custom tray, perform the sequential muscle trimming movements for both arches, and capture the final wash impression with meticulous accuracy. The exact time depends on the complexity of the patient’s oral anatomy and the specific materials utilized.
References
- Journal of Prosthetic Dentistry. The anatomy and physiology of the denture border seal. (2021).
- International Journal of Prosthodontics. Dynamic impression techniques for complete dentures: A systematic review. (2020).
- British Dental Journal. Materials science in border molding: Modeling compound versus polyether. (2019).
- Journal of Oral Rehabilitation. The role of the retromolar pad and buccal shelf in mandibular denture stability. (2022).
- Clinical Oral Investigations. Patient satisfaction outcomes following functional impression techniques. (2018).