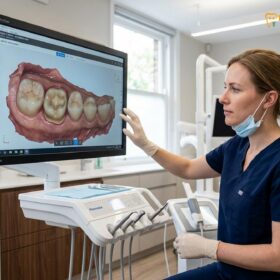
The dental crown procedure steps involve clinical evaluation, precise tooth preparation, digital scanning, temporary protection, laboratory fabrication, and final cementation. This workflow restores damaged teeth with custom-milled prosthetics, ensuring optimal biomechanical function, marginal integrity, and lifelike aesthetics for long-term oral health.
Clinical Summary:
The fabrication and placement of dental crowns represent a cornerstone of restorative dentistry, designed to salvage teeth compromised by extensive decay, trauma, or endodontic therapy. The clinical workflow demands meticulous precision, beginning with comprehensive radiographic diagnostics to assess pulpal and periodontal health. Subsequent phases include conservative tooth reduction, highly accurate 3D digital impressions, and the placement of a provisional restoration. Utilizing advanced CAD/CAM technology, the final prosthetic is milled from certified materials such as high-translucency Zirconia or lithium disilicate (E.max). The procedure concludes with rigorous occlusal adjustment and adhesive cementation, ensuring a biomechanically sound and aesthetically seamless integration into the patient’s natural dentition.
Key Takeaways:
- Digital diagnostics and CBCT imaging are critical for evaluating the structural integrity of the tooth root prior to crown placement.
- Modern intraoral scanners eliminate the need for uncomfortable traditional putty impressions, yielding highly accurate 3D models.
- Material selection is tailored to functional demands: Zirconia for posterior strength and E.max for anterior aesthetics.
- Provisional (temporary) crowns are essential for protecting exposed dentin and maintaining gingival architecture during lab fabrication.
- Precise margin design and advanced adhesive cementation protocols are vital for the long-term success and retention of the restoration.
Initial Consultation and Digital X-Ray Assessment
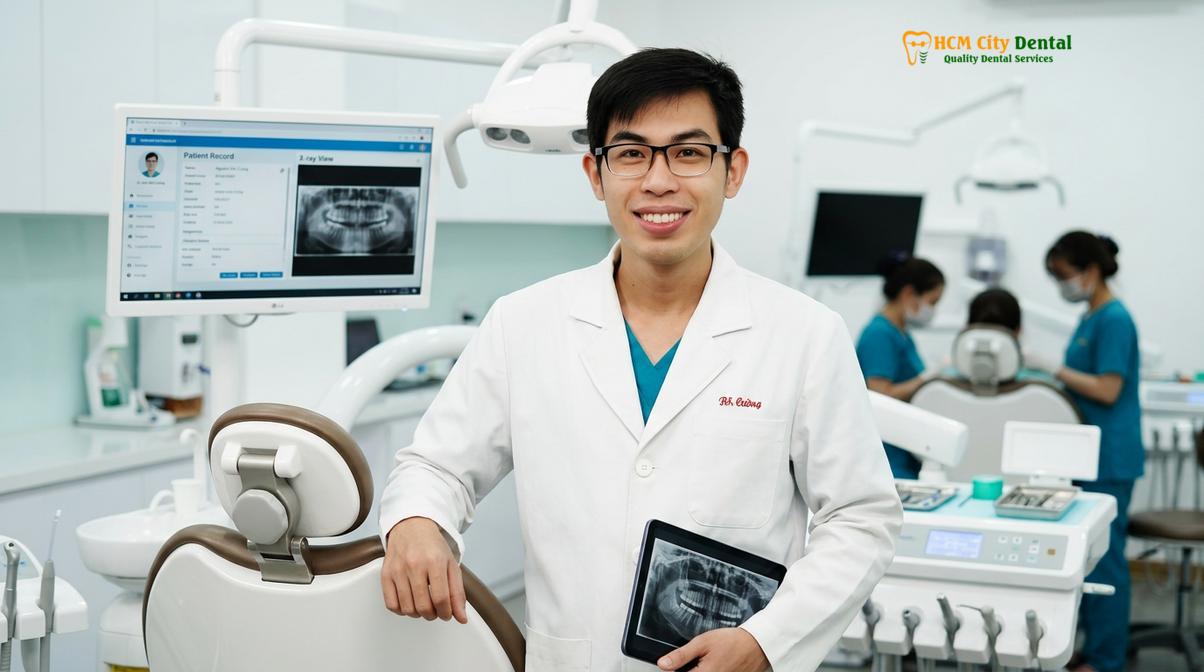
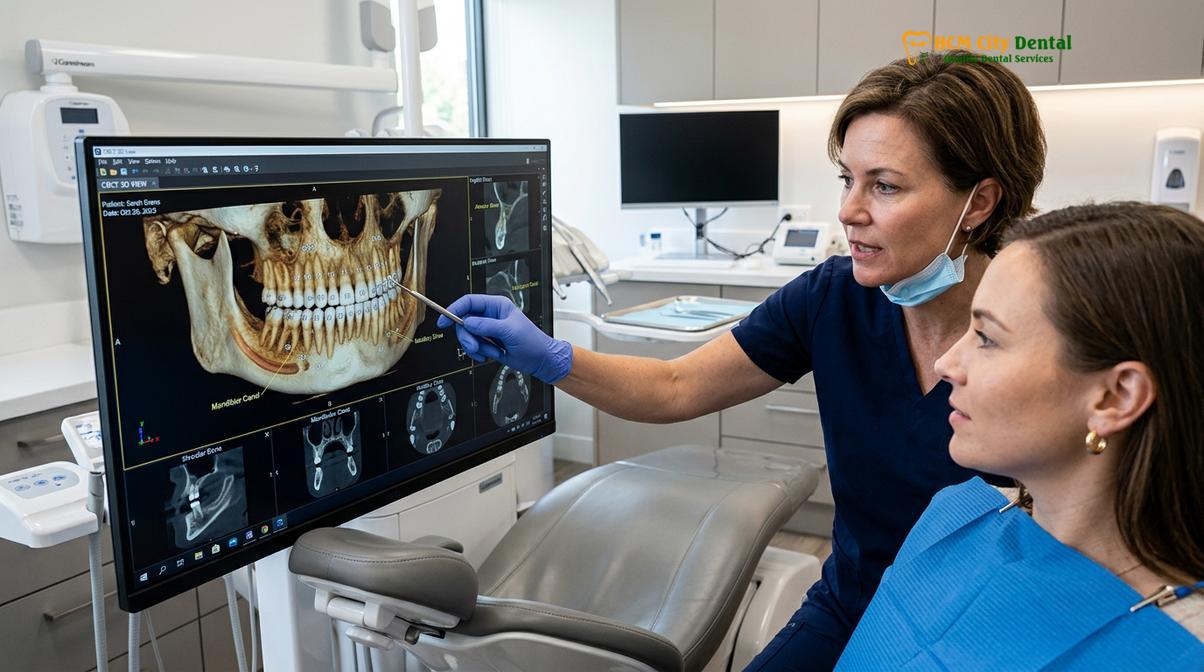
The initial consultation utilizes digital radiography and clinical examination to assess tooth vitality, structural integrity, and the surrounding periodontium before prescribing a crown.
The foundation of any successful restorative treatment begins with a rigorous diagnostic phase. When a patient presents with a heavily compromised tooth—whether due to extensive caries, a fractured cusp, or failing large amalgam fillings—a visual inspection alone is insufficient. The clinician must evaluate the unseen structures beneath the enamel and below the gingival margin. This is achieved through high-resolution digital periapical X-rays and, when necessary, Cone Beam Computed Tomography (CBCT) [1].
During this assessment, the dentist evaluates the biological width, the health of the periodontal ligament, and the status of the dental pulp. If the decay has encroached upon the pulp chamber, or if there are signs of apical periodontitis (infection at the root tip), root canal therapy must be performed prior to crown fabrication. Placing a crown over an inflamed or necrotic pulp will inevitably lead to severe pain and the need to drill through the newly fabricated restoration later.
Furthermore, the clinician assesses the amount of remaining sound tooth structure. For a crown to be successful, there must be an adequate “ferrule”—a band of solid tooth structure above the gumline that the crown can grasp. If the tooth is broken down to the gumline, a core buildup, often retained by a post placed into the root canal, is required to provide a stable foundation. Dr. Nguyen Van Cuong, a leading restorative specialist, emphasizes that meticulous treatment planning during this initial phase is the most critical determinant of the restoration’s long-term survival.
Tooth Preparation: Shaping for the Crown
Tooth preparation requires meticulous reduction of enamel and dentin to create adequate restorative space and precise margins for the final prosthetic to seat flawlessly.
Once the tooth is deemed structurally viable and profound local anesthesia is administered, the physical alteration of the tooth begins. The goal of the tooth preparation crown phase is to remove all compromised tissue and reshape the remaining structure into a miniature, tapered version of the original tooth. This geometric reshaping is governed by strict biomechanical principles [2].
The clinician uses specialized diamond burs to reduce the occlusal (chewing) surface by 1.5 to 2.0 millimeters, depending on the restorative material chosen. Axial reduction (shaping the sides) is performed to create a slight convergence angle, typically between 6 to 10 degrees. This taper allows the crown to slide onto the tooth while providing maximum frictional retention and resistance form, preventing the crown from dislodging under the lateral forces of chewing.
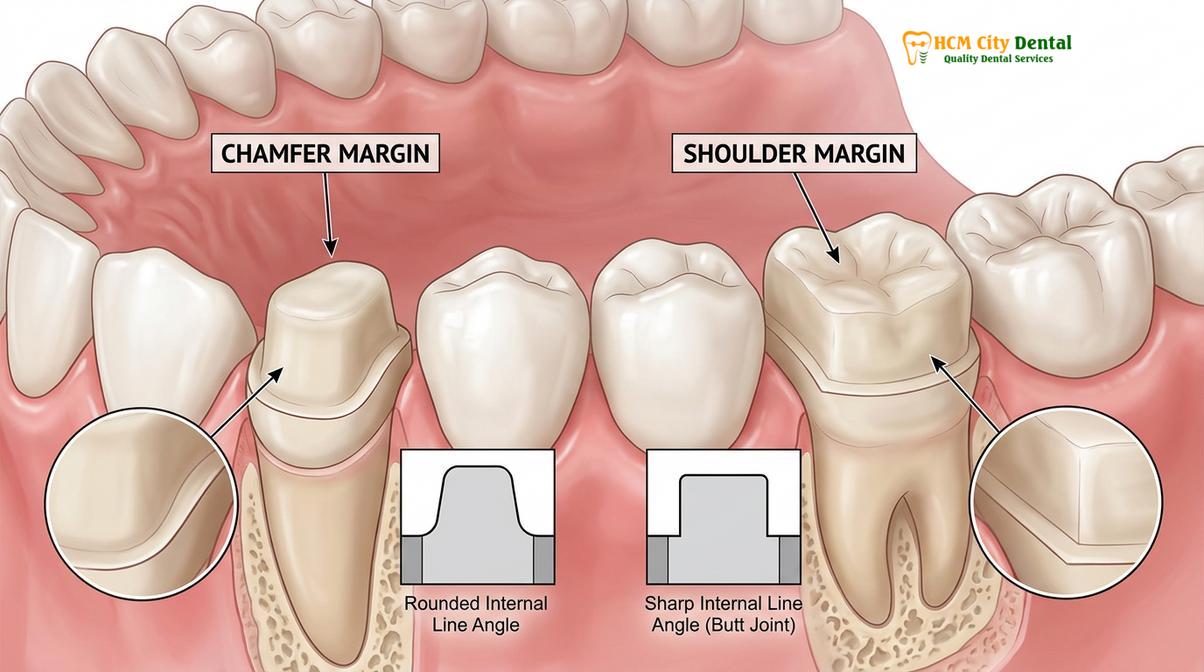
Equally important is the creation of the finish line, or margin, at the base of the preparation. The margin design dictates how the crown meets the natural tooth. For high-strength ceramics like monolithic zirconia, a heavy chamfer margin is often preferred, providing a distinct, curved ledge that the digital scanner can easily capture. For highly aesthetic glass-ceramics like E.max, a rounded shoulder margin is frequently utilized to provide adequate bulk of material at the edge, preventing fracture.
Clinical Warning: Biologic Width Violation
If the tooth preparation margin is placed too deeply beneath the gumline, it can invade the biologic width—the natural attachment apparatus of the gingiva. This violation triggers chronic inflammation, persistent bleeding, and localized bone loss. In cases of deep decay, a minor surgical procedure known as crown lengthening must be performed to reposition the bone and gums, ensuring the crown margin rests on healthy tooth structure without irritating the periodontium.
In cases where the tooth is severely broken down, a core buildup is performed using a highly filled composite resin. This replaces the missing dentin and provides the necessary geometric form for the crown to adhere to. The precision of this preparation phase directly dictates the marginal seal of the final restoration, which is the primary defense against recurrent decay.
Digital Impressions with iTero Scanner (No Messy Molds!)
Modern digital impressions utilize intraoral scanners to capture highly accurate 3D models of the prepared tooth, eliminating the discomfort of traditional putty materials.
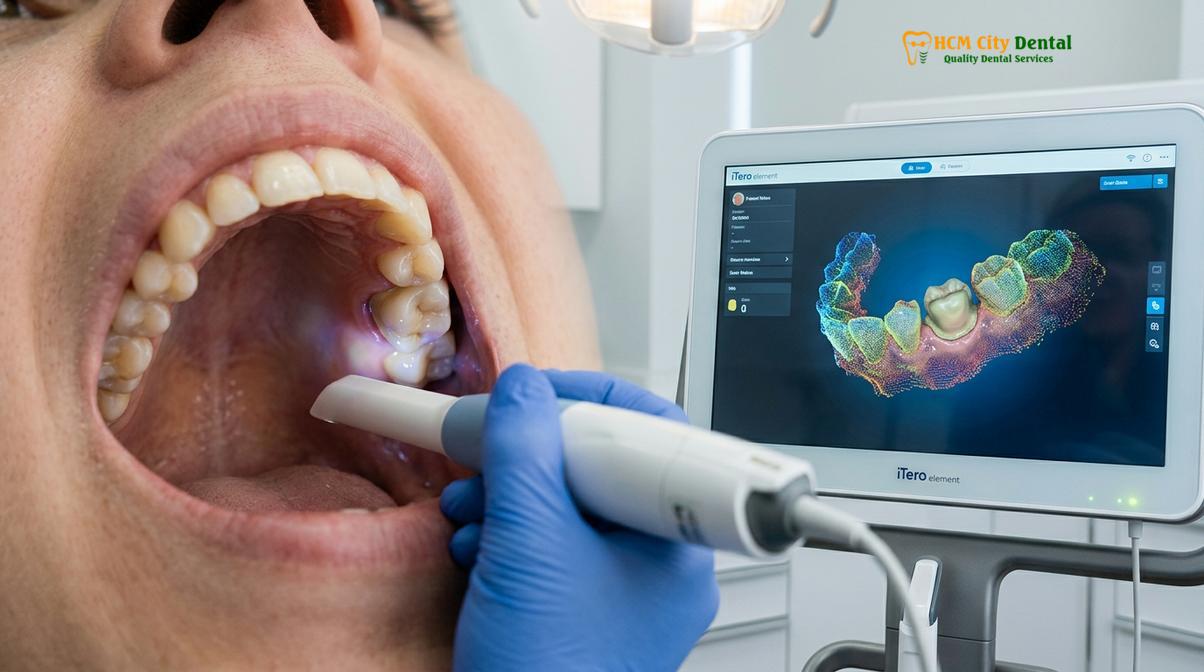
Following the meticulous shaping of the tooth, the clinician must transfer this exact geometry to the dental laboratory. Historically, this required the use of polyvinyl siloxane (PVS) or polyether impression materials—a process often associated with patient discomfort, gag reflexes, and the risk of material distortion. Today, advanced clinics utilize state-of-the-art optical technology to capture the preparation.
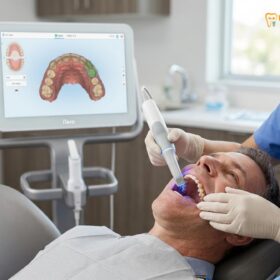
Using the iTero scanner or the Medit i700, the clinician captures thousands of optical images per second, stitching them together to create a highly accurate, full-color 3D digital model of the patient’s arches. This technology completely eliminates the need for a physical dental impression mold. The digital workflow offers superior clinical advantages: it is immune to temperature-induced shrinkage, it allows the dentist to magnify the preparation on a monitor to verify margin crispness instantly, and it provides a more comfortable experience for the patient [3].
To ensure the scanner captures the exact finish line, especially if it lies slightly subgingival (below the gumline), the dentist may use a technique called gingival retraction. This involves gently packing a tiny, medicated cord between the tooth and the gum tissue to temporarily push the gums away and control any minor bleeding. Once the area is isolated and dry, the digital scan is completed in a matter of minutes.
Concurrently, the clinical team performs digital shade matching. Selecting the correct hue, chroma, and value is critical, particularly for anterior restorations. High-resolution photographs are taken with polarized filters to communicate the internal characteristics, translucency, and surface texture of the adjacent natural teeth to the master ceramist.
Temporary Crown Placement and Care
A temporary crown is fabricated and temporarily cemented to protect the exposed dentin, prevent tooth shifting, and maintain gingival health while the final restoration is milled.
Because the prepared tooth has had its protective enamel removed, the underlying dentinal tubules are exposed. If left uncovered, the tooth would be exquisitely sensitive to temperature changes and susceptible to bacterial ingress. Therefore, an interim restoration is mandatory. The temporary crown placement serves multiple critical physiological and biomechanical functions during the laboratory fabrication period.
Fabricated from bis-acrylic or polymethyl methacrylate (PMMA) resins, the provisional crown is custom-made chairside. It acts as a biological bandage, sealing the dentin and soothing the pulp. Furthermore, it holds the tooth in its exact spatial position. Teeth have a natural tendency to erupt or drift if they lose contact with their neighbors or opposing teeth. Even a fraction of a millimeter of movement can result in the final permanent crown not fitting correctly.
“The provisional restoration is not merely a placeholder; it is a critical diagnostic tool. It allows the clinician to evaluate the proposed occlusal scheme, verify phonetic function in anterior cases, and sculpt the healing gingival architecture to ensure a harmonious emergence profile for the final ceramic restoration.”
The temporary crown is secured using a non-eugenol temporary cement, designed to be easily broken by the dentist at the final insertion appointment. Patients are instructed to exercise caution during this interim phase. Hard, sticky, or highly cohesive foods should be avoided on the treated side, and flossing must be done by pulling the thread through the contact horizontally to prevent accidental dislodgement.
Lab Fabrication: CAD/CAM Milling Process
The dental laboratory utilizes CAD/CAM technology to design and mill the permanent crown from high-strength ceramics, ensuring precise marginal adaptation and anatomical accuracy.
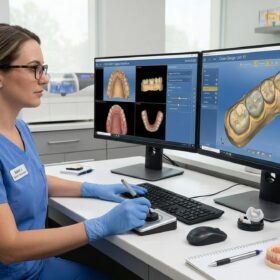
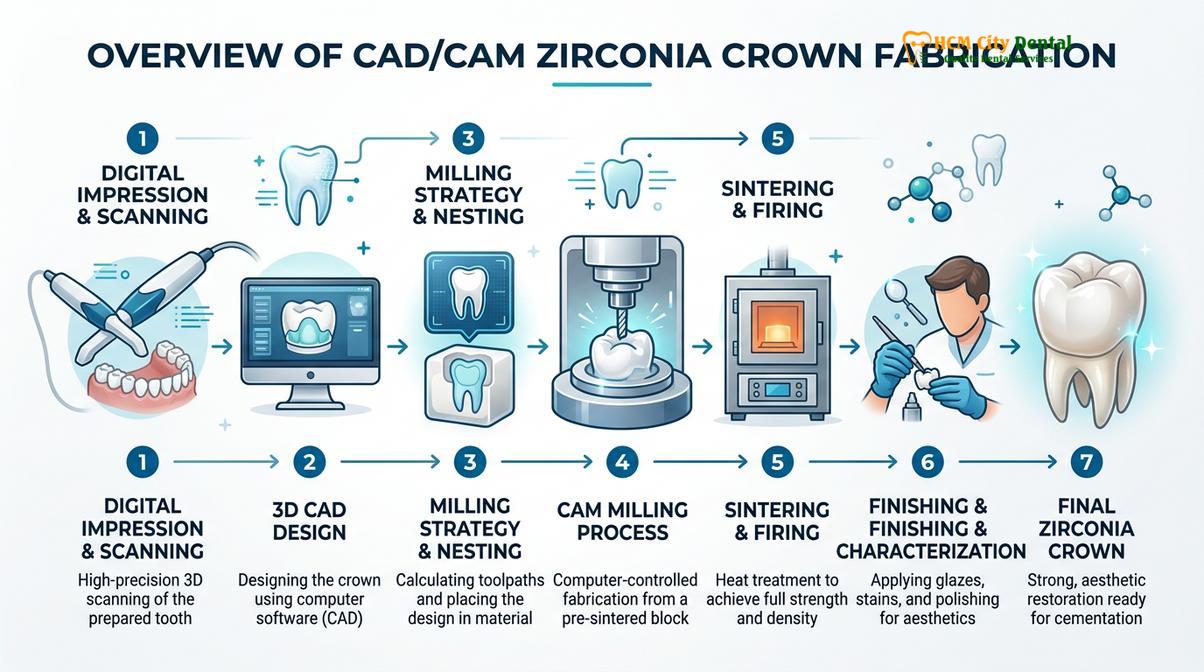
The digital impression files are transmitted instantaneously to the dental laboratory, initiating the Computer-Aided Design and Computer-Aided Manufacturing (CAD/CAM) workflow. At HCMC Dental Clinic, our Direct Lab Partnership in Ho Chi Minh City allows for seamless communication between the prosthodontist and the master ceramist, ensuring absolute quality control over the prosthetic design.
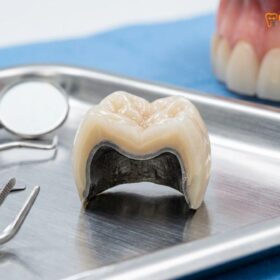
Using sophisticated software, the technician designs the crown, calculating the exact occlusal contacts, proximal contours, and material thickness required for structural durability. Once the design is finalized, the data is sent to a multi-axis milling machine. The crown is milled from a solid block of certified, biocompatible material. For posterior teeth requiring immense strength, Zirconia HT (Cercon HT, Germany) is often selected. Zirconia is a polycrystalline ceramic that undergoes a high-temperature sintering process, shrinking to its final, incredibly dense state, rendering it highly resistant to fracture [4].
For anterior teeth where lifelike aesthetics are paramount, E.max (Ivoclar, Liechtenstein) lithium disilicate is the material of choice. E.max mimics the natural light transmission, opalescence, and fluorescence of human enamel. While traditional PFM crown (Porcelain-Fused-to-Metal) options are still available, all-ceramic restorations have largely become the gold standard due to the elimination of the dark metal margin at the gumline.
This streamlined digital workflow enables an Express 3-5 Day Turnaround, a significant advantage for international patients engaging in dental tourism. This efficiency allows for complete smile makeovers or the fabrication of complex 3-unit or 4-unit bridges within a single week, without sacrificing clinical excellence.
| Crown / Bridge Material | Standard Walk-in Fee | WhatsApp Pre-Booking (-40%) | Clinical Indication |
|---|---|---|---|
| PFM Crown (Porcelain-Fused-to-Metal) | ~$140 (3.5M VND) | From $84 (2.1M VND) | Cost-effective posterior restoration |
| Zirconia Crown (Cercon, Germany) | ~$200 (5.0M VND) | From $120 (3.0M VND) | High strength, bruxism cases |
| Zirconia HT Crown (Cercon HT) | ~$260 (6.5M VND) | From $156 (3.9M VND) | Premium strength with high translucency |
| E.max Crown (Ivoclar, Liechtenstein) | ~$280 (7.0M VND) | From $168 (4.2M VND) | Ultimate anterior aesthetics |
| 3-Unit Bridge (Zirconia HT) | ~$480 (12.0M VND) | From $288 (7.2M VND) | Replacing a single missing tooth |
| 4-Unit Bridge (Zirconia HT) | ~$640 (16.0M VND) | From $384 (9.6M VND) | Replacing two missing teeth |
| Inlay / Onlay (Sứ Lab) | ~$180 (4.5M VND) | From $108 (2.7M VND) | Conservative partial coverage |
Note: HCMC Dental Clinic offers 0% interest monthly credit card installment plans to facilitate comprehensive care.
Final Fitting, Bite Adjustment, and Permanent Cementation
The final appointment involves verifying the crown’s fit, adjusting the occlusion, and permanently bonding the restoration to the underlying tooth structure.
The delivery appointment is the culmination of the restorative process. The temporary crown is carefully removed, and the prepared tooth is thoroughly cleansed of any residual temporary cement using pumice and a rotary brush. The permanent crown is then seated on the tooth for a dry try-in. The clinician meticulously evaluates three critical parameters: marginal adaptation, interproximal contacts, and aesthetics.
The margins are checked with a sharp explorer to ensure a virtually seamless transition between the ceramic and the natural tooth root. An open margin would act as a harbor for plaque, leading to recurrent decay. The interproximal contacts (where the crown touches adjacent teeth) are verified using dental floss; the contact must be tight enough to prevent food impaction but allow for proper hygiene.
Once the fit is verified, the bite adjustment dental phase begins. The patient bites on articulating paper to mark the occlusal contact points. The clinician carefully adjusts the ceramic to ensure the crown harmonizes with the patient’s natural bite, preventing occlusal trauma or temporomandibular joint (TMJ) discomfort. In the context of a dental implant, the clinician will also finalize the torque of a screw-retained crown or proceed with the cementation of a cement-retained implant crown, ensuring no excess cement remains in the peri-implant sulcus.
Clinical Case Review: Full Arch Rehabilitation
A 55-year-old patient visited HCMC Dental Clinic presenting with severe occlusal wear and multiple failing amalgam restorations. Dr. Cuong utilized a combination of E.max crowns for the anterior sextant to restore a youthful, translucent smile, and monolithic Zirconia HT crowns for the posterior molars to withstand heavy masticatory forces. The digital workflow allowed for precise vertical dimension restoration, resulting in a biomechanically stable and highly aesthetic outcome within a 5-day treatment window.
The final step is the crown cementation process. The internal surface of the ceramic is treated—often etched with hydrofluoric acid and silanated for glass-ceramics, or sandblasted for zirconia—to enhance micromechanical retention. The tooth is isolated, etched, and coated with a bonding agent. A dual-cure resin cement is applied, and the crown is firmly seated. Excess cement is meticulously removed before final light-curing, creating an impenetrable seal [5].
Post-Procedure Recovery and First 48 Hours
Post-procedure recovery focuses on managing mild thermal sensitivity and adapting to the new bite, with strict oral hygiene protocols to ensure long-term success.
Following the permanent cementation, patients can generally resume normal activities immediately. However, the first 48 hours require minor precautions as the periodontium adapts to the new restoration and the resin cement achieves its maximum bond strength. It is normal to experience mild thermal sensitivity to hot or cold stimuli; this is a transient pulpal response to the preparation and cementation chemistry, which typically subsides within a few days to a couple of weeks.
Patients are advised to avoid chewing extremely hard or sticky foods on the newly crowned tooth for the first day. The gingival tissue around the margin may be slightly tender due to the isolation and cement cleanup procedures; warm saltwater rinses can expedite tissue healing. If the bite feels “high” or uneven after the anesthesia wears off, patients must return to the clinic for a minor occlusal adjustment to prevent bruising the periodontal ligament.
“The longevity of a dental crown is a shared responsibility. While we utilize the highest strength ceramics and advanced bonding protocols, the ultimate survival of the restoration depends heavily on the patient’s daily plaque control and adherence to routine professional prophylaxis.”
For international patients, HCMC Dental Clinic provides a comprehensive global warranty policy. Should any issues arise, such as the rare need for an emergency loose crown recementation, patients have access to remote follow-up support via WhatsApp, utilizing photo and video assessment protocols to guide them to appropriate local care or arrange for warranty adjustments.
When to See a Doctor
While dental crowns have a remarkably high success rate, clinical complications can occasionally occur. It is imperative to seek professional dental evaluation if you experience any of the following symptoms after receiving a crown:
- Spontaneous, Throbbing Pain: Pain that occurs without stimulus and wakes you up at night is a classic sign of irreversible pulpitis, indicating the nerve inside the tooth has died and root canal therapy is required.
- Pain Upon Biting: If the tooth is sharply painful only when applying pressure, the crown may be sitting too high (occlusal trauma), or there may be an underlying root fracture.
- Persistent Gingival Bleeding: Swollen, red, or bleeding gums around the crown margin that do not resolve with proper flossing may indicate a biologic width violation, retained cement, or a poorly contoured margin.
- Mobility or Looseness: If the crown feels loose or shifts when chewing, the cement seal may have failed. Do not attempt to glue it back yourself; professional recementation is required to prevent bacterial leakage and decay of the underlying tooth.
Regular clinical examinations and radiographic monitoring are essential to ensure the long-term integrity of both the ceramic restoration and the foundational tooth structure. To explore your restorative options, learn more about Dental Crowns & Bridges and schedule a comprehensive evaluation with our specialists.
Frequently Asked Questions
What is the procedure for a dental crown?
The procedure for a dental crown involves clinical evaluation, tooth preparation, digital scanning, temporary coverage, and final cementation. First, the tooth is reshaped to accommodate the prosthetic. Next, a 3D scan is taken to mill the custom crown, which is then permanently bonded to restore full function and aesthetics. The entire process is designed to replace compromised enamel and dentin with high-strength, biocompatible materials.
Is the dental crown prep painful?
No, the dental crown preparation is not painful because it is performed under profound local anesthesia. Patients may feel pressure or vibration from the dental handpiece, but the nerve endings are completely numbed. Post-operative mild sensitivity to temperature is normal as the pulp reacts to the procedure, but this typically resolves within a few days and can be managed with over-the-counter analgesics.
How long does it take to get a dental crown step by step?
The entire process typically takes two appointments spaced a few days to a couple of weeks apart. However, with our express 3-5 day turnaround tailored for dental tourism, the steps from initial preparation to final cementation are completed rapidly without compromising clinical precision or material quality. Same-day milling options are also available for specific clinical indications.
What is the difference between Zirconia and E.max crowns?
Zirconia crowns offer exceptional flexural strength, making them ideal for posterior molars and heavy biters. E.max (lithium disilicate) crowns provide superior translucency and light-reflecting properties, making them the preferred choice for highly aesthetic restorations on anterior (front) teeth where natural appearance is paramount. Your clinician will recommend the optimal material based on functional and cosmetic requirements.
How do I care for my temporary crown?
To care for your temporary crown, avoid sticky, chewy, or excessively hard foods that could dislodge or fracture the acrylic material. When flossing, pull the floss out horizontally through the side of the teeth rather than snapping it upward, and maintain gentle brushing around the gingival margins. If the temporary crown falls off, contact your clinic immediately for recementation to prevent the underlying tooth from shifting.
References
- Journal of Prosthetic Dentistry. Biomechanical principles of tooth preparation for complete crowns. (2021).
- International Journal of Prosthodontics. Accuracy of digital impressions vs conventional techniques. (2022).
- Journal of Esthetic and Restorative Dentistry. Optical properties and translucency of lithium disilicate. (2020).
- Dental Materials Journal. Fracture resistance of monolithic zirconia restorations. (2019).
- American Dental Association. Clinical guidelines for the cementation of indirect restorations. (2023).