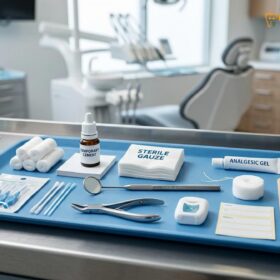
A temporary tooth repair DIY approach involves using over-the-counter dental cements or wax to temporarily seal a lost filling, reattach a crown, or cover a sharp chipped edge. These methods provide short-term protection and pain relief but require prompt professional dental intervention to prevent infection and permanent structural damage.
Clinical Summary:
Managing a dental emergency at home requires a strict understanding of the limitations of over-the-counter materials. Temporary tooth repair DIY solutions are designed solely to mitigate pain, prevent soft tissue trauma, and shield exposed dentinal tubules from thermal and bacterial stimuli until professional care is accessible. Utilizing appropriate materials, such as zinc oxide-based cements or orthodontic wax, can safely stabilize a compromised tooth. Conversely, the application of household adhesives or improper manipulation of the dental structure can lead to irreversible pulpal necrosis, severe chemical burns, and complex restorative challenges. Clinical protocols dictate that any home-based intervention must be followed by a comprehensive diagnostic evaluation and permanent restoration by a qualified dental professional to ensure long-term oral health and structural integrity.
Key Takeaways:
- DIY dental repairs are strictly temporary measures meant to last only a few days to a week.
- Over-the-counter temporary cements help seal exposed dentin and reduce thermal sensitivity.
- Household adhesives, such as superglue, are highly toxic and can cause irreversible nerve damage.
- Proper isolation and moisture control are critical for the temporary adhesion of DIY materials.
- All temporary home repairs must be evaluated and replaced by a dentist to prevent deep bacterial infections.
The Limits of Do-It-Yourself Tooth Repair
DIY dental repairs are strictly short-term measures designed to protect exposed dentin and prevent soft tissue trauma until a dentist can perform a permanent restoration.
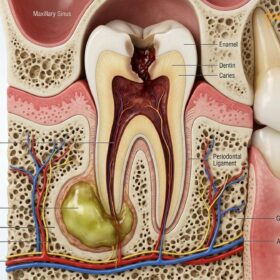
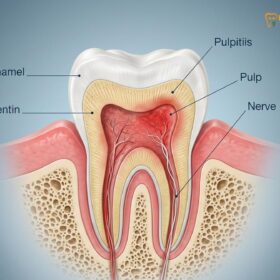
When a dental emergency strikes, the immediate instinct is often to seek a rapid solution to alleviate discomfort and restore the appearance of the smile. However, understanding the anatomical and biomechanical limitations of a temporary tooth repair DIY approach is paramount to preventing further, more severe complications. The human tooth is a complex, multi-layered structure consisting of the outer protective enamel, the sensitive underlying dentin, and the innermost pulp chamber, which houses the vital nerves and blood vessels. When a tooth is fractured, or a restoration is lost, the protective seal of the enamel is compromised, exposing the dentinal tubules to the oral environment.[1]
Over-the-counter temporary materials are formulated to provide a physical barrier over these exposed tubules. By covering the defect, these materials help to reduce the hydrodynamic fluid movement within the dentin, which is the primary mechanism responsible for sharp, shooting pain when consuming hot, cold, or sweet foods. While this provides significant symptomatic relief, it is crucial to recognize that these materials do not possess the compressive strength, tensile strength, or adhesive properties of professional dental composites or ceramics. They are inherently designed to be weak so that a dentist can easily remove them without damaging the remaining healthy tooth structure.
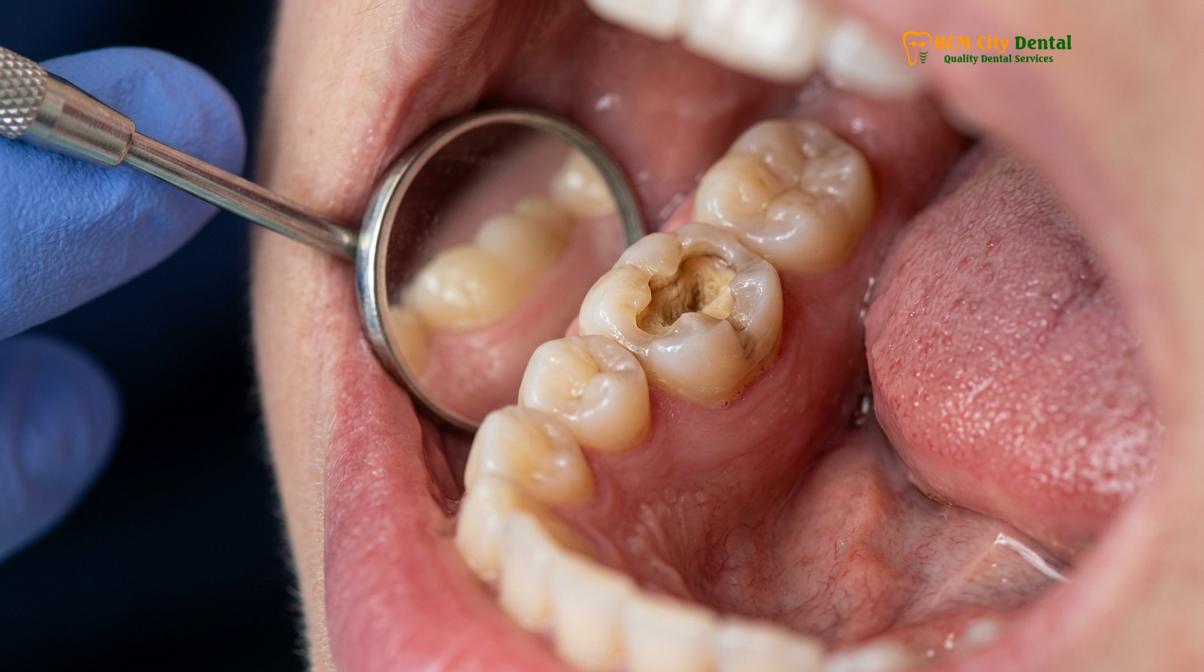
One of the most significant clinical limitations of any DIY repair is the phenomenon of microleakage. Microleakage refers to the microscopic gap that exists between the temporary filling material and the natural tooth walls. Because DIY materials cannot chemically bond to the tooth structure in the same manner as professional bonding agents, saliva and microscopic bacteria can easily seep into this interface. Over a period of days or weeks, this bacterial infiltration can progress deep into the tooth, potentially reaching the pulp chamber and initiating an acute inflammatory response known as pulpitis.[2]
Furthermore, the stomatognathic system—comprising the jaws, teeth, and chewing muscles—exerts tremendous occlusal forces during normal mastication. A temporary filling or re-cemented crown cannot withstand these dynamic forces for an extended period. The material will inevitably degrade, wash out, or fracture, leaving the tooth vulnerable once again. Dr. Nguyen Van Cuong frequently emphasizes to patients that a successful DIY repair can sometimes create a false sense of security. Because the immediate pain is resolved, patients may delay seeking professional care, inadvertently allowing silent bacterial decay to undermine the tooth, often resulting in the need for more invasive procedures such as root canal therapy or even extraction.
Safe DIY Steps for Lost Fillings
Safely managing a lost filling at home requires gently cleaning the cavity, isolating the tooth from saliva, and carefully applying a temporary filling material to seal the exposure.
A lost dental filling is one of the most common dental emergencies, often occurring while chewing sticky or hard foods. When the filling dislodges, it leaves behind a prepared cavity that is highly susceptible to food impaction and bacterial colonization. If you cannot reach a dental clinic immediately, applying a temporary filling over the counter can effectively protect the tooth and minimize sensitivity. The success of this procedure relies heavily on proper preparation and moisture control.
The first step in the protocol is to thoroughly but gently clean the affected area. Vigorously brushing the exposed cavity can cause severe pain and irritate the delicate dentin. Instead, rinse the mouth with warm salt water or a mild, non-alcoholic antimicrobial mouthwash. This helps to flush out any loose food debris and reduces the immediate bacterial load. If food particles are stubbornly lodged in the cavity, you may use an interdental brush or dental floss to carefully dislodge them, taking great care not to traumatize the surrounding gingival tissues.
Once the area is clean, moisture control becomes the critical factor. Dental materials, even temporary ones, adhere poorly in a wet environment. To isolate the tooth, place small, rolled-up pieces of clean gauze or cotton rolls between the tooth and the cheek, as well as between the tooth and the tongue. This helps to block the salivary ducts and keeps the working area as dry as possible. Use a clean tissue or a cotton swab to gently dab the inside of the cavity dry.
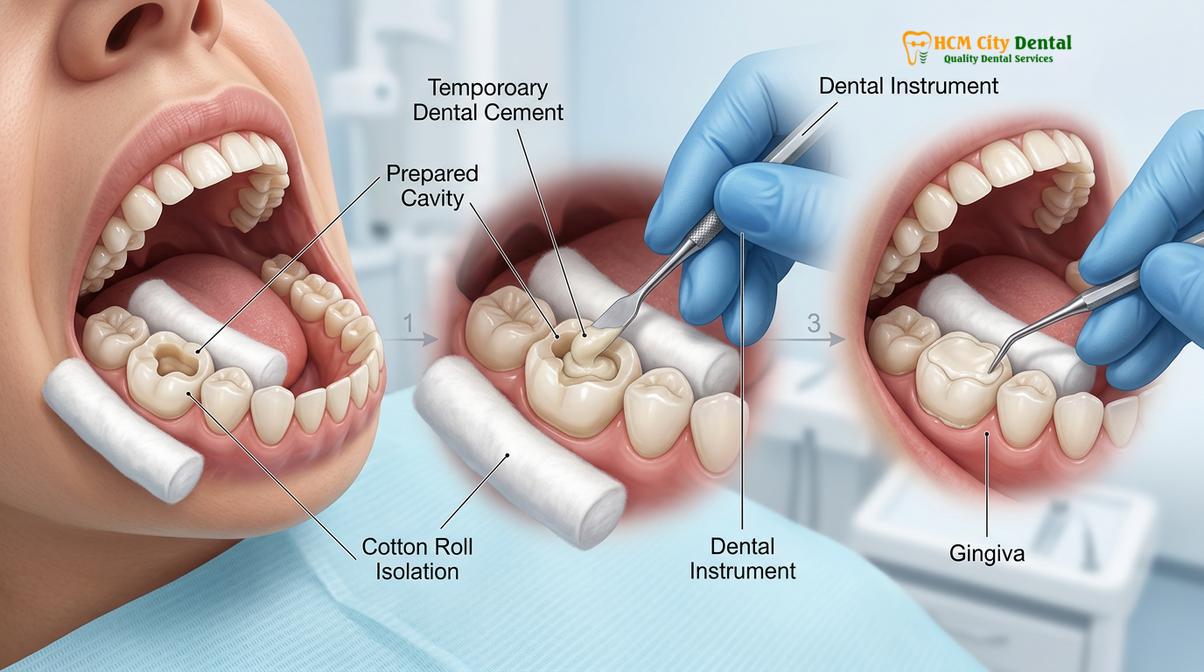
Next, prepare the temporary filling material. Most over-the-counter kits contain a putty-like substance that is activated by moisture or body temperature. Wash your hands thoroughly with antibacterial soap and dry them completely. Pinch off a small piece of the material—usually the size of a small pea—and roll it into a smooth ball between your fingers. Carefully place the ball into the cavity. Using a clean cotton swab or the small applicator tool provided in the kit, gently pack the material down, ensuring it fills the entire void and reaches the margins of the cavity.[3]
After the material is packed, remove the cotton isolation rolls and gently bite down a few times. This action utilizes your opposing teeth to shape the top of the temporary filling, ensuring it conforms to your natural bite (occlusion). If the filling feels too high, it will cause premature contact during chewing, leading to localized trauma and pain in the periodontal ligament. Use a damp cotton swab to wipe away any excess material that has extruded over the edges of the tooth. Most temporary materials will begin to set within a few minutes upon contact with saliva, but it is advisable to avoid chewing on that side of the mouth for at least a few hours to allow the material to achieve its maximum temporary strength.
How to Temporarily Re-Cement a Lost Crown
To temporarily re-cement a lost crown, you must clean the internal surface of the prosthetic, apply a small amount of temporary crown cement, and seat it firmly over the prepared tooth.
Dental crowns are highly durable restorations, but the underlying cement can degrade over time, or the tooth structure beneath can experience secondary decay, leading to the crown becoming dislodged. A lost crown is not only an aesthetic concern, especially if it involves an anterior (front) tooth, but it also leaves the prepared abutment tooth highly sensitive and vulnerable to damage. If the crown is intact and undamaged, it is often possible to temporarily reattach it using specialized temporary crown cement until you can visit a professional.
The initial step is to carefully inspect both the dislodged crown and the exposed tooth. Ensure that there are no sharp fragments of natural tooth structure stuck inside the crown, which would indicate a tooth fracture rather than a simple cement failure. If the tooth is fractured, do not attempt to re-cement the crown, as this requires immediate professional assessment. If the crown is clear, gently clean the inside (intaglio surface) using a soft toothbrush and water to remove any loose debris or remnants of the old cement. Allow the crown to dry completely.
Before applying any adhesive, perform a “dry try-in.” Carefully place the crown back onto the tooth without any cement to ensure you know the correct orientation and that it seats fully and comfortably. It should slide into place and align perfectly with the adjacent teeth. If it does not seat properly, do not force it.
“Never apply excessive force when attempting to seat a dislodged crown. If the prosthetic does not slide easily into its original position, forcing it can cause catastrophic root fractures or severe damage to the periodontal ligament, transforming a simple re-cementation into a complex surgical extraction.”
Once you are confident in the orientation, isolate the tooth using cotton rolls to keep it dry, just as you would for a temporary filling. Apply a small amount of temporary crown cement to the inside walls of the crown. Avoid overfilling the crown, as excessive cement will prevent the crown from seating fully and will extrude heavily into the gingival sulcus, causing severe gum irritation. A thin layer coating the internal walls is sufficient.[4]
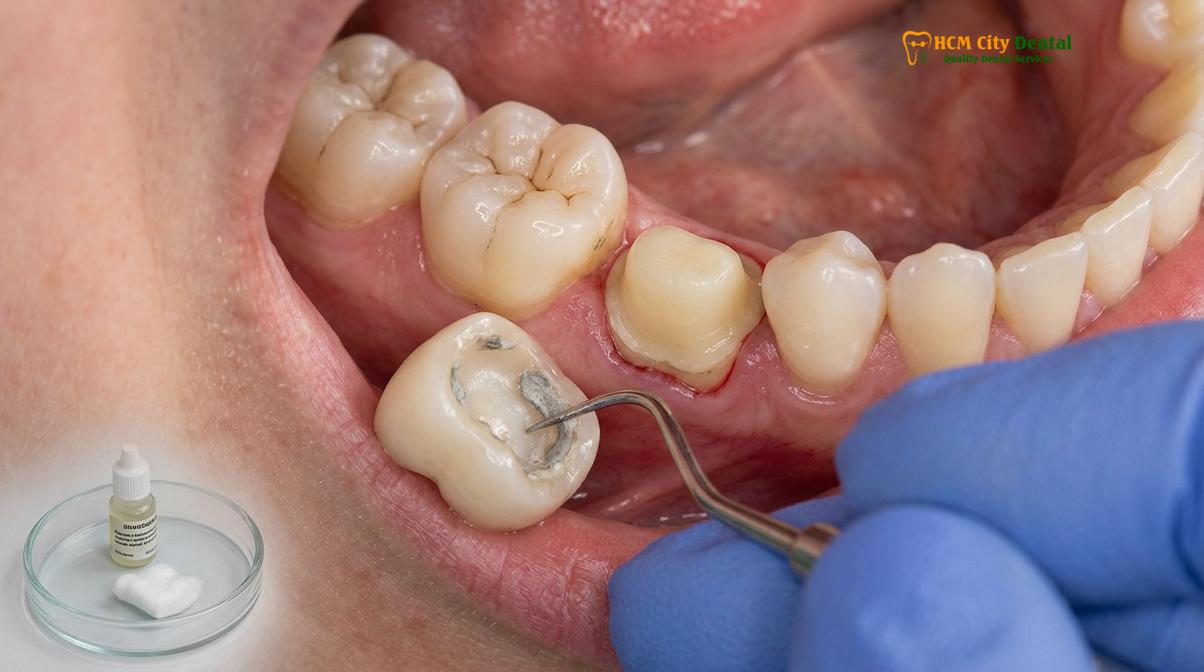
Carefully place the crown over the tooth and press it down firmly with your finger. Bite down gently on a clean piece of gauze or a cotton roll to apply even, sustained pressure for a few minutes while the cement begins to set. Once the crown feels stable, use a dental explorer (if provided in the kit) or a piece of dental floss to carefully remove the excess cement that has squeezed out around the gumline. Pull the floss through the side of the teeth rather than snapping it upward, as an upward motion could easily dislodge the newly placed temporary crown. Remember that this is a fragile bond; you must maintain a soft diet and avoid sticky or hard foods entirely until a dentist can permanently re-cement the restoration.
Warning: What You Should Never Do at Home
Never use household adhesives, toxic chemicals, or hardware tools in the mouth, as these can cause irreversible pulpal necrosis, severe chemical burns, and systemic toxicity.
While the desire to fix a broken smile quickly is understandable, the oral cavity is a highly sensitive and vascular environment. Introducing non-biocompatible materials or attempting aggressive mechanical alterations at home can lead to devastating clinical consequences. The most critical warning issued by dental professionals worldwide concerns the use of household adhesives, specifically cyanoacrylate-based products commonly known as superglue.
Superglue is an industrial adhesive designed for porous and non-porous inanimate materials. It is highly toxic to human tissues. When cyanoacrylate cures, it undergoes an exothermic chemical reaction, meaning it releases a significant amount of heat. If applied to an exposed tooth, this heat is transferred directly through the dentinal tubules into the pulp chamber. The resulting thermal shock can cause immediate and irreversible pulpal necrosis (death of the tooth nerve). Furthermore, the chemicals in the glue can cause severe chemical burns to the gingival tissues, leading to painful ulcerations and tissue sloughing. From a restorative perspective, superglue creates a chaotic, rock-hard layer that is incredibly difficult for a dentist to remove without inadvertently drilling away healthy tooth structure.
Clinical Warning: The application of cyanoacrylate (superglue) or any industrial adhesive to dental structures is strictly contraindicated. These substances are cytotoxic, can induce rapid pulpal necrosis via exothermic reactions, and severely complicate subsequent professional restorative procedures. Always use clinically approved, biocompatible temporary dental cements.
Another dangerous practice is attempting to file or smooth a chipped tooth using household tools such as nail files, sandpaper, or metal rasps. The enamel of a tooth is the hardest substance in the human body, but it is also brittle. Using unsterilized, inappropriate tools can introduce deep micro-fractures into the enamel structure, weakening the entire tooth and making it highly susceptible to catastrophic failure under normal biting forces. Additionally, these tools are laden with environmental bacteria, introducing a high risk of deep tissue infection. If a chipped tooth has a sharp edge that is lacerating the tongue or cheek, the only safe DIY intervention is to cover the sharp edge with a piece of orthodontic wax or sugar-free chewing gum until professional contouring or bonding can be performed.
Finally, never attempt to extract a tooth yourself, regardless of how loose it may feel. The roots of the teeth are intimately connected to the jawbone via the periodontal ligament, and in the upper jaw, the roots of the molars often extend into the maxillary sinus cavity. A DIY extraction can result in fractured roots left behind in the bone, severe hemorrhage, or the creation of an oroantral communication (a hole between the mouth and the sinus), all of which require complex surgical intervention to repair.
Sourcing Safe DIY Temporary Materials
Always purchase emergency dental kits from reputable pharmacies, ensuring the products contain clinically approved ingredients like zinc oxide rather than unregulated industrial compounds.
When seeking a dentemp fix tooth solution, the source and composition of the material are just as important as the application technique. The market is flooded with various products claiming to offer a diy tooth fix safe for home use, but not all products meet the rigorous safety standards required for intraoral application. It is imperative to source these materials responsibly to avoid exposing yourself to toxic or ineffective compounds.
The safest and most reliable place to purchase temporary dental repair kits is a licensed brick-and-mortar pharmacy or a verified online medical supply retailer. Products sold in these environments are typically subject to regulatory oversight by health authorities (such as the FDA in the United States or the CE mark in Europe). These regulatory bodies ensure that the materials are biocompatible, non-toxic if swallowed in small quantities, and free from heavy metal contamination.
When reviewing the packaging, look for the active ingredients. The gold standard for over-the-counter temporary fillings and cements is Zinc Oxide. Often combined with a small amount of eugenol (an extract from clove oil), zinc oxide provides excellent temporary sealing properties. Eugenol is particularly beneficial because it possesses natural analgesic and antibacterial properties, providing a mild sedative effect on the inflamed dental pulp, which significantly helps in managing toothache symptoms.[5] Other safe formulations may use calcium sulfate, which sets when exposed to moisture and provides a rigid, protective barrier.
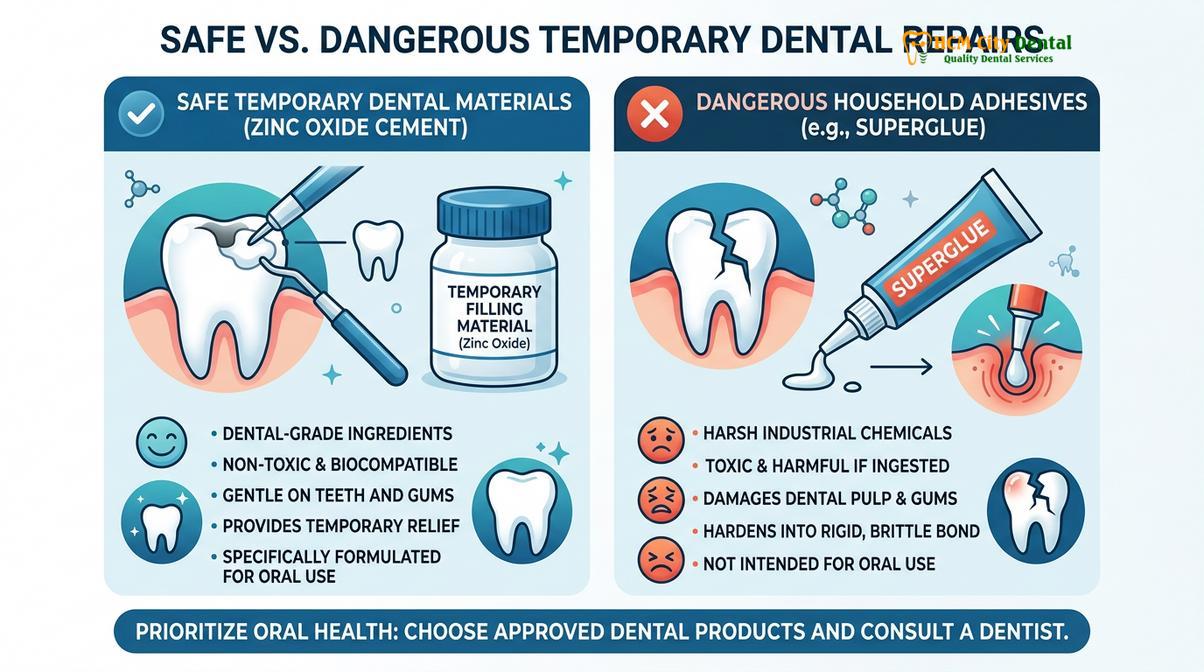
Conversely, you should exercise extreme caution when purchasing dental repair kits from unverified third-party sellers on large e-commerce platforms or social media marketplaces. Counterfeit medical products are a significant global issue. These unregulated kits may contain industrial polymers, toxic solvents, or unrefined chemicals that can cause severe allergic reactions, chemical burns, or systemic toxicity. If a product’s packaging lacks clear ingredient lists, manufacturer contact information, or regulatory approval symbols, it should not be placed in your mouth.
| Material Type | Common Ingredients | Clinical Safety Profile | Recommended Use |
|---|---|---|---|
| Approved Dental Cement | Zinc Oxide, Eugenol, Calcium Sulfate | High (Biocompatible, non-toxic) | Temporary fillings, re-cementing crowns |
| Orthodontic Wax | Paraffin, Beeswax, Carnauba Wax | High (Inert, safe if swallowed) | Covering sharp edges, protecting soft tissue |
| Industrial Adhesives | Cyanoacrylate (Superglue) | Extremely Low (Toxic, exothermic) | NEVER USE IN THE MOUTH |
| Household Putty/Resins | Epoxy, Polyurethane | Extremely Low (Carcinogenic, toxic) | NEVER USE IN THE MOUTH |
Transitioning from DIY to Professional Treatment
A dentist will carefully remove your temporary repair, disinfect the underlying tooth structure, and place a permanent restoration to ensure long-term functional and aesthetic stability.
The ultimate goal of any temporary tooth repair DIY is to bridge the gap between the moment the emergency occurs and the moment you sit in a professional dental chair. Transitioning from a home fix to a permanent clinical restoration is a critical phase that ensures the long-term survival of the tooth. When you arrive at the clinic, the dental team will initiate a comprehensive diagnostic protocol to assess both the visible damage and the underlying health of the tooth.
The appointment typically begins with a thorough clinical examination and the acquisition of digital radiographs (X-rays). These images allow the dentist to visualize the extent of the decay, check for any hidden root fractures, and evaluate the health of the periapical tissues (the bone surrounding the tip of the root). Even if your temporary filling feels secure and you are experiencing no pain, this radiographic assessment is mandatory, as chronic infections can often develop asymptomatically beneath a compromised seal.
Once the diagnosis is confirmed, the dentist will administer local anesthesia to ensure profound numbness. The removal of the temporary material is usually swift. Dentists use high-speed handpieces or ultrasonic scalers to gently vibrate and wash away the over-the-counter cement. Because these materials are designed with low compressive strength, they break apart easily without damaging the surrounding healthy enamel or dentin. After the temporary material is removed, the dentist will use caries detector dyes and specialized instruments to ensure that all necrotic (dead) or infected tooth structure is completely excavated.
Clinical Case Review: A patient visited HCMC Dental Clinic in Ho Chi Minh City after applying an over-the-counter temporary filling to a lost molar restoration during a business trip. The DIY material successfully prevented severe pain for four days. Upon clinical examination, Dr. Nguyen Van Cuong carefully removed the temporary cement, thoroughly disinfected the cavity to eliminate microleakage, and placed a highly durable, aesthetic composite resin restoration. The patient’s proactive, safe DIY approach, followed by prompt professional intervention, successfully prevented the need for a complex root canal procedure.
The final step is the placement of the permanent restoration. Depending on the extent of the structural loss, this may involve a direct composite resin filling, which is bonded chemically to the tooth and cured with a specialized light, or an indirect restoration such as a ceramic inlay, onlay, or full-coverage crown. These professional restorations restore the tooth to its original anatomical contour, re-establish proper occlusal contacts, and provide a hermetic seal against bacterial microleakage, ensuring the tooth remains healthy and functional for years to come. For patients seeking comprehensive care after an emergency, exploring urgent dental care services is the most crucial step in the recovery process.
When to See a Doctor (Important Clinical Considerations)
While temporary DIY fixes are valuable tools for managing minor emergencies, certain clinical presentations require immediate, urgent professional intervention. You must bypass home remedies and seek emergency dental or medical care if you experience any of the following red flag symptoms:
- Severe, Unrelenting Pain: Pain that is spontaneous, throbbing, and not relieved by over-the-counter analgesics often indicates irreversible pulpitis or an acute periapical abscess.
- Facial Swelling: Any swelling in the gums, cheeks, jaw, or neck is a sign of a spreading bacterial infection. If the swelling approaches the eye or causes difficulty swallowing or breathing (a condition known as Ludwig’s angina), it is a life-threatening medical emergency requiring immediate hospital care.
- Trauma and Mobility: If a tooth has been partially extruded, pushed into the socket, or is highly mobile following a physical impact, it requires immediate splinting by a dentist to save the tooth.
- Uncontrolled Bleeding: Continuous hemorrhage from the gingival tissues or a tooth socket that does not stop after 15-20 minutes of firm pressure requires professional hemostatic intervention.
“Patient safety is always the primary objective. A temporary fix should never be viewed as a substitute for professional diagnostics. Delaying care when signs of active infection are present can transform a highly treatable localized issue into a severe systemic health risk.”
Frequently Asked Questions
How long does a temporary DIY tooth filling last?
A temporary DIY tooth filling typically lasts between 48 hours and one week, depending on the material used and your chewing habits. These over-the-counter cements are designed to degrade over time and cannot withstand the long-term occlusal forces of normal mastication. Prolonged reliance on a temporary filling increases the risk of microleakage, bacterial infiltration, and subsequent pulpal infection, which is why you should schedule a professional dental appointment as soon as possible.
Can I use superglue to fix a broken tooth or crown?
No, you should never use superglue to fix a broken tooth or crown because it is highly toxic and can cause irreversible damage to the dental pulp. Cyanoacrylate adhesives undergo an exothermic reaction that generates heat, potentially killing the tooth’s nerve. Furthermore, industrial glues are not biocompatible, can cause severe chemical burns to the gingival tissues, and make it incredibly difficult for a dentist to properly clean and restore the tooth later.
Is it safe to use over-the-counter dental wax?
Yes, over-the-counter dental wax is completely safe and highly recommended for covering sharp edges of chipped teeth or broken orthodontic appliances. Dental wax is non-toxic, easy to apply, and provides an excellent physical barrier that prevents lacerations to the tongue, lips, and buccal mucosa. However, it does not provide any structural support or seal against bacteria, so it should only be used as a comfort measure while awaiting professional care.
Where can I buy emergency dental repair kits?
You can purchase emergency dental repair kits at most major pharmacies, drugstores, and verified online medical supply retailers. When selecting a kit, look for products that contain clinically recognized temporary materials like zinc oxide. It is crucial to avoid unverified third-party sellers on generic marketplaces, as counterfeit dental products may contain unregulated chemicals or heavy metals that are unsafe for oral use.
Does travel insurance cover permanent repairs after DIY fixes?
Most comprehensive travel insurance policies cover emergency dental treatments to relieve immediate pain, but they often exclude permanent restorative work like definitive crowns or implants. If you perform a temporary fix while traveling, your insurance will typically cover the cost of a local dentist stabilizing the tooth or prescribing antibiotics. You should always review your specific policy details and keep all receipts for any over-the-counter emergency kits or clinical visits.
References
- Journal of the American Dental Association. Efficacy of temporary restorative materials in emergency dental care. (2021).
- International Endodontic Journal. Microleakage and bacterial penetration in temporary restorations. (2019).
- Dental Materials. Biocompatibility and cytotoxicity of cyanoacrylate adhesives in oral environments. (2020).
- Journal of Prosthetic Dentistry. Retention forces of over-the-counter temporary crown cements. (2022).
- British Dental Journal. Management of dental emergencies outside clinical settings: A review of patient protocols. (2018).